 Anabelle
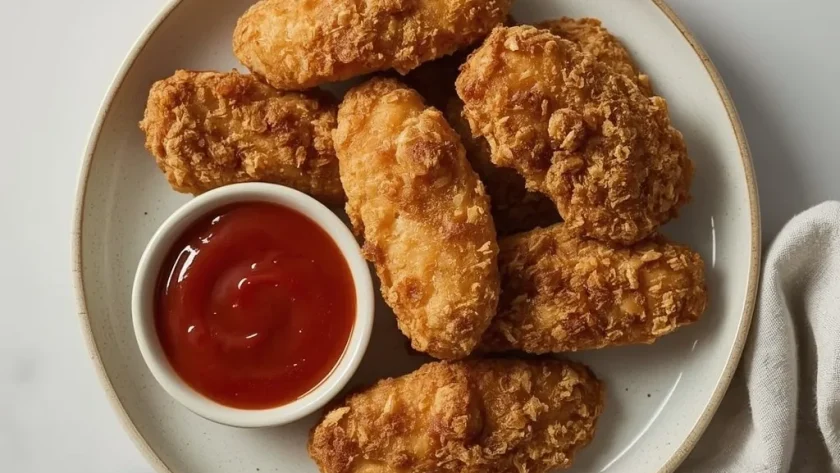
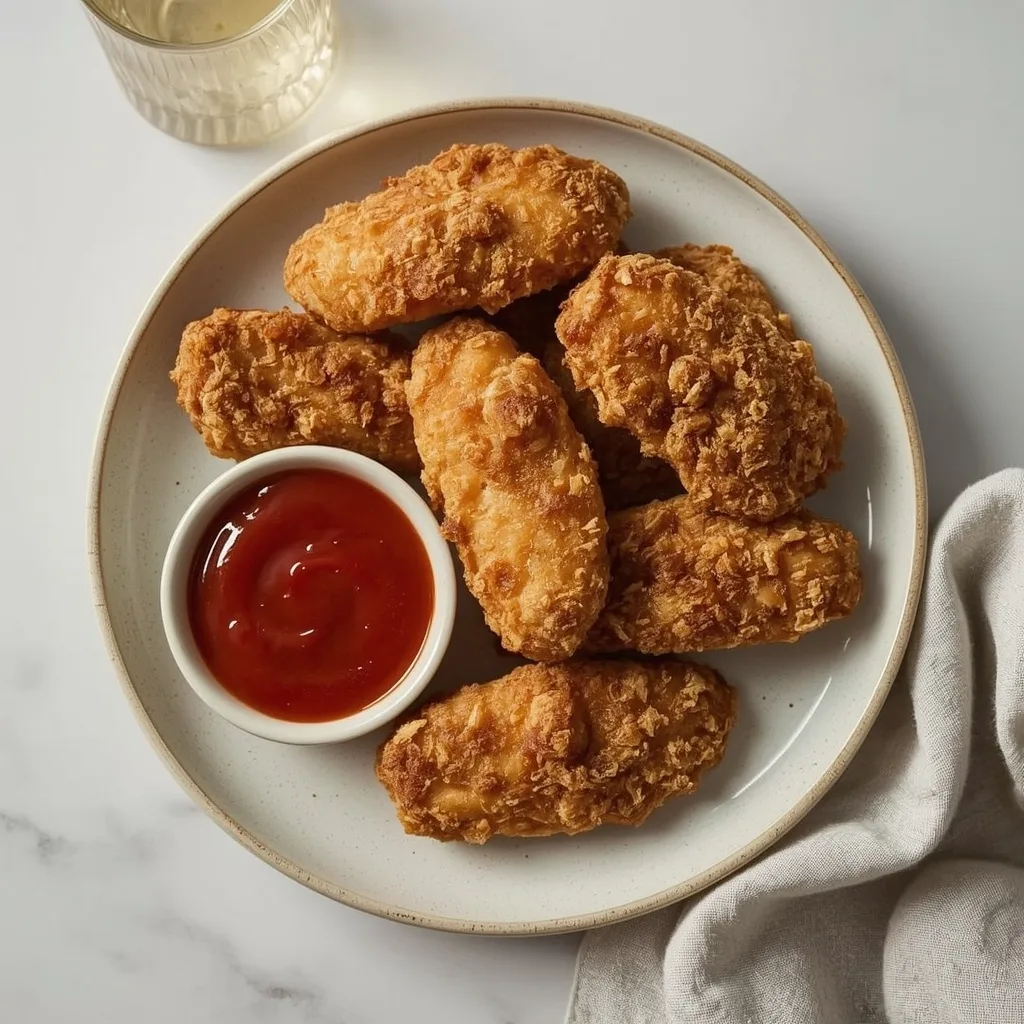
 Pioneer Woman Chicken Fingers bring that classic diner-style crunch right into your own kitchen. These golden strips feature a crispy panko-Parmesan coating wrapped around juicy, tender chicken breast — the kind of meal that disappears before you even sit down. It’s simple American comfort food at its finest, built on pantry staples like flour, eggs, and buttermilk.
The whole process takes about 32 minutes from start to finish, making this an easy weeknight dinner that even beginner cooks can handle. The only slightly fiddly part is butterflying the chicken breasts into thin cutlets, but I’ll walk you through that step clearly. Whether it’s a casual family dinner or game-day snacking, these fingers deliver every single time.
A Quick Glimpse at Pioneer Woman Chicken Fingers
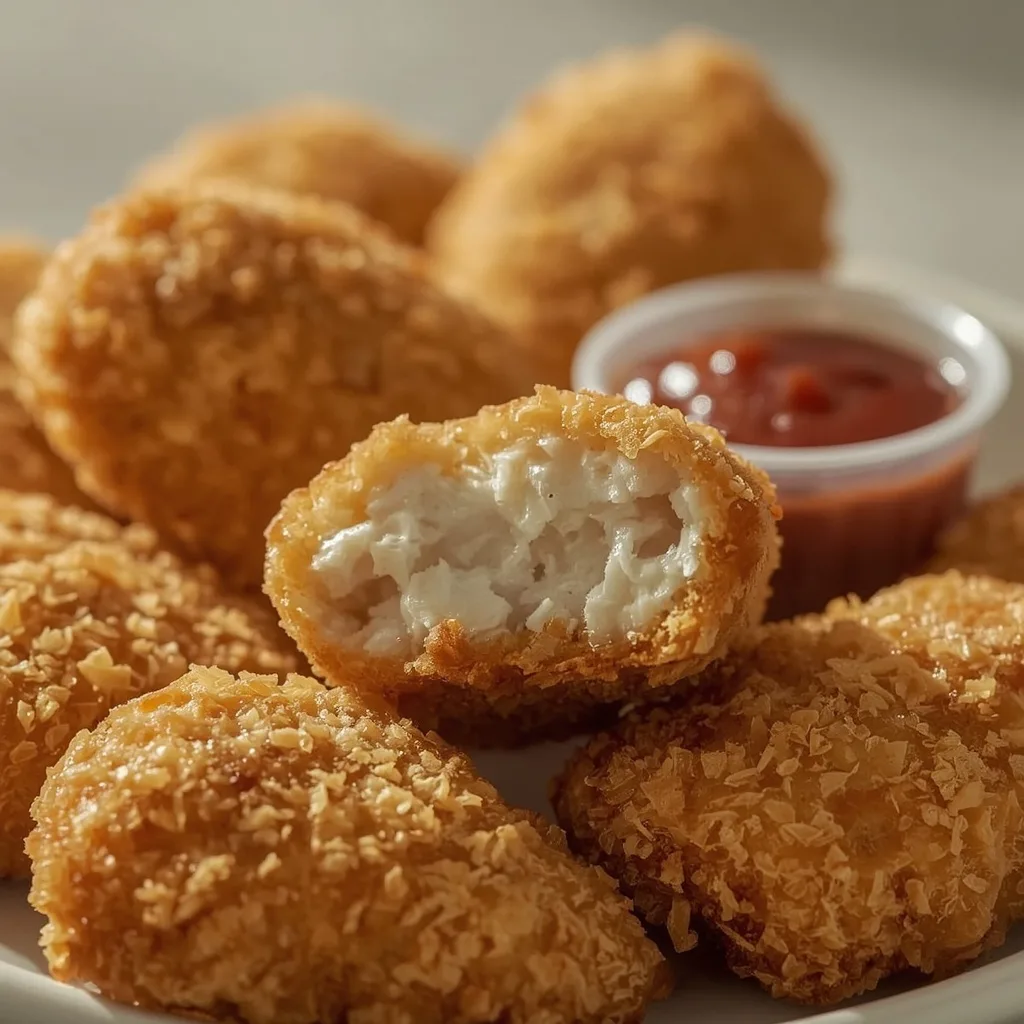
These are boneless, skinless chicken breasts cut into strips, coated in a three-step breading process, and fried in hot oil until deeply golden. The exterior crackles when you bite into it, thanks to the panko breadcrumbs mixed with salty Parmesan. Inside, the chicken stays remarkably moist because the thin cutlets cook fast — just 3-4 minutes per side — before the meat has a chance to dry out. You’ll want these for Friday night dinners, birthday parties, or any time you need a guaranteed crowd-pleaser.
Why This Recipe is Worth Trying
Some recipes promise more than they deliver. This one actually lives up to the hype.
- Crunch factor — The combination of panko and Parmesan creates an extra-crispy crust that stays crunchy even after sitting on the counter for a few minutes.
- Quick cooking time — Thin cutlets fry up in about 12 minutes total, so you can have dinner on the table faster than takeout delivery.
- Simple ingredients — Nothing fancy here. Just chicken, pantry spices, eggs, panko, and cheese that you probably already have on hand.
- Kid-approved flavor — Mildly seasoned with paprika, garlic, and onion powder, these appeal to picky eaters while still satisfying adults.
- Versatile base — Change the spices, swap the dipping sauces, or bake instead of fry — this recipe adapts to whatever you’re in the mood for.
Essential Ingredients for This Recipe
Thirteen ingredients make up this dish, and most of them are probably sitting in your pantry right now. Here’s what each one does and where you can flex if needed.
The Chicken
- 1 lb boneless, skinless chicken breasts (about 4) — The star of the show. You’ll butterfly each breast into thin cutlets, then slice into 1-inch-wide strips. Buy pre-cut chicken tenders if you want to skip the prep work entirely.
The Breading Station
- 1 cup all-purpose flour — This first coating layer helps the egg stick and creates a dry base for the breadcrumbs to cling to.
- 1 teaspoon paprika — Adds that warm, slightly smoky color and mild flavor to the flour mixture.
- 1/2 teaspoon garlic powder — Brings savory depth without any sharp fresh garlic bite.
- 1/2 teaspoon onion powder — Rounds out the seasoning with a subtle sweet-savory note.
- 1/2 teaspoon kosher salt, plus more for seasoning — Seasons the coating itself, and you’ll add a pinch more right after frying.
- 1/4 teaspoon freshly ground black pepper — A touch of heat and earthiness. Freshly ground tastes noticeably better than pre-ground.
The Egg Wash
- 2 large eggs — The glue that binds the flour layer to the panko coating.
- 1/4 cup buttermilk — Adds tanginess and helps thin the egg wash so it coats evenly. No buttermilk? Mix 2 tablespoons milk with 1 teaspoon lemon juice and let it sit 5 minutes.
The Crispy Coating
- 1 1/2 cups panko breadcrumbs — Larger, flakier crumbs than regular breadcrumbs give that signature shatter-crunch.
- 1/2 cup grated Parmesan cheese — Salty, nutty, and essential for flavor. Freshly grated melts better than the stuff in the green can.
For Frying and Finishing
- 1/2 cup canola oil — Neutral-flavored oil with a high smoke point. Vegetable oil works just as well.
- 1/4 cup fresh parsley, chopped (optional) — A bright, fresh garnish that cuts through the richness.
Useful Equipment
You don’t need a deep fryer or fancy gadgets. Just a few basics that most kitchens already have.
- Wire rack over a baking sheet — Holds the breaded strips before frying and lets air circulate so the coating stays dry and crisp.
- Large heavy-bottomed skillet — Cast iron or stainless steel holds heat evenly, which means consistent browning. A flimsy nonstick pan won’t cut it here.
- Three shallow dishes — Pie plates or wide bowls work perfectly for the flour, egg wash, and panko mixture. You need enough surface area to coat each strip without crowding.
- Instant-read thermometer — Takes the guesswork out of doneness. The chicken is ready at 165°F (74°C), and the thermometer tells you exactly when that happens.
- Paper-towel-lined baking sheet — Drains the excess oil right after frying so the coating stays crispy instead of soggy.
Directions to Make Pioneer Woman Chicken Fingers
This recipe follows a classic breading-and-frying method, but a few small details make the difference between good and great. Let me walk you through each step the way I actually do it.
- Set up your stations — Place a wire rack over a baking sheet. Line another baking sheet with paper towels for draining the finished fingers. Having everything ready before you start makes the process smooth.
- Prep the chicken — Lay each breast flat, hold it steady, and slice horizontally through the middle to create two thin cutlets. Cut each cutlet into 3-4 strips about 1 inch wide. Pre-cut chicken tenders skip this step entirely for an even faster dinner.
- Build the breading station — In one shallow dish, whisk together the flour, paprika, garlic powder, onion powder, salt, and pepper. In a second dish, whisk the eggs and buttermilk until combined. In a third, mix the panko and Parmesan.
- Coat the strips — Work in batches. Dredge each strip in the flour, shake off the excess, dip into the egg wash, then press firmly into the panko-Parmesan mixture. Place the breaded strips on the wire rack and repeat with the rest.
- Heat the oil — Pour the canola oil into your skillet so it’s about 1/4 inch deep. Heat over medium-high heat. Drop a pinch of panko into the oil — when it sizzles immediately without burning, you’re ready. Aim for around 350°F (175°C).
- Fry in batches — Gently lay 3-4 strips in the hot oil, leaving space between them. Fry 3-4 minutes per side until deep golden brown and crispy. Check the thickest strip with your thermometer — 165°F (74°C) means it’s done.
- Drain and season — Transfer to the paper-towel-lined sheet and immediately sprinkle with a pinch of kosher salt. Let the oil return to temperature before starting the next batch.
- Serve hot — Garnish with chopped parsley if you like, and bring out the dipping sauces. Honey mustard, ranch, or ketchup all work beautifully.
What I Got Wrong (And How I Fixed It)
My first few attempts at this dish taught me some hard lessons. Here’s what tripped me up and how I solved each problem.
- Burning the coating — The oil was too hot on my first batch, and the outside charred before the chicken cooked through. I learned to test the temperature with a panko crumb first and let the oil come back to temp between batches.
- Overcrowding the pan — Dropping in too many strips at once dropped the oil temperature dramatically. The coating absorbed more oil and turned greasy. Now I stick to 3-4 pieces per batch and give them room to fry.
- Losing the breading — When I didn’t press the panko firmly enough, half the coating fell off in the pan. Press the crumbs into the chicken with your fingers so they actually adhere before frying.
- Soggy result — Skipping the wire rack and letting the breaded strips sit on a flat surface made the bottoms damp. The rack lets air circulate around the entire strip, so the coating stays dry and crispy.
- Overcooked dry meat — Thicker strips took longer to cook through, and by the time the center hit 165°F, the rest was overcooked. Cutting uniform 1-inch-wide strips ensures everything cooks at the same rate.
Healthier Ways to Make Pioneer Woman Chicken Fingers
Fried food isn’t an everyday thing in my house, so I’ve figured out a few lighter approaches that still deliver on crunch.
- Baking instead of frying — Preheat the oven to 400°F (200°C) and bake the breaded strips on the wire rack over a baking sheet for 12-15 minutes, flipping once halfway. You get crispy chicken fingers without the frying oil.
- Spritzing with oil spray — Before baking, spray the breaded strips lightly with cooking spray. This helps the panko brown and crisp up instead of staying pale and soft.
- Cutting back on Parmesan — Reduce the cheese to 1/3 cup and add an extra tablespoon of panko. You’ll lower the sodium a bit while keeping the nutty flavor.
- Using whole wheat panko — Swapping in whole wheat breadcrumbs adds a few grams of fiber and a slightly nuttier taste that works surprisingly well here.
- Air frying — If you have an air fryer, cook the breaded strips at 400°F (200°C) for 8-10 minutes, flipping once. A light oil mist keeps the coating crispy without deep frying.
Ingredient Substitutions for Pioneer Woman Chicken Fingers
Ran out of something? Here are the swaps I’ve tested and actually recommend.
- Buttermilk → Milk and lemon juice — Mix 2 tablespoons of milk with 1 teaspoon of lemon juice and let it sit 5 minutes. The acid mimics buttermilk’s tang and tenderizing effect.
- Panko → Regular breadcrumbs — Use plain or Italian-seasoned breadcrumbs, though you’ll get a finer, less shattery crunch. Regular breadcrumbs also absorb more oil, so watch the frying time.
- Chicken breasts → Chicken tenders — Pre-cut tenders skip the butterflying step entirely. They’re already uniform in size, so you just slice them into strips if needed.
- Canola oil → Vegetable oil — Both have neutral flavors and high smoke points. Peanut oil works too, but skip anything strongly flavored like olive oil.
- Parmesan → Pecorino Romano — A slightly saltier, sharper Italian cheese. Reduce the added salt in the flour mixture by a pinch to balance it out.
- Fresh parsley → Dried parsley — Use about 1 tablespoon of dried if that’s all you have. It’s mostly for looks anyway, so don’t stress about it.
Unexpected Ways to Enjoy This Pioneer Woman Chicken Fingers
Dipping them in ketchup is classic, but these crispy strips deserve a little creativity sometimes.
- Buffalo chicken wrap — Toss the strips in buffalo sauce, wrap them in a tortilla with lettuce, tomato, and blue cheese dressing for a spicy lunch that beats any restaurant version.
- Chicken finger parmesan — Top the cooked strips with marinara and shredded mozzarella, then broil until the cheese melts. Serve over pasta for a quick riff on chicken parm.
- BLT-style salad — Slice the fingers and arrange them over romaine with cherry tomatoes, avocado, and a drizzle of ranch. Crunchy, fresh, and filling.
- Slider sandwiches — Tuck a strip into a mini brioche bun with pickles and a smear of honey mustard. They make fantastic party appetizers.
- Chinese-style orange chicken — Skip the salt after frying, then toss the warm strips in store-bought orange chicken sauce. Serve over rice for a sweet-savory twist.
- Nacho topper — Dice the fingers and scatter them over tortilla chips with melted cheddar, jalapeños, and a drizzle of hot sauce.
Best Tips for Pioneer Woman Chicken Fingers Success
These are the little details I’ve picked up over many batches. Each one makes the final result noticeably better.
- Pat the chicken dry first — Excess moisture on the meat prevents the flour from sticking properly. A quick paper towel press before breading makes a real difference.
- Season each layer — The flour mixture has salt, but the chicken itself is unseasoned. A pinch of salt on the raw strips before breading ensures every bite is well-seasoned.
- Shake off excess flour — Too much flour creates a pasty layer under the breadcrumbs. A few firm shakes over the dish removes what shouldn’t be there.
- Press the panko firmly — The coating needs to actually stick to the chicken, not just rest on top. Use the palm of your hand to press each side into the crumbs.
- Watch the oil temperature — If the panko burns within seconds, the oil is too hot. If it just floats without sizzling, it’s too cold. Perfect is an immediate, gentle sizzle.
- Rest before serving — Letting the cooked strips sit 2-3 minutes redistributes the juices inside. Cut one open too early and the chicken will be drier and less tender.
- Season right after frying — The salt sticks to the hot oil on the coating. Wait even 30 seconds and it’ll just slide right off onto the plate.
Tasty Twists on Pioneer Woman Chicken Fingers
Once you’ve mastered the basic version, try these variations to keep things interesting.
- Spicy southern style — Add 1/2 teaspoon cayenne and 1 teaspoon hot sauce to the egg wash for heat lovers. The Parmesan still balances the spice nicely.
- Herb-crusted version — Mix 1 tablespoon dried Italian herbs into the panko mixture. Oregano, basil, and thyme all work beautifully with the Parmesan.
- Lemon pepper twist — Add 1 tablespoon lemon zest and 1 teaspoon cracked black pepper to the flour. Bright and zesty, perfect for summer dinners.
- Sesame chicken fingers — Replace a quarter of the panko with toasted sesame seeds and add a splash of soy sauce to the egg wash. Serve with a sweet chili dipping sauce.
- Gluten-free option — Use gluten-free panko and replace the all-purpose flour with a gluten-free 1:1 blend. The texture stays surprisingly close to the original.
- Cornflake crust — Crush cornflakes and mix them half-and-half with the panko. You get extra sweetness and an even shatter-ier crunch.
Best Ways to Store Your Pioneer Woman Chicken Fingers
Leftovers are rare in my house, but when they happen, proper storage keeps the fingers just as good the next day.
- Refrigerator storage — Place the leftovers in an airtight container and refrigerate for up to 3 days. Put a paper towel in the container to absorb any condensation that would soften the coating.
- Freezer method — Cool completely, then arrange in a single layer on a baking sheet. Freeze until solid, transfer to a freezer-safe bag, and store for up to 1 month.
- Separate layers — Stacking the fingers directly on top of each other traps steam and ruins the crispiness. If you must stack them in a container, place parchment between the layers.
- Raw breaded strips — You can bread the uncooked chicken and freeze that instead. Freeze them in a single layer, then bag them. They fry straight from frozen with an extra minute or two of cooking time.
Ways to Warm It Up Again
Reheating fried food properly means reviving the crunch, not steaming it into mush. Here are the methods that actually work.
- Oven method — Place the fingers on a wire rack over a baking sheet and warm in a 375°F (190°C) oven for 8-10 minutes. The rack keeps air moving around the coating so it re-crisps evenly.
- Air fryer approach — Heat at 375°F (190°C) for 4-6 minutes until hot and re-crisped. Give them a quick shake halfway through for even heating.
- Stovetop skillet — Add a thin layer of oil to a skillet and reheat over medium heat for 2-3 minutes per side. This works best for fingers that were fried originally.
- Avoid the microwave — If you must use it, place a paper towel under and over the fingers and heat in 30-second bursts. It softens the coating noticeably, but it’s the fastest option.
Nutritional Breakdown (per serving)
Based on 1 serving = 1 portion out of 4 total. These numbers reflect the fried version, not the baked alternative, which will have slightly lower fat.
- Calories — 585 per serving
- Protein — 39g
- Fat — 22g
- Saturated Fat — about 5g
- Carbohydrates — 32g
- Fiber — 1g
- Sugar — 1g
- Sodium — about 490mg
- Cholesterol — around 145mg
Try These Recipes
Wrapping It Up
Pioneer Woman Chicken Fingers are the kind of recipe you’ll make again and again, whether it’s a busy Tuesday night or a weekend gathering with friends. The crispy, golden coating and juicy chicken inside hit all the right notes for both kids and adults. I hope you give them a try — and maybe experiment with one of the twists along the way.
PrintPioneer Woman Chicken Fingers
Crispy, golden chicken fingers with a crunchy panko-Parmesan coating and juicy, tender chicken inside. These are a family favorite, perfect for dipping in ketchup, honey mustard, or your favorite sauce.
- Prep Time: 20
- Cook Time: 12
- Total Time: 32
- Yield: 4 1x
- Category: Main Course
- Method: Stovetop
- Cuisine: American
Ingredients
- 1 lb (about 4) boneless, skinless chicken breasts
- 1 cup all-purpose flour
- 1 teaspoon paprika
- 1/2 teaspoon garlic powder
- 1/2 teaspoon onion powder
- 1/2 teaspoon kosher salt, plus more for seasoning
- 1/4 teaspoon black pepper, freshly ground
- 2 large eggs
- 1/4 cup buttermilk (or 2 tbsp milk + 1 tsp lemon juice, let sit 5 minutes)
- 1 1/2 cups panko breadcrumbs
- 1/2 cup grated Parmesan cheese
- 1/2 cup canola oil, for frying (or vegetable oil)
- 1/4 cup fresh parsley, chopped (optional, for garnish)
Instructions
- Place a wire rack over a baking sheet; set aside. Line another baking sheet with paper towels for draining the cooked fingers.
- Butterfly the chicken breasts: lay each breast flat on a cutting board, hold it steady with one hand, and slice horizontally through the middle to create two thin cutlets. Cut each cutlet into 3-4 strips, about 1-inch wide. Alternatively, you can buy chicken tenders directly.
- Set up a breading station: in a shallow dish (like a pie plate), whisk together the flour, paprika, garlic powder, onion powder, 1/2 teaspoon salt, and black pepper. In a second shallow dish, whisk the eggs and buttermilk until combined. In a third shallow dish, mix the panko breadcrumbs and Parmesan cheese.
- Working in batches, dredge the chicken strips in the flour mixture, shaking off any excess. Then dip into the egg mixture, letting the excess drip off, and finally press into the panko-Parmesan mixture, ensuring an even coating. Place the breaded strips on the wire rack.
- Heat the canola oil in a large, heavy-bottomed skillet (like cast iron or stainless steel) over medium-high heat. The oil should be about 1/4-inch deep. To test if the oil is ready, drop a pinch of panko into the oil – it should sizzle immediately but not burn. The oil temperature should reach about 350°F (175°C) for best results.
- Gently lay 3-4 chicken strips into the hot oil, being careful not to crowd the pan. Fry for 3-4 minutes per side, until the coating is deep golden brown and crispy. The chicken is cooked through when an instant-read thermometer inserted into the thickest strip registers 165°F (74°C).
- Transfer the cooked chicken fingers to the paper-towel-lined baking sheet to drain. Immediately sprinkle with a pinch of kosher salt. Continue frying the remaining chicken strips in batches, letting the oil come back to temperature between batches.
- Serve hot, garnished with chopped parsley if desired. Pair with your favorite dips like honey mustard, ranch, or ketchup.
- For a healthier alternative, you can bake the chicken fingers: preheat the oven to 400°F (200°C). Bake the breaded strips on the wire rack over a baking sheet for 12-15 minutes, flipping once halfway through, until golden and cooked through to 165°F (74°C).
- Let the cooked chicken fingers rest for 2-3 minutes before serving to allow the juices to redistribute, ensuring each bite stays moist.
Notes
To store, place leftover chicken fingers in an airtight container and refrigerate for up to 3 days. To freeze, cool completely, then arrange in a single layer on a baking sheet and freeze until solid; transfer to a freezer-safe bag for up to 1 month. To reheat, place them on a wire rack over a baking sheet and warm in a 375°F (190°C) oven for 8-10 minutes, or until crisp and heated through. Avoid microwaving, as it will soften the coating.
Nutrition
- Calories: 585
- Sugar: 1g
- Sodium: 490mg
- Unsaturated Fat: 3g
- Carbohydrates: 32g
- Fiber: 1g
- Protein: 39g
- Cholesterol: 165mg
Keywords: chicken fingers, crispy chicken tenders, panko chicken, fried chicken, kid-friendly dinner, easy chicken recipe, family dinner, chicken strips, homemade chicken fingers, quick dinner