
 Anabelle
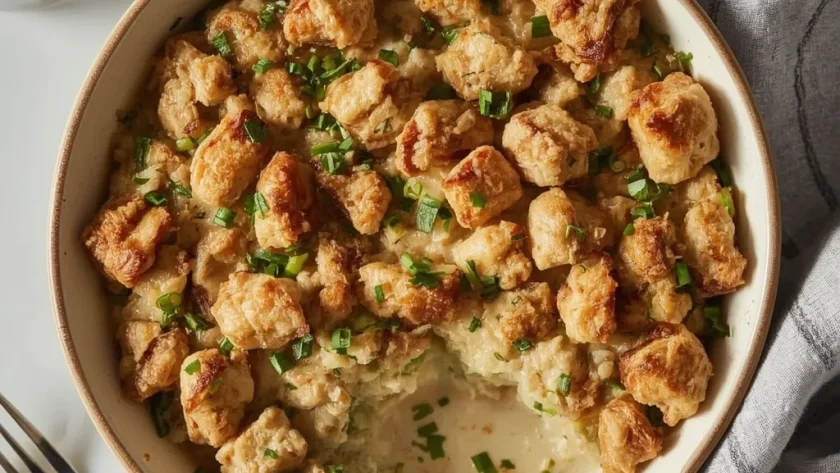
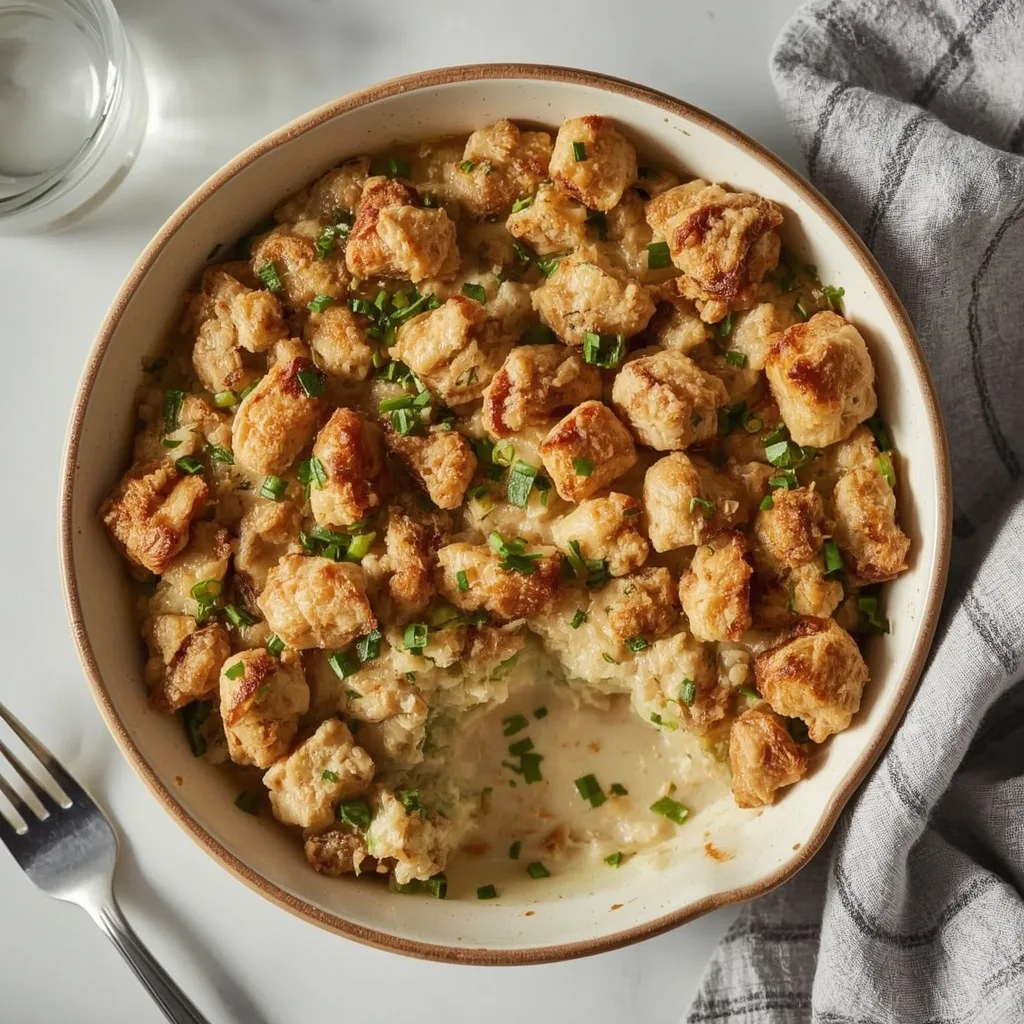
 The Pioneer Woman Chicken Stuffing Casserole layers tender chicken, a creamy herb sauce, and a crunchy stuffing top into one hearty, family-friendly meal. It is American comfort food at its most practical, combining pantry staples with a few fresh ingredients for a rich, savory result.
You can have it on the table in 50 minutes from start to finish, and I would call it beginner-friendly with one mildly tricky step. The roux-based sauce needs a little attention, but the rest is just layering and baking. This is a cozy weeknight dinner that feels like more effort than it actually takes.
A Quick Glimpse at Pioneer Woman Chicken Stuffing Casserole
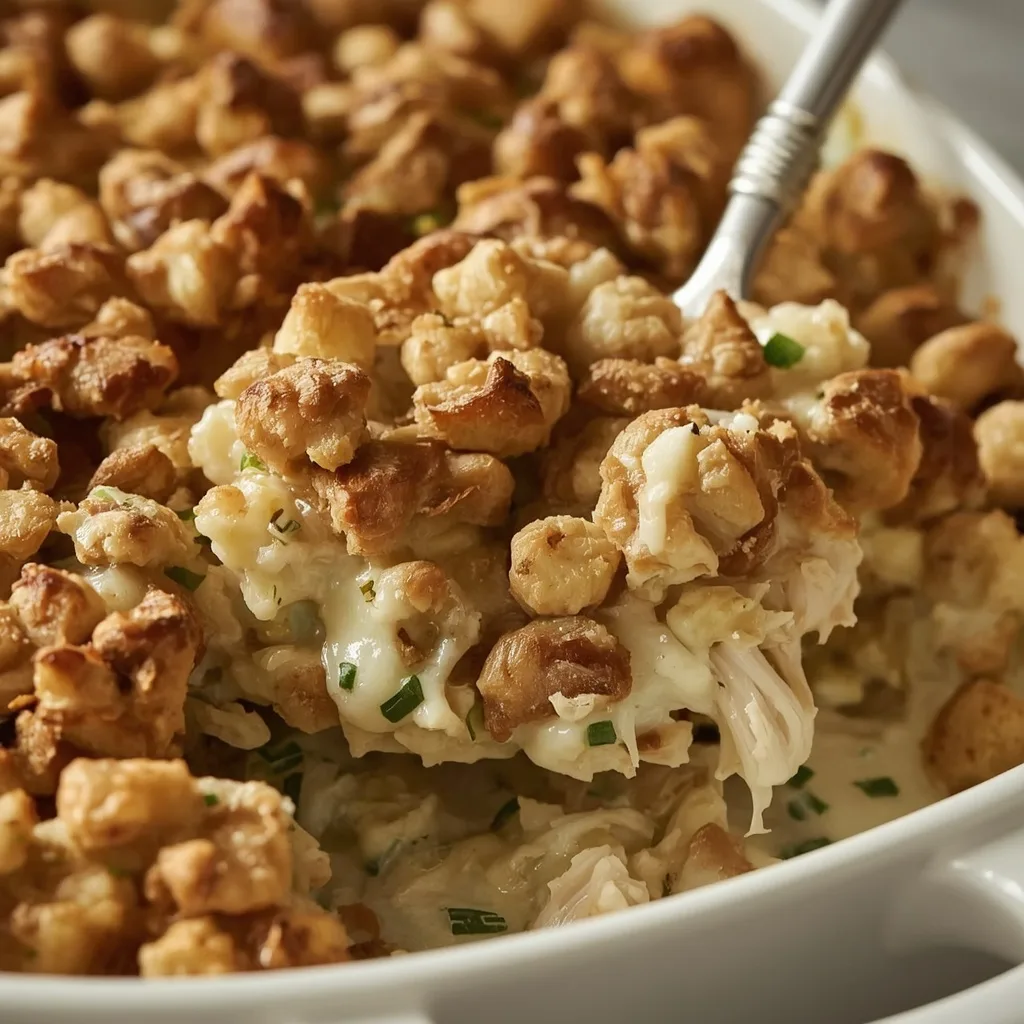
This dish takes boneless chicken breasts, nestles them under a silky herb-and-cheese sauce, and tops everything with moist, golden stuffing. The stuffing soaks up the broth and turns crisp at the edges while the center stays fluffy. You get a creamy bite, a tender piece of chicken, and that crunchy top all in one forkful. It is the kind of casserole that disappears fast on a cool evening.
Why This Recipe is Worth Trying
Here is what sold me on making this on repeat.
- Weeknight speed — With 15 minutes of prep and 35 minutes in the oven, this fits neatly into a busy evening without stress.
- One-dish cleanup — Everything bakes in a single 9×9-inch dish, so after dinner you are washing one pan and a skillet.
- Kid-approved texture — The soft chicken, creamy sauce, and crunchy topping give picky eaters plenty of familiar textures to enjoy.
- Pantry-friendly base — Most of the ingredients are staples you likely already stock, from flour to broth to stuffing mix.
Essential Ingredients for This Recipe
I have grouped these by role so you can see at a glance what each component does. Every measurement below matches the recipe exactly.
Protein and Aromatics
- 4 boneless, skinless chicken breasts — About 1.5 lb total, pounded to even thickness so they cook through without drying out. Look for similar-sized breasts for even cooking.
- 1/2 cup yellow onion, finely diced — This sweetens as it sautés and forms the flavor base of the sauce. A white onion works too.
- 2 cloves garlic, minced — Added at the end of the sauté so it stays aromatic rather than bitter. Do not let it brown.
For the Creamy Sauce
- 2 tbsp unsalted butter — Melted with the onion to build the roux. You will use 1 tablespoon here and save the rest for greasing.
- 2 tbsp all-purpose flour — Cooked briefly to remove the raw taste, then thickened with liquid.
- 1 cup chicken broth, low sodium — Whisked in slowly to prevent lumps. Low sodium keeps the final dish from getting too salty.
- 1/2 cup whole milk — Adds richness and a smooth mouthfeel. Whole milk gives the best texture here.
- 1/2 tsp kosher salt, 1/4 tsp black pepper, 1/2 tsp dried thyme — The seasoning backbone. Thyme pairs beautifully with chicken and adds an earthy note.
Vegetables and Cheese
- 1 cup frozen peas and carrots, thawed — Stirred into the hot sauce so they warm through. Thawing first stops them from cooling the sauce.
- 1 cup shredded sharp cheddar cheese — Split in half: 1/2 cup melts into the sauce and the rest goes on top for a golden crust.
For the Topping
- 2 cups herb-seasoned stuffing mix, dry — Stove Top or generic both work. The seasoning is already in there, so you do not need extra salt.
- 1 1/2 cups low-sodium chicken broth, hot — Poured over the dry mix to soften it. Hot liquid absorbs faster and more evenly.
Fresh parsley for garnish is optional but adds a nice pop of color at the end.
Useful Equipment
You do not need anything fancy for this one. Here is the kit I reach for.
- A 9×9-inch casserole dish — A 2-quart baking dish works too. Grease it well with butter so nothing sticks.
- A large skillet — You will sear the chicken and build the sauce in this one pan. A 12-inch skillet gives you room to work.
- A whisk — Essential for smoothing out the roux and preventing lumps in the sauce.
- A meat pounder — Flattening the chicken to even thickness helps it cook uniformly. A rolling pin or heavy pan works in a pinch.
- A mixing bowl — For combining the stuffing mix with the hot broth before layering it on top.
Directions to Make Pioneer Woman Chicken Stuffing Casserole
Follow these steps in order and you will have a bubbling, golden casserole ready in just under an hour.
- Preheat and prep — Set the oven to 375°F. Grease the baking dish with butter and pound the chicken to about 1/2-inch thickness. Season both sides with salt and pepper.
- Sear the chicken — Heat olive oil in a large skillet over medium-high until shimmering. Cook the chicken 3-4 minutes per side, until golden but not cooked through; it should reach about 130°F internally. Set it aside on a plate.
- Sauté the aromatics — Drop the heat to medium and add 1 tablespoon butter. Once it foams, add the onion and cook 3-4 minutes until translucent. Stir in the garlic for 30 seconds, watching it carefully.
- Build the roux — Sprinkle the flour over the onion and stir constantly for 1 minute. Slowly pour in the broth while whisking, then add the milk, salt, pepper, and thyme. Simmer 2-3 minutes until the sauce thickens and coats the back of a spoon.
- Finish the sauce — Pull the pan off the heat and stir in the peas and carrots along with 1/2 cup of cheddar. Mix until the cheese melts into the sauce.
- Layer the casserole — Arrange the chicken in the prepared dish in a single layer if you can. Pour the sauce over the top, making sure it covers the meat.
- Prep the stuffing — In a bowl, combine the dry stuffing mix with the hot broth. Stir until the liquid is absorbed and the mixture is fluffy, not dense. Spoon it over the chicken, pressing down lightly.
- Top with cheese — Sprinkle the remaining cheddar over the stuffing so it melts into a golden crust during baking.
- Bake — Put the dish in the oven for 20-25 minutes, until bubbly at the edges and the stuffing is golden. The chicken should hit 165°F at the thickest point. Cover loosely with foil if the top darkens too fast.
- Rest and serve — Let the casserole sit for 5 minutes before serving so the sauce sets a little. Garnish with parsley if you like.
What I Got Wrong (And How I Fixed It)
My first attempt had a few wobbles. Here is what tripped me up and how I corrected course.
- Lumpy sauce — I poured the broth in too fast and got flour clumps. Whisking constantly and pouring slowly fixed it completely.
- Soggy stuffing — I added too much broth and the topping turned mushy. Sticking to 1 1/2 cups hot broth and stirring briefly kept it fluffy.
- Dry chicken — Skipping the pounding meant thin parts overcooked. Evening out the thickness to 1/2-inch solved the problem.
- Burnt garlic — I left the garlic in the pan too long and it turned bitter. A quick 30-second sauté is all it needs.
- Runny sauce — I did not simmer it long enough, so the sauce stayed thin. Waiting until it visibly coats a spoon made all the difference.
Healthier Ways to Make Pioneer Woman Chicken Stuffing Casserole
If you want to lighten this up without losing the comfort factor, try these swaps.
- Lower-fat dairy — Use 2% milk instead of whole and reduced-fat cheddar. You will cut some fat while keeping the creamy texture.
- Whole-wheat stuffing — Swap the herb stuffing mix for a whole-wheat version to boost fiber. The flavor profile stays similar.
- Less sodium — Use unsalted broth and skip the added salt entirely. The stuffing mix and cheese already bring plenty of saltiness.
- More vegetables — Double the peas and carrots or throw in some diced celery and mushrooms. It stretches the dish and adds nutrients.
- Skinless chicken — This recipe already uses skinless breasts, so keep it that way. Pound them thinner to speed cooking and retain moisture.
Ingredient Substitutions for Pioneer Woman Chicken Stuffing Casserole
You can adapt this casserole to what you have on hand without losing the spirit of the dish.
- Chicken breasts → chicken thighs — Thighs stay juicy even if you cook them a little longer. Adjust the sear time to 5-6 minutes per side.
- Whole milk → half-and-half — Richer and creamier, this makes the sauce even more decadent. Use the same amount.
- Sharp cheddar → Gruyère or Swiss — These melt beautifully and add a nutty depth. Gruyère is pricier but worth it for special occasions.
- Frozen peas and carrots → fresh or leftover vegetables — Chopped broccoli, green beans, or corn all work. Just thaw or blanch them first.
- Herb stuffing mix → plain bread cubes with herbs — Toss plain cubes with a teaspoon of dried thyme and a pinch of poultry seasoning.
- Chicken broth → turkey or vegetable broth — Either works as a straight swap. Vegetable broth keeps this vegetarian if you also skip the chicken.
Unexpected Ways to Enjoy This Pioneer Woman Chicken Stuffing Casserole
Do not limit this to a plain dinner plate. These ideas give it a fresh spin.
- Stuffed baked potatoes — Spoon the casserole over a split baked potato and add extra cheese. It turns into a loaded, hearty meal.
- Sandwich filling — Pile the leftovers between two slices of sourdough with a smear of cranberry sauce. The stuffing adds a great crunch.
- Breakfast hash — Crumble the cold casserole into a skillet with a fried egg on top. The stuffing crisps back up like hash browns.
- Pot pie topping — Use the stuffing as a crust over the chicken and sauce, then bake until golden. It skips the pastry entirely.
- Wrapped in tortillas — Warm leftover casserole in a flour tortilla with a little hot sauce. It makes an excellent lunch wrap.
Best Tips for Pioneer Woman Chicken Stuffing Casserole Success
These small details separate a good casserole from a great one.
- Pound the chicken evenly — A consistent 1/2-inch thickness means every piece cooks at the same rate. I use a ziplock bag to keep things tidy.
- Whisk the sauce constantly — The roux thickens fast once the liquid hits it. Keep that whisk moving to avoid lumps from the start.
- Simmer until it coats a spoon — If the sauce looks thin in the pan, it will stay thin in the dish. Give it the full 2-3 minutes.
- Check the chicken temperature — Pull the casserole at 165°F, not before. The sear gets you close, but the oven finishes the job safely.
- Rest before serving — Those 5 minutes let the sauce settle so you get clean servings instead of a runny mess.
- Use hot broth for the stuffing — Cold liquid makes the stuffing gummy. Hot broth absorbs quickly and keeps the texture light.
Tasty Twists on Pioneer Woman Chicken Stuffing Casserole
Once you have made the original, these variations are fun to explore.
- Lemon herb version — Add the zest of one lemon and a teaspoon of fresh dill to the sauce. It brightens the whole dish.
- Mushroom addition — Sauté 8 ounces of sliced mushrooms with the onion. They add an earthy, savory depth.
- Spicy kick — Stir a teaspoon of hot sauce or a pinch of cayenne into the cream sauce. It pairs well with the sharp cheddar.
- Cranberry twist — Layer a thin spread of whole cranberry sauce under the chicken. The sweet-tart notes cut the richness.
- Broccoli cheddar style — Swap the peas and carrots for chopped broccoli florets. Add an extra 1/2 cup of cheddar for a cheesy punch.
Best Ways to Store Your Pioneer Woman Chicken Stuffing Casserole
Leftovers keep well if you follow these storage rules.
- Refrigerator storage — Cool completely, then cover with foil or transfer to an airtight container. It stays good for up to 3 days.
- Freezer method — Wrap the dish tightly in plastic wrap and aluminum foil. It freezes for up to 2 months without losing quality.
- Thawing technique — Move the casserole to the fridge overnight before reheating. Do not skip this or the oven time gets unpredictable.
- Portion containers — For single servings, divide leftovers into individual containers. They reheat quicker and make easy lunches.
Ways to Warm It Up Again
Reheating is simple, but the method changes the result.
- Oven method — Cover with foil and warm at 350°F for 15-20 minutes. Remove the foil for the last 5 minutes to crisp the top.
- Microwave option — Heat a single portion on high for 1-2 minutes. Watch it so the chicken does not dry out.
- Broiler finish — After microwaving or oven reheating, run the casserole under the broiler for 1-2 minutes to restore crunch.
- Air fryer trick — Reheat leftovers at 350°F for 5-7 minutes. The air fryer brings the stuffing back to crispy quickly.
Nutritional Breakdown (per serving)
Based on 1 serving = 1 portion out of 4 total servings of this casserole.
- Calories — 543 per serving
- Protein — 47g
- Fat — 19g, with about 9g of saturated fat
- Carbohydrates — 40g
- Fiber — 3g
- Sugar — 6g
- Sodium — 1020mg, which is on the higher side
- Cholesterol — around 145mg
Try These Recipes
Wrapping It Up
The Pioneer Woman Chicken Stuffing Casserole delivers everything I want from a weeknight dinner: minimal fuss, familiar flavors, and a table full of happy eaters. The contrast between that creamy sauce and crunchy topping keeps every bite interesting. Give it a try on your next busy evening and see how fast it becomes a regular in your rotation.
PrintPioneer Woman Chicken Stuffing Casserole
This comforting casserole layers tender chicken, a creamy herb sauce, and a golden, crunchy stuffing topping. It’s a hearty, family-friendly main dish that delivers rich, savory flavor with contrasting textures, perfect for a cozy weeknight dinner.
- Prep Time: 15
- Cook Time: 35
- Total Time: 50
- Yield: 4 1x
- Category: Main Course
- Method: Baking
- Cuisine: American
Ingredients
- 4 boneless, skinless chicken breasts (about 1.5 lb / 680 g total), pounded to even thickness
- 1 tbsp olive oil
- 2 tbsp unsalted butter, plus extra for greasing the dish
- 1/2 cup yellow onion, finely diced
- 2 cloves garlic, minced
- 2 tbsp all-purpose flour
- 1 cup chicken broth, low sodium
- 1/2 cup whole milk
- 1/2 tsp kosher salt
- 1/4 tsp black pepper
- 1/2 tsp dried thyme
- 1 cup frozen peas and carrots, thawed
- 2 cups herb-seasoned stuffing mix (e.g., Stove Top or generic), dry
- 1 1/2 cups low-sodium chicken broth, hot (for the stuffing topping)
- 1 cup shredded sharp cheddar cheese (about 4 oz / 113 g)
- Fresh parsley for garnish, optional
Instructions
- Preheat your oven to 375°F / 190°C. Grease a 9×9-inch casserole dish or a 2-quart baking dish with a little butter. Pounding the chicken breasts to an even 1/2-inch thickness ensures they cook evenly and stay juicy.
- Season the chicken breasts on both sides with a pinch of salt and pepper. In a large skillet over medium-high heat, heat the olive oil until shimmering. Carefully lay the chicken in the pan — it should sizzle. Cook for 3-4 minutes per side, until golden brown but not cooked through (internal temperature about 130°F / 54°C). Remove the chicken to a plate and set aside.
- Reduce heat to medium. Add 1 tablespoon of the butter to the same skillet. Once it melts and foams, add the diced onion. Sauté, stirring occasionally, for 3-4 minutes until the onion is translucent and fragrant. Add the minced garlic and cook for another 30 seconds, until aromatic — do not let the garlic brown.
- Sprinkle the flour over the onion mixture and stir constantly for 1 minute to cook out the raw flour taste. This roux will thicken the sauce. Slowly pour in the chicken broth while whisking to prevent lumps. Then add the whole milk, kosher salt, black pepper, and dried thyme. Bring the sauce to a gentle simmer, whisking occasionally, until it thickens noticeably, about 2-3 minutes. It should coat the back of a spoon.
- Remove the sauce from heat and stir in the thawed peas and carrots and 1/2 cup of the shredded cheddar cheese. Mix until the cheese melts into the sauce, making a creamy, cheesy base.
- Spread the chicken breasts evenly in the prepared baking dish. They can overlap slightly, but arrange them in a single layer if possible. Pour the creamy vegetable and cheese sauce over the chicken, making sure it covers the meat well.
- In a separate bowl, combine the dry stuffing mix with the hot chicken broth. Stir briefly until the broth is absorbed and the stuffing is moist but not soggy. The mixture should be fluffy, not dense. Spoon the stuffing evenly over the chicken and sauce, pressing down lightly to form a compact topping.
- Sprinkle the remaining 1/2 cup of cheddar cheese over the top of the stuffing. The cheese will melt and form a golden, crusty layer during baking.
- Place the casserole in the preheated oven and bake for 20-25 minutes, until the casserole is bubbly at the edges and the stuffing is golden brown and crisp. The chicken should register 165°F / 74°C at the thickest point. If the top gets too dark before the center is done, cover loosely with foil.
- Remove from the oven and let rest for 5 minutes before serving. This allows the sauce to set slightly and makes it easier to serve. Garnish with fresh parsley if desired.
Notes
Storage: Allow leftovers to cool completely, then store in an airtight container in the refrigerator for up to 3 days. Freezing: Wrap the casserole tightly in plastic wrap and aluminum foil, and freeze for up to 2 months. Thaw overnight in the fridge. Reheat: To reheat a portion, microwave on high for 1-2 minutes. For a whole casserole, cover with foil and warm in a 350°F / 175°C oven for 15-20 minutes, or until hot. For a crispier topping, remove the foil for the last 5 minutes. Note: The stuffing topping may lose its crunch after refrigeration; crisp it under a broiler for 1-2 minutes if desired.
Nutrition
- Calories: 543
- Sugar: 6g
- Sodium: 1020mg
- Unsaturated Fat: 9g
- Carbohydrates: 40g
- Fiber: 3g
- Protein: 47g
- Cholesterol: 125mg
Keywords: chicken stuffing casserole, Pioneer Woman, chicken casserole, stuffing casserole, baked chicken, weeknight dinner, comfort food, creamy chicken casserole, chicken and stuffing, easy chicken bake