Pioneer Woman Chicken Fingers
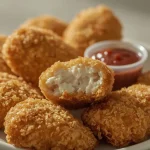
Crispy, golden chicken fingers with a crunchy panko-Parmesan coating and juicy, tender chicken inside. These are a family favorite, perfect for dipping in ketchup, honey mustard, or your favorite sauce.
- Prep Time: 20
- Cook Time: 12
- Total Time: 32
- Yield: 4 1x
- Category: Main Course
- Method: Stovetop
- Cuisine: American
Ingredients
- 1 lb (about 4) boneless, skinless chicken breasts
- 1 cup all-purpose flour
- 1 teaspoon paprika
- 1/2 teaspoon garlic powder
- 1/2 teaspoon onion powder
- 1/2 teaspoon kosher salt, plus more for seasoning
- 1/4 teaspoon black pepper, freshly ground
- 2 large eggs
- 1/4 cup buttermilk (or 2 tbsp milk + 1 tsp lemon juice, let sit 5 minutes)
- 1 1/2 cups panko breadcrumbs
- 1/2 cup grated Parmesan cheese
- 1/2 cup canola oil, for frying (or vegetable oil)
- 1/4 cup fresh parsley, chopped (optional, for garnish)
Instructions
- Place a wire rack over a baking sheet; set aside. Line another baking sheet with paper towels for draining the cooked fingers.
- Butterfly the chicken breasts: lay each breast flat on a cutting board, hold it steady with one hand, and slice horizontally through the middle to create two thin cutlets. Cut each cutlet into 3-4 strips, about 1-inch wide. Alternatively, you can buy chicken tenders directly.
- Set up a breading station: in a shallow dish (like a pie plate), whisk together the flour, paprika, garlic powder, onion powder, 1/2 teaspoon salt, and black pepper. In a second shallow dish, whisk the eggs and buttermilk until combined. In a third shallow dish, mix the panko breadcrumbs and Parmesan cheese.
- Working in batches, dredge the chicken strips in the flour mixture, shaking off any excess. Then dip into the egg mixture, letting the excess drip off, and finally press into the panko-Parmesan mixture, ensuring an even coating. Place the breaded strips on the wire rack.
- Heat the canola oil in a large, heavy-bottomed skillet (like cast iron or stainless steel) over medium-high heat. The oil should be about 1/4-inch deep. To test if the oil is ready, drop a pinch of panko into the oil – it should sizzle immediately but not burn. The oil temperature should reach about 350°F (175°C) for best results.
- Gently lay 3-4 chicken strips into the hot oil, being careful not to crowd the pan. Fry for 3-4 minutes per side, until the coating is deep golden brown and crispy. The chicken is cooked through when an instant-read thermometer inserted into the thickest strip registers 165°F (74°C).
- Transfer the cooked chicken fingers to the paper-towel-lined baking sheet to drain. Immediately sprinkle with a pinch of kosher salt. Continue frying the remaining chicken strips in batches, letting the oil come back to temperature between batches.
- Serve hot, garnished with chopped parsley if desired. Pair with your favorite dips like honey mustard, ranch, or ketchup.
- For a healthier alternative, you can bake the chicken fingers: preheat the oven to 400°F (200°C). Bake the breaded strips on the wire rack over a baking sheet for 12-15 minutes, flipping once halfway through, until golden and cooked through to 165°F (74°C).
- Let the cooked chicken fingers rest for 2-3 minutes before serving to allow the juices to redistribute, ensuring each bite stays moist.
Notes
To store, place leftover chicken fingers in an airtight container and refrigerate for up to 3 days. To freeze, cool completely, then arrange in a single layer on a baking sheet and freeze until solid; transfer to a freezer-safe bag for up to 1 month. To reheat, place them on a wire rack over a baking sheet and warm in a 375°F (190°C) oven for 8-10 minutes, or until crisp and heated through. Avoid microwaving, as it will soften the coating.
Nutrition
- Calories: 585
- Sugar: 1g
- Sodium: 490mg
- Unsaturated Fat: 3g
- Carbohydrates: 32g
- Fiber: 1g
- Protein: 39g
- Cholesterol: 165mg
Keywords: chicken fingers, crispy chicken tenders, panko chicken, fried chicken, kid-friendly dinner, easy chicken recipe, family dinner, chicken strips, homemade chicken fingers, quick dinner