

 Anabelle
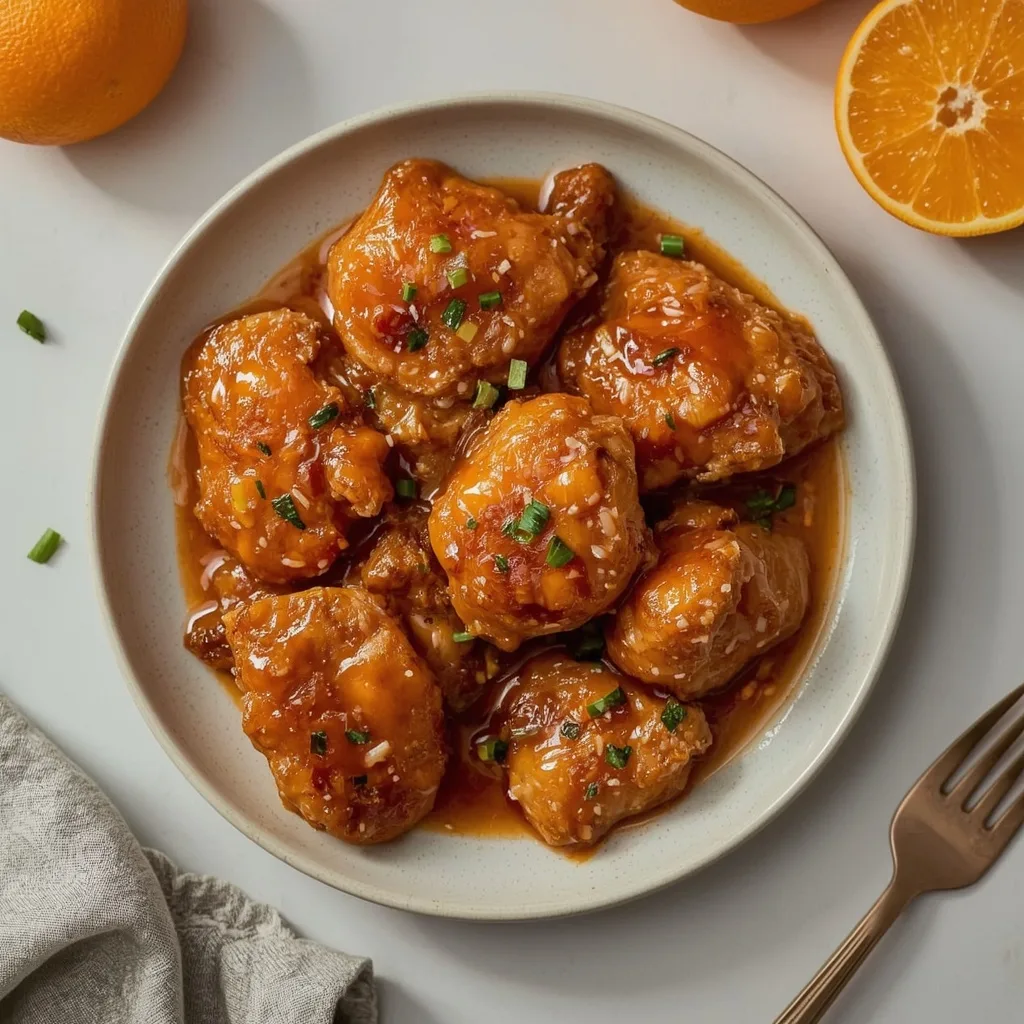
 Pioneer Woman Orange Chicken delivers all the sticky, tangy-sweet satisfaction of your favorite takeout spot, but it comes together in your own kitchen in about 40 minutes. This Chinese-American classic features crispy fried chicken pieces tossed in a glossy sauce made with fresh orange zest, ginger, garlic, and honey.
This is an intermediate-level recipe because the double-coating and frying steps need a little attention, but nothing here is difficult. It is perfect for a busy weeknight when you want something more exciting than plain grilled chicken, and it is guaranteed to impress anyone who loves bright, citrusy flavors.
A Quick Glimpse at Pioneer Woman Orange Chicken
This dish is all about contrast. You get crunchy, golden-brown chicken pieces coated in a thin, crackly crust, then enveloped in a silky sauce that balances sweet honey with tangy orange juice and savory soy sauce. The fresh ginger and garlic add a warm kick that keeps every bite interesting.
Serve it over steamed rice and you have a complete meal that tastes like it came from a restaurant kitchen, not your stovetop.

Why This Recipe is Worth Trying
Here is what makes this version stand out from other orange chicken recipes you might have tried.
- Real citrus flavor — Fresh orange juice and zest give the sauce a bright, natural taste that bottled sauce simply cannot match.
- Extra crispy coating — The double-dredge method creates a sturdy crust that stays crunchy even after being tossed in the sauce.
- Better than takeout — You control the oil quality and salt level, so the final dish feels lighter and fresher than restaurant versions.
- Simple pantry ingredients — Most of the sauce components are probably already sitting in your kitchen cabinets right now.
- One skillet cleanup — The entire dish cooks in a single pan, which means less scrubbing and more relaxing after dinner.
Essential Ingredients for This Recipe
Gathering your ingredients before you start cooking makes the whole process smoother. Here is everything you need and why each item matters.
For the Chicken
- 1 1/2 lb boneless, skinless chicken breasts — Cut into 1-inch pieces so they cook quickly and evenly. Look for uniform pieces to ensure everything crisps at the same rate.
- 1/4 cup cornstarch — This is the secret to a light, crispy coating. Cornstarch creates a delicate crunch that flour alone cannot achieve.
- 1/4 cup all-purpose flour — The flour gives the coating structure and helps the cornstarch cling to the chicken.
- 1/2 teaspoon kosher salt — Seasons the coating directly so every bite tastes seasoned, not just the sauce.
- 1/4 teaspoon ground black pepper — Adds a subtle warmth that balances the sweet sauce.
- 2 large eggs, beaten — The glue that holds the double coating together between the two flour dips.
- 1/2 cup vegetable oil — Use a neutral oil with a high smoke point for frying. Canola or peanut oil work well here too.
For the Sauce
- 1/2 cup fresh orange juice — This is about 2 oranges. Fresh juice makes a noticeable difference, so skip the bottled stuff if you can.
- 1 tablespoon orange zest — The zest carries concentrated citrus oils that brighten the entire sauce and add aromatic depth.
- 1/4 cup low-sodium soy sauce — Provides the savory backbone and saltiness that balances the honey and orange.
- 1/4 cup honey — Natural sweetness that creates the glossy finish. It also helps the sauce cling to each chicken piece.
- 2 tablespoons rice vinegar — A touch of acidity cuts through the sweetness and adds a subtle tang.
- 1 tablespoon fresh ginger, minced — Warm and slightly spicy, ginger is essential to the classic orange chicken flavor profile.
- 3 cloves garlic, minced — Savory depth that rounds out the sauce.
- 1/2 teaspoon red pepper flakes — Optional, but recommended if you like a little heat. Leave them out for a milder sauce.
- 1/2 cup water — Combined with cornstarch to create the slurry that thickens the sauce.
- 1 tablespoon cornstarch — Forms the slurry that gives the sauce its glossy, coat-the-spoon consistency.
For Serving
- 2 green onions, thinly sliced — A fresh, oniony garnish that adds color and a mild bite.
- Steamed rice — The perfect base to soak up all that extra sauce.
Useful Equipment
You probably own most of these already. Here is what makes the cooking process easier.
- A large nonstick skillet or wok — The wide surface area lets you fry multiple pieces at once without overcrowding.
- Two shallow dishes — One for the dry coating mixture and one for the beaten eggs. Pie plates work great.
- A wooden spoon — Useful for scraping up the browned bits from the pan when you add the sauce.
- A slotted spoon — Lets you remove the fried chicken while allowing excess oil to drain back into the skillet.
- A wire rack — Placing fried chicken on a rack keeps it crispy. Paper towels work, but they can make the coating soggy.
Directions to Make Pioneer Woman Orange Chicken
The process has three main parts: coating the chicken, frying it until golden, and building the glossy sauce. Here is how it all comes together.
- Set up the coating station — Whisk the cornstarch, flour, salt, and pepper in one shallow dish. Beat the eggs in a second dish. Dredge each chicken piece in the dry mixture, shake off the excess, dip it in the eggs, then coat it in the dry mixture again. This double coating is what creates that durable, crispy crust.
- Fry the chicken in batches — Heat the oil over medium-high heat until it shimmers and a test piece sizzles immediately. Add the chicken in a single layer without overcrowding, and fry for 4 to 5 minutes per side until golden brown and cooked through. Remove with a slotted spoon and drain on a wire rack.
- Whisk together the sauce — While the chicken cooks, combine the orange juice, zest, soy sauce, honey, rice vinegar, ginger, garlic, and red pepper flakes in a small bowl. Mix the water and cornstarch separately to create the slurry.
- Simmer the sauce — Discard most of the oil from the skillet, leaving a thin film. Return the pan to medium heat and add the orange juice mixture, scraping up any browned bits from the bottom. Let it simmer for about 2 minutes so the flavors meld.
- Thicken with the slurry — Stir the cornstarch slurry to recombine, then pour it into the simmering sauce while whisking constantly. Cook for 1 to 2 minutes until the sauce turns glossy and thick enough to coat the back of a spoon.
- Toss the chicken in the sauce — Add the fried chicken pieces to the skillet and toss gently to coat every piece without breaking the crust. Let everything simmer together for 1 to 2 minutes so the chicken absorbs some flavor while keeping its crunch.
- Garnish and serve — Sprinkle with sliced green onions and serve immediately over steamed rice. This dish is best eaten fresh, while the chicken is still crispy and the sauce is hot.
What I Got Wrong (And How I Fixed It)
Nobody nails this dish on the first attempt. Here are the common pitfalls I have hit and the simple fixes that saved dinner.
- Overcrowding the pan — Adding too many chicken pieces at once lowers the oil temperature and produces soggy, steamed coating instead of crispy crust. Fry in small batches and give each piece room to brown.
- The sauce turned pasty — Adding too much slurry at once or cooking it too long creates a gluey texture. Pour the slurry slowly while whisking, and stop as soon as the sauce coats the back of a spoon.
- Chicken stuck to the pan — Not letting the oil heat enough causes sticking. Wait until the oil shimmers and a test piece sizzles immediately before adding the rest.
- The coating fell off in the sauce — Tossing too aggressively breaks the crust. Use a gentle folding motion with a spatula instead of stirring vigorously.
- Bland sauce — Skipping the fresh orange zest leaves the sauce flat and one-dimensional. The zest adds aromatic citrus oils that bottled juice simply lacks.
Healthier Ways to Make Pioneer Woman Orange Chicken
You can lighten up this dish without losing the flavor that makes it so good. Here are some simple swaps.
- Bake instead of fry — Coat the chicken as directed, then arrange it on a baking sheet lined with parchment. Spray lightly with oil and bake at 425°F / 218°C for about 20 minutes, flipping halfway.
- Use chicken thighs — Boneless, skinless thighs have more fat and flavor, which means they stay juicy even with a lighter cooking method. They also tolerate slightly longer cooking times without drying out.
- Cut the honey in half — Reduce the honey to 2 tablespoons and add a splash of extra orange juice to maintain the sauce consistency. This cuts the sugar content noticeably.
- Swap in cauliflower rice — Serve the orange chicken over steamed cauliflower rice instead of white rice. You save a significant number of carbs while keeping the meal filling.
- Air fry the chicken — If you have an air fryer, cook the coated chicken at 400°F / 204°C for about 12 minutes, shaking the basket halfway. You get crispy results with a fraction of the oil.
Ingredient Substitutions for Pioneer Woman Orange Chicken
Running low on something, or have a dietary restriction to work around? These swaps will keep the dish on track.
- Honey → maple syrup or brown sugar — Maple syrup adds a slightly smoky sweetness, while brown sugar dissolves easily into the sauce. Use the same amount and adjust to taste.
- Rice vinegar → apple cider vinegar — Apple cider vinegar has a similar acidity level and a slightly fruity note that works fine in this sauce. Use the same measurement.
- Soy sauce → tamari or coconut aminos — Tamari is a gluten-free option with nearly identical flavor. Coconut aminos are sweeter and lower in sodium, so reduce the honey slightly to balance.
- Fresh ginger → 1/2 teaspoon ground ginger — Ground ginger lacks the brightness of fresh, but it works in a pinch. Add it to the sauce mixture and let it simmer a little longer to hydrate.
- Chicken breasts → chicken thighs — Thighs are more forgiving and stay tender. They take about the same amount of time to fry, so no other adjustments are needed.
- Vegetable oil → peanut or canola oil — Both have high smoke points and neutral flavors that let the orange sauce shine. Swap them one-for-one.
Unexpected Ways to Enjoy This Pioneer Woman Orange Chicken
Steamed rice is the classic pairing, but this dish is versatile enough for some creative alternatives.
- Orange chicken tacos — Pile the chicken into warm corn tortillas with shredded cabbage and a drizzle of the extra sauce. The crispy chicken works surprisingly well in a taco format.
- Over crispy noodles — Serve the chicken over pan-fried chow mein noodles instead of rice. The crunchy noodles echo the crispy coating and soak up the sauce beautifully.
- In lettuce cups — Spoon the chicken into crisp butter lettuce leaves with sliced cucumber and mint for a fresh, lighter take on the dish.
- On a grain bowl — Build a bowl with quinoa or brown rice, steamed broccoli, edamame, and the orange chicken on top. It is a colorful, hearty meal that works for meal prep.
- As a sandwich filling — Pile the chicken onto a soft brioche bun with pickled red onions and a smear of sriracha mayo. Sweet, tangy, and satisfying.
- Tossed into fried rice — Chop leftover orange chicken and stir it into vegetable fried rice. The sauce coats the rice grains and turns an ordinary side dish into a full meal.
Best Tips for Pioneer Woman Orange Chicken Success
These small details make the difference between good orange chicken and great orange chicken. Pay attention to them and the results will speak for themselves.
- Pat the chicken dry first — Moisture is the enemy of crispy coating. Blot the chicken pieces with paper towels before dredging to help the coating adhere properly.
- Keep the coating consistent — Shake off excess dry mixture before the egg dip, and let the excess egg drip off before the second coating. Too much of either leads to gummy, uneven crust.
- Check your oil temperature — The oil should shimmer and produce a sizzle immediately when you add a test piece. If it does not sizzle, wait a little longer before proceeding.
- Work in small batches — Frying too many pieces at once drops the oil temperature and makes the coating absorb excess oil. Patience here pays off with crispier results.
- Rest the fried chicken briefly — Letting the fried pieces sit on a wire rack for a minute or two allows excess oil to drain before they hit the sauce.
- Add the slurry slowly — Pouring it all at once can create lumps. Whisk as you pour, and stop when the sauce reaches the desired consistency.
- Serve immediately — The sauce will soften the coating over time, so this dish is best enjoyed right after it hits the pan. Have your rice ready and the table set before you start tossing.
Tasty Twists on Pioneer Woman Orange Chicken
Once you master the base recipe, try one of these variations to keep things interesting.
- Spicy orange sriracha — Add 1 to 2 tablespoons of sriracha to the sauce mixture for a fiery kick that pairs well with the honey.
- Crispy orange tofu — Swap the chicken for extra-firm tofu that has been pressed and cut into cubes. Coat and fry the same way, and the sauce works perfectly with the crunchy exterior.
- Orange ginger beef — Replace the chicken with thinly sliced flank steak cut against the grain. Fry it quickly in batches to avoid overcooking, and use the same sauce.
- Honey sesame orange — Toasted sesame seeds and a drizzle of sesame oil stirred into the finished dish add nutty depth and a beautiful finish.
- Garlicky orange shrimp — Use peeled and deveined large shrimp instead of chicken. They cook much faster, so reduce the frying time to about 2 minutes per side.
- Pineapple orange chicken — Add chunks of fresh pineapple to the sauce during the final simmer. The extra sweetness and acidity brighten the entire dish.
Best Ways to Store Your Pioneer Woman Orange Chicken
Leftovers are a real possibility, so here is how to keep them tasting good for another day.
- Refrigerator storage — Allow the chicken to cool completely, then transfer it to an airtight container. It will stay fresh in the fridge for up to 4 days.
- Freezer storage — You can freeze the cooked chicken and sauce separately for up to 3 months. Thaw overnight in the refrigerator before reheating for best results.
- Separate the sauce — If you have leftovers with extra sauce, store the sauce in its own container. It reheats better on its own and avoids making the chicken soggy.
- Label your containers — Write the date on the container so you know exactly how long it has been stored. It is easy to lose track otherwise.
Ways to Warm It Up Again
Reheating is where many people ruin the crispy coating, but a few simple methods will keep it mostly intact.
- Skillet method — Heat a skillet over medium heat with a splash of water or chicken broth. Add the chicken and toss gently for 5 to 7 minutes until heated through. The liquid keeps the chicken moist while the gentle heat revives some crispness.
- Microwave method — Place the chicken in a microwave-safe dish and heat in 30-second bursts, stirring in between until hot. The coating will soften, but it is the quickest option for lunch.
- Oven method — Spread the chicken in a single layer on a baking sheet and warm it at 350°F / 177°C for about 10 minutes. This method restores the most crispness without much extra effort.
- Air fryer method — Set the air fryer to 375°F / 190°C and heat the chicken for about 5 minutes. This is the best way to bring the crunch back, though the sauce may stick to the basket.
Nutritional Breakdown (per serving)
Based on 1 serving = 1 portion out of 4 total servings.
- Calories — 650 per serving
- Protein — 42g per serving
- Fat — about 27g per serving
- Saturated Fat — around 4g per serving
- Carbohydrates — about 58g per serving
- Fiber — 2g per serving
- Sugar — roughly 34g per serving
- Sodium — 1170mg per serving
- Cholesterol — around 145mg per serving
Try These Recipes
Wrapping It Up
Pioneer Woman Orange Chicken is proof that takeout favorites are absolutely achievable at home. The bright citrus, sticky honey, and crispy coating come together in a way that feels special but fits easily into a weeknight schedule.
Give this recipe a try the next time you crave something tangy and satisfying. The steps are straightforward, the ingredients are simple, and the payoff is a dish that tastes like it came from your favorite restaurant. You might just find yourself making it every week.
PrintPioneer Woman Orange Chicken

This is a bright and tangy orange chicken with a crispy, golden coating and a glossy, sweet-savory sauce infused with fresh orange zest and juice. The balance of citrus, ginger, garlic, and a touch of honey creates a vibrant glaze that clings to every bite. Serve it over steamed rice for a satisfying weeknight meal that tastes like takeout but is made fresh at home.
- Prep Time: 20
- Cook Time: 20
- Total Time: 40
- Yield: 4 1x
- Category: Main Course
- Method: Stovetop
- Cuisine: Chinese-American
Ingredients
- 1 1/2 lb boneless, skinless chicken breasts, cut into 1-inch pieces
- 1/4 cup cornstarch
- 1/4 cup all-purpose flour
- 1/2 teaspoon kosher salt
- 1/4 teaspoon ground black pepper
- 2 large eggs, beaten
- 1/2 cup vegetable oil, for frying
- 1/2 cup fresh orange juice (about 2 oranges)
- 1 tablespoon orange zest (from 1 orange)
- 1/4 cup low-sodium soy sauce
- 1/4 cup honey
- 2 tablespoons rice vinegar
- 1 tablespoon fresh ginger, minced
- 3 cloves garlic, minced
- 1/2 teaspoon red pepper flakes (optional, for heat)
- 1/2 cup water
- 1 tablespoon cornstarch (for slurry)
- 2 green onions, thinly sliced (for garnish)
- Steamed rice, for serving
Instructions
- In a shallow dish, whisk together the cornstarch, flour, salt, and black pepper. In another shallow dish, place the beaten eggs. Working in batches, dredge the chicken pieces in the dry mixture, shaking off any excess, then dip into the eggs, letting the excess drip off, and then coat again in the dry mixture. This double coating ensures a crispy crust that holds up to the sauce.
- Heat the vegetable oil in a large nonstick skillet or wok over medium-high heat until shimmering (about 350°F / 177°C if you have a thermometer, but the oil should sizzle immediately when a piece of chicken is added). Carefully place the coated chicken pieces into the hot oil in a single layer, being careful not to overcrowd the pan—cook in batches if needed. Fry for 4 to 5 minutes per side, turning occasionally, until golden brown and cooked through to 165°F / 74°C internally. Remove with a slotted spoon and drain on a wire rack or paper towel-lined plate.
- While the chicken cooks, prepare the sauce. In a small bowl, whisk together the orange juice, orange zest, soy sauce, honey, rice vinegar, ginger, garlic, and red pepper flakes (if using). In a separate small bowl, mix the 1/2 cup water with the 1 tablespoon cornstarch to create a slurry; set aside.
- Once all the chicken is fried, carefully discard the oil from the skillet, leaving only a thin film. Place the skillet over medium heat. Add the orange juice mixture, scraping up any browned bits from the bottom of the pan with a wooden spoon—this adds flavor to the sauce. Bring the sauce to a gentle simmer, then cook for 2 minutes until it slightly reduces and the flavors meld.
- Stir the cornstarch slurry again to recombine, then slowly pour it into the simmering sauce while whisking constantly. Continue to cook for 1 to 2 minutes, until the sauce thickens to a glossy, coat-the-back-of-a-spoon consistency. It should be thick enough to coat the chicken without being pasty.
- Add the fried chicken pieces to the skillet with the sauce. Toss gently with a spatula to coat every piece evenly, being careful not to break the crispy coating. Let the chicken simmer in the sauce for 1 to 2 minutes, allowing it to absorb some of the flavor while keeping the crisp texture.
- Garnish with sliced green onions and serve immediately over steamed rice. The dish is best eaten fresh, while the chicken is still crispy and the sauce is hot and glossy.
Notes
Storage: Allow any leftover orange chicken to cool completely, then store in an airtight container in the refrigerator for up to 4 days. Freezing: You can freeze the cooked chicken and sauce separately for up to 3 months; thaw overnight in the refrigerator before reheating. Reheating: For best results, reheat in a skillet over medium heat with a splash of water or chicken broth, tossing until heated through (about 5-7 minutes). Alternatively, microwave in 30-second bursts, stirring in between, until hot, but be aware that the coating may lose crispness. Add a fresh squeeze of orange juice to brighten the sauce if it seems too thick after reheating.
Nutrition
- Calories: 650
- Sugar: 34g
- Sodium: 1170mg
- Unsaturated Fat: 4g
- Carbohydrates: 58g
- Fiber: 2g
- Protein: 42g
- Cholesterol: 195mg
Keywords: orange chicken, Chinese orange chicken, crispy orange chicken, takeout at home, weeknight dinner, stir-fry, orange glaze, fresh orange juice, chicken breast recipe, Asian-inspired