
 Anabelle
 Pioneer Woman Kiwi Lime Pie is a refreshing no-bake dessert that brings together a buttery graham cracker crust, a tangy lime filling, and vibrant kiwi slices on top. The creamy citrus filling gets its brightness from fresh lime juice and zest, while the sweet-tart kiwi balances every bite.
You can have this pie on the table in just 25 minutes of hands-on work, making it perfect for beginner bakers. The only mildly tricky part is folding the whipped cream into the lime mixture without deflating it, but the steps below walk you through exactly how to handle it. This is an ideal summer dessert for cookouts, bridal showers, or any occasion where you want something light and impressive.
A Quick Glimpse at Pioneer Woman Kiwi Lime Pie
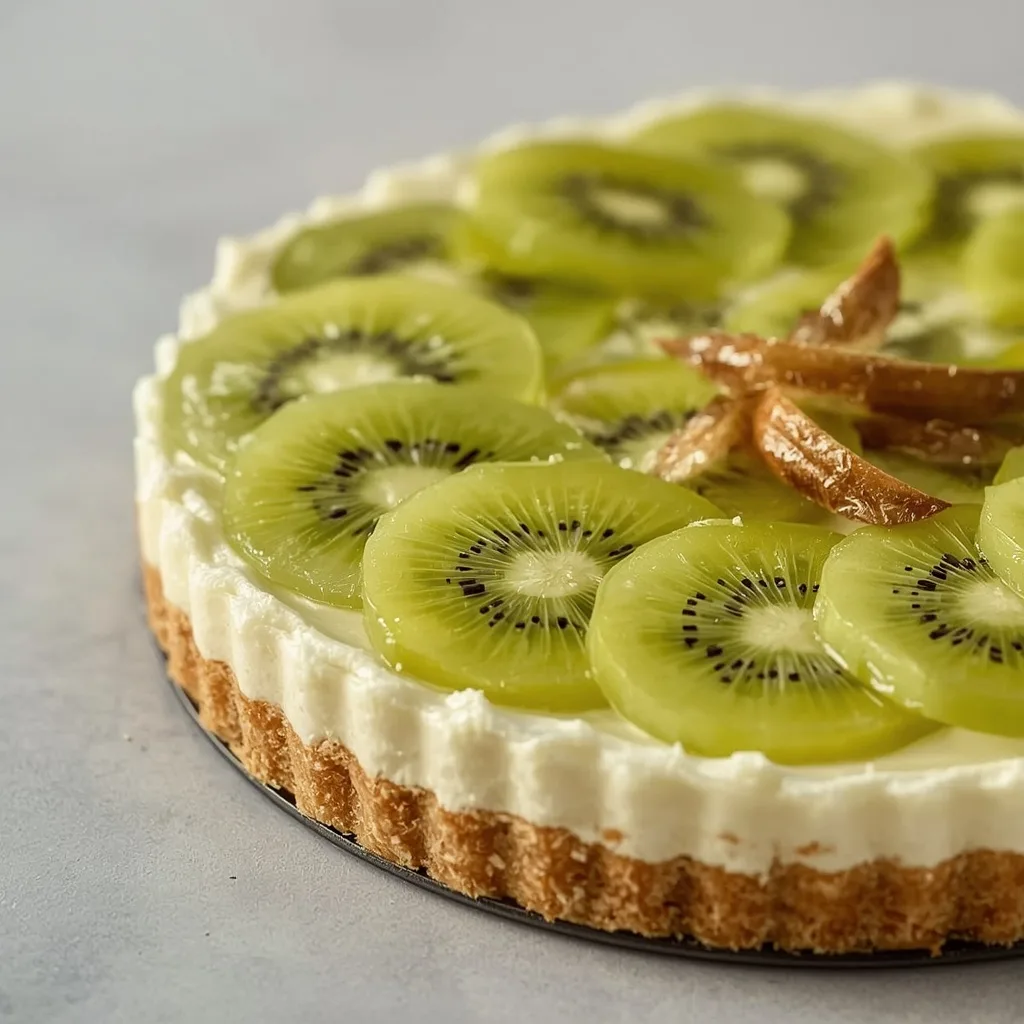
This pie layers a crisp graham cracker crust with a silky, mousse-like filling made from sweetened condensed milk, egg yolks, lime juice, and freshly whipped cream. The filling firms up in the refrigerator without any baking, so the texture stays light and airy rather than dense. Fresh kiwi rounds sit on top just before serving, adding a pop of green color and a juicy finish that cuts through the richness.
Why This Recipe is Worth Trying
This one checks a lot of boxes whether you are new to baking or have been at it for years. Here is what makes it stand out:
- No oven required — The entire pie comes together without heat, which means it works perfectly during hot summer months when you do not want to turn on the oven.
- Bright, balanced flavors — The tart lime juice and zest keep the sweetened condensed milk from becoming cloying, while the kiwi adds a fresh, fruity contrast.
- Make-ahead friendly — You can prepare the pie up to a day in advance and add the kiwi topping right before serving, saving you time on the day of your event.
- Simple ingredients — Most of what you need, like graham crackers, butter, sugar, and cream, are probably already in your kitchen.
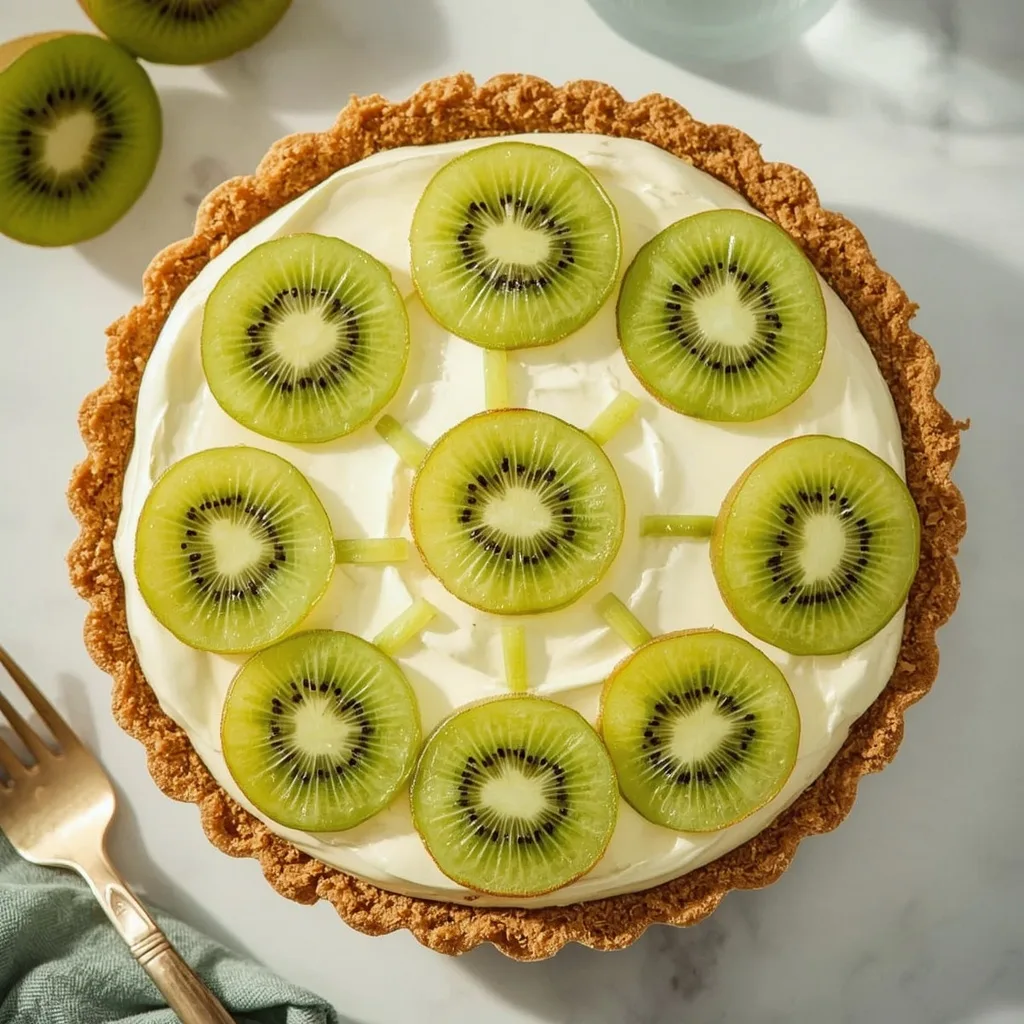
- Beautiful presentation — The green kiwi rounds create a stunning pattern on top that looks like you spent far more effort than you actually did.
Essential Ingredients for This Recipe
Every ingredient here plays a specific role, so let us break down what you need and why each one matters.
For the Crust
- 1 1/4 cups graham cracker crumbs (about 10 full sheets) — These form the buttery base of the pie. You can pulse whole sheets in a food processor or crush them in a zip-top bag with a rolling pin.
- 6 tablespoons unsalted butter, melted — The butter binds the crumbs together and gives the crust its rich flavor. Unsalted butter lets you control the salt level, but salted butter works in a pinch.
- 2 tablespoons granulated sugar — This adds just enough sweetness to balance the salty-savory notes of the graham crackers.
For the Lime Filling
- 1/2 cup fresh lime juice (about 4 limes) — Freshly squeezed juice is non-negotiable here. Bottled juice has a flat, less vibrant flavor that will noticeably change the pie.
- 1 tablespoon lime zest (about 2 limes) — The zest carries the aromatic oils that make the filling smell incredible. Grate it before juicing the limes while they are still firm.
- 1 (14-ounce) can sweetened condensed milk — This provides the sweetness and structure for the filling. Do not substitute evaporated milk; the texture will not set properly.
- 2 large egg yolks — These help thicken the filling and give it a rich, custard-like body. The lime juice gently “cooks” the yolks through acid, so there is no heat required.
- 1/4 teaspoon kosher salt — A small pinch of salt heightens the citrus flavors and balances the sweetness.
For the Topping and Whipped Cream
- 1 cup heavy cream, chilled — Cold cream whips up to stiff peaks that fold into the filling, creating that light, airy texture. Keep it in the fridge until the very last minute.
- 1/3 cup granulated sugar — This sweetens the whipped cream so it blends seamlessly with the tart lime mixture.
- 2 kiwis, peeled and sliced into thin rounds — Ripe but still slightly firm kiwis slice cleanly and hold their shape on top of the pie. Choose ones that give slightly when pressed.
Useful Equipment
You probably have most of what you need already. Here is the gear that makes the process smoother:
- 9-inch pie pan — A standard glass or ceramic pie pan works well. A metal pan also works, but glass lets you see the crust through the bottom.
- Flat-bottomed measuring cup — This is the best tool for pressing the crust evenly into the pan. The flat base lets you compact the crumbs firmly without creating uneven spots.
- Electric mixer — Whipping cream by hand is possible but takes a solid 8-10 minutes of arm work. A hand mixer or stand mixer cuts that down to about 3 minutes.
- Rubber spatula — Folding the whipped cream into the lime mixture requires a gentle hand, and a spatula gives you the control you need to avoid deflating the batter.
- Offset spatula — This helps you smooth the top of the filling evenly. A regular butter knife can work in a pinch, but the offset angle makes it easier.
Directions to Make Pioneer Woman Kiwi Lime Pie
The process moves quickly, so read through the steps once before you start. Here is how it all comes together:
- Build the crust — Combine the graham cracker crumbs, melted butter, and 2 tablespoons of sugar in a medium bowl. Mix with a fork until the crumbs are evenly moistened and clump together slightly, then press firmly into the bottom and up the sides of a 9-inch pie pan using a flat-bottomed measuring cup.
- Chill the crust — Place the prepared crust in the freezer while you make the filling. This sets the butter and prevents the crust from crumbling when you pour in the filling later.
- Whisk the lime base — In a large heatproof bowl, whisk together the lime juice, lime zest, sweetened condensed milk, egg yolks, and salt. The mixture will thicken slightly as the lime juice begins to “cook” the yolks. Keep whisking for about 2 minutes until fully combined and noticeably thicker.
- Whip the cream — In a separate bowl, beat the chilled heavy cream and remaining 1/3 cup sugar on medium-high speed until stiff peaks form, about 3-4 minutes. It is ready when the cream holds its shape and does not slide out of the bowl when tilted.
- Fold it together — Gently fold the whipped cream into the lime mixture in three additions. Cut down through the center with a rubber spatula, sweep around the side, and rotate the bowl. Stop as soon as no white streaks remain — overmixing will deflate the filling.
- Fill the crust — Remove the chilled crust from the freezer and pour in the filling. Smooth the top with an offset spatula, spreading it evenly to the edges.
- Set the pie — Refrigerate uncovered for at least 4 hours, or overnight, until the filling is firm to the touch and does not jiggle when you gently shake the pan.
- Add the kiwi — Just before serving, arrange the kiwi slices on top in a fan pattern or in concentric circles from the center outward.
- Slice and serve — Use a sharp knife and wipe the blade clean between cuts for neat wedges. This pie tastes best the same day you add the kiwi topping.
What I Got Wrong (And How I Fixed It)
The first time I made this pie, a few things went sideways. Here is what tripped me up so you can avoid the same mistakes:
- Skipping the freeze step — I poured the filling into a warm, freshly pressed crust the first time, and the crust crumbled into the filling. Freezing the crust for even 10 minutes makes a massive difference in holding everything together.
- Overwhipping the cream — I got distracted and whipped the cream until it looked grainy and curdled. It still folded in okay, but the filling came out slightly denser than it should have. Stop the mixer the moment stiff peaks form.
- Folding too aggressively — Vigorous stirring deflated all the air I had whipped into the cream, leaving a flat, heavy filling. Gentle folding in three additions keeps the texture light and mousse-like.
- Adding kiwi too early — I topped the pie with kiwi the night before, and by morning it had released a pool of juice that made the filling soggy. Always add the kiwi within a couple hours of serving.
- Using bottled lime juice — Bottled juice made the filling taste dull and slightly bitter. Freshly squeezed limes give a bright, clean citrus flavor that is worth the extra minute of juicing.
Healthier Ways to Make Pioneer Woman Kiwi Lime Pie
This pie is a treat, no question about that. But you can lighten it up without wrecking the texture or flavor:
- Swap the crust — Use crushed ginger snaps or reduced-fat graham crackers to cut some of the butter. You can also reduce the butter to 4 tablespoons if the crumbs hold together well.
- Lower the sugar — Cut the sugar in the whipped cream down to 2 tablespoons, or use a sugar alternative that measures like granulated sugar. The lime juice is tart enough that you will not miss the extra sweetness.
- Use half-and-half — Replacing half of the heavy cream with half-and-half reduces the fat while still whipping to soft peaks. The filling will be slightly less rich but still creamy.
- Skip the egg yolks — The filling still sets without the yolks, though the texture will be a bit lighter and less custard-like. This cuts the cholesterol noticeably.
- Portion control — Slice the pie into 8 smaller wedges instead of 4 generous servings. You get the same flavors with half the calories per portion.
Ingredient Substitutions for Pioneer Woman Kiwi Lime Pie
You do not have to run to the store if you are missing something. These swaps work well:
- Crust base → Vanilla wafers or shortbread — Both crush into a fine crumb and pair beautifully with the lime filling. Use the same 1 1/4 cup measurement.
- Fresh lime juice → Bottled lime juice (in a pinch) — The flavor will be less vibrant, so add an extra teaspoon of zest to boost the citrus notes.
- Heavy cream → Coconut cream — Chilled full-fat coconut cream whips up similarly and adds a subtle tropical note that complements the kiwi. Whip it until stiff peaks form, just like regular cream.
- Kiwis → Strawberries or raspberries — Sliced strawberries or whole raspberries sit beautifully on top and bring their own sweet-tart contrast to the filling.
- Unsalted butter → Salted butter — The difference is minimal here. Just reduce or skip the kosher salt in the filling to avoid an overly salty pie.
- Granulated sugar → Honey or maple syrup — Use half the amount and expect a slightly softer set in the whipped cream. The filling will carry a gentle floral or woodsy note.
Unexpected Ways to Enjoy This Pioneer Woman Kiwi Lime Pie
This pie is delicious straight from the fridge, but you can get creative with how you serve it. A few ideas that work surprisingly well:
- As a parfait — Crumble the crust into small glasses, layer with the lime filling, and top with diced kiwi for an elegant single-serve dessert.
- Frozen treat — Slice the finished pie into wedges and freeze them uncovered for an hour. The semi-frozen texture turns it into something like an ice cream cake.
- With coconut whipped cream — Add a dollop of sweetened coconut cream on top for extra richness and a tropical pairing that echoes the kiwi.
- On a graham cracker — Spread the filling on whole graham crackers and top with kiwi slices for a quick, snackable version when you do not want to make a full pie.
- As a topping — Spoon the filling over vanilla ice cream or pound cake and scatter kiwi pieces over the top for a quicker dessert with the same flavors.
- Layered in a trifle — Alternate chunks of the pie with whipped cream, additional kiwi, and crumbled shortbread in a glass bowl for a dramatic centerpiece.
Best Tips for Pioneer Woman Kiwi Lime Pie Success
A few small details make the difference between a good pie and a great one. Keep these in mind:
- Chill everything — Cold cream whips faster and holds its structure better. Cold limes zest more easily and juice more efficiently. Start with everything straight from the fridge.
- Press the crust firmly — Loose crumbs fall apart when you slice. Use consistent pressure with a flat-bottomed cup and go all the way up the sides to create a sturdy edge.
- Zest before juice — Zesting a juicy lime is messy and awkward. Grate the zest first, then cut and juice the limes.
- Whisk the yolks thoroughly — The lime juice thickens the yolks through acid, so spend a full 2 minutes whisking. Undermixed yolks leave an unpleasant eggy streak in the filling.
- Let the filling set overnight — Four hours works, but overnight gives the filling a firmer, cleaner slice. If you are in a rush, at least give it the full four hours.
- Use a hot, dry knife — Run your knife under hot water and dry it between each cut. This gives you clean, neat wedges without dragging the filling.
- Top at the last minute — Kiwi releases moisture as it sits. Add it within two hours of serving for the best look and texture.
Tasty Twists on Pioneer Woman Kiwi Lime Pie
Once you have made the original, try a few variations to keep things interesting:
- Coconut-lime version — Add 1/2 teaspoon coconut extract to the filling and toast shredded coconut on top for extra depth.
- Mango topping — Swap the kiwi for thinly sliced ripe mango. The sweetness pairs beautifully with the tart lime filling.
- Spiced crust — Add 1/4 teaspoon ground ginger and a pinch of cinnamon to the graham cracker crumbs for a warm, aromatic base.
- Berry lime pie — Scatter fresh blueberries or raspberries over the top alongside the kiwi for a colorful, juicy finish.
- Key lime twist — Use key limes instead of regular limes for a slightly more floral, intensely tart version. You will need about 8 key limes for the same juice and zest.
- Meringue topping — Skip the kiwi and top the pie with a lightly torched meringue for a more traditional citrus pie feel.
Best Ways to Store Your Pioneer Woman Kiwi Lime Pie
Storage is straightforward, but a couple of details matter for keeping the texture right. Here is what to do:
- Refrigerator (with kiwi) — Cover the pie loosely with plastic wrap and refrigerate for up to 24 hours. The kiwi will release moisture, so it is best eaten quickly.
- Refrigerator (without kiwi) — The plain pie keeps well for up to 3 days when covered. Add the kiwi just before serving for the freshest result.
- Freezer (long-term) — Wrap the pie tightly in plastic wrap, then a layer of aluminum foil, and freeze for up to 2 months. Thaw overnight in the refrigerator before adding the kiwi and serving.
- Individual slices — Freeze leftover wedges on a baking sheet until firm, then wrap each slice individually for grab-and-go desserts later.
Ways to Warm It Up Again
This pie is designed to be served chilled, but if you want to take the chill off, here are your options:
- Room temperature — Let a slice sit out for 5-10 minutes before serving. This softens the filling slightly without warming it all the way through.
- Microwave (short burst) — Heat a single slice on 30% power for 10-15 seconds. Watch closely; the filling can turn soupy if it gets too warm.
- No oven, no air fryer — Neither method suits this pie. Heat destroys the delicate mousse-like texture and causes the cream to separate.
Nutritional Breakdown (per serving)
Based on 1 serving = 1 portion out of 4 total.
- Calories — 650
- Protein — about 9g
- Fat — about 35g
- Saturated Fat — around 21g
- Carbohydrates — 75g
- Fiber — 2g
- Sugar — 58g
- Sodium — roughly 430mg
- Cholesterol — about 145mg
Try These Recipes
Wrapping It Up
Pioneer Woman Kiwi Lime Pie delivers a refreshing, no-bake dessert that looks impressive and tastes even better. The creamy lime filling, buttery crust, and bright kiwi topping come together in about 25 minutes of work, making it a great choice for weeknights and special occasions alike.
Try this recipe the next time you need a summer dessert that does not require turning on the oven. You will have a beautiful, delicious pie that disappears fast.
PrintPioneer Woman Kiwi Lime Pie
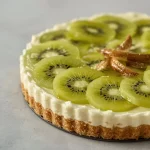
A refreshing no-bake pie with a buttery graham cracker crust, a tangy lime filling, and a vibrant kiwi topping. The creamy, citrusy filling is balanced by the sweet-tart kiwi slices, making it a perfect summer dessert.
- Prep Time: 25
- Total Time: 25
- Yield: 4 1x
- Category: Dessert
- Method: No-Cook
- Cuisine: American
Ingredients
- 1 1/4 cups graham cracker crumbs (about 10 full sheets)
- 6 tablespoons unsalted butter, melted
- 2/3 cup granulated sugar, divided
- 1/2 cup fresh lime juice (about 4 limes)
- 1 tablespoon lime zest (about 2 limes)
- 1 (14-ounce) can sweetened condensed milk
- 2 large egg yolks
- 1 cup heavy cream, chilled
- 2 kiwis, peeled and sliced into thin rounds
- 1/4 teaspoon kosher salt
Instructions
- In a medium bowl, combine the graham cracker crumbs, melted butter, and 2 tablespoons of the granulated sugar. Mix with a fork until the crumbs are evenly moistened and clump together slightly. Press the mixture firmly into the bottom and up the sides of a 9-inch pie pan. Use a flat-bottomed measuring cup to compact the crust evenly.
- Place the prepared crust in the freezer while you make the filling. Chilling the crust sets the butter and prevents it from crumbling when you add the filling.
- In a large heatproof bowl, whisk together the lime juice, lime zest, sweetened condensed milk, egg yolks, and salt. The mixture will thicken slightly, and the lime juice will begin to ‘cook’ the yolks, creating a smooth, creamy base. Whisk for about 2 minutes until fully combined and slightly thicker.
- In a separate large bowl, using an electric mixer on medium-high speed, whip the heavy cream with the remaining 1/3 cup granulated sugar until stiff peaks form. This will take about 3-4 minutes. You know it’s ready when the cream holds its shape and does not slide out of the bowl when tilted.
- Gently fold the whipped cream into the lime mixture in three additions. Use a rubber spatula and cut down through the center, then sweep around the side, rotating the bowl, until no streaks of whipped cream remain. Be careful not to overmix—you want the filling to stay light and airy.
- Remove the chilled crust from the freezer. Pour the filling into the crust and smooth the top with an offset spatula. Spread it evenly to the edges.
- Refrigerate the pie uncovered for at least 4 hours, or until fully set. The filling should be firm to the touch, not jiggly. This can be done overnight for best results.
- Just before serving, arrange the kiwi slices in a decorative pattern on top of the set pie. You can overlap them like a fan or create a circular pattern from the center outward.
- Serve chilled. Use a sharp knife to slice, wiping the blade clean between cuts for neat wedges. The pie is best enjoyed the same day after adding the kiwi topping, as the kiwi may release moisture over time.
Notes
Storage: Store the pie covered in the refrigerator for up to 3 days. If the kiwi topping is added, the pie is best eaten within 24 hours to avoid the kiwi becoming overly juicy. Freezing: The pie (without the kiwi topping) can be frozen for up to 2 months. Wrap it tightly in plastic wrap and then aluminum foil. Thaw overnight in the refrigerator before serving. Add the kiwi slices just before serving. Reheating: Not applicable—this is a no-bake, chilled dessert. If you prefer a firmer texture, you can add 1/2 teaspoon of unflavored gelatin to the lime juice mixture before combining with the cream, but it’s not necessary.
Nutrition
- Calories: 650
- Sugar: 58g
- Sodium: 430mg
- Unsaturated Fat: 20g
- Carbohydrates: 75g
- Fiber: 2g
- Protein: 9g
- Cholesterol: 155mg
Keywords: kiwi lime pie, no-bake pie, lime curd pie, kiwi dessert, graham cracker crust, no-bake dessert, summer pie, easy pie recipe, creamy pie, citrus pie, pioneer woman, kiwi recipe, lime recipe, no-cook dessert