 Anabelle
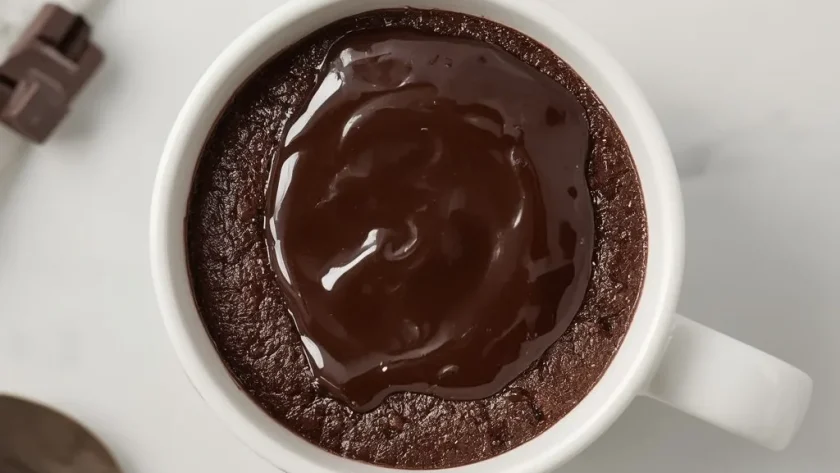
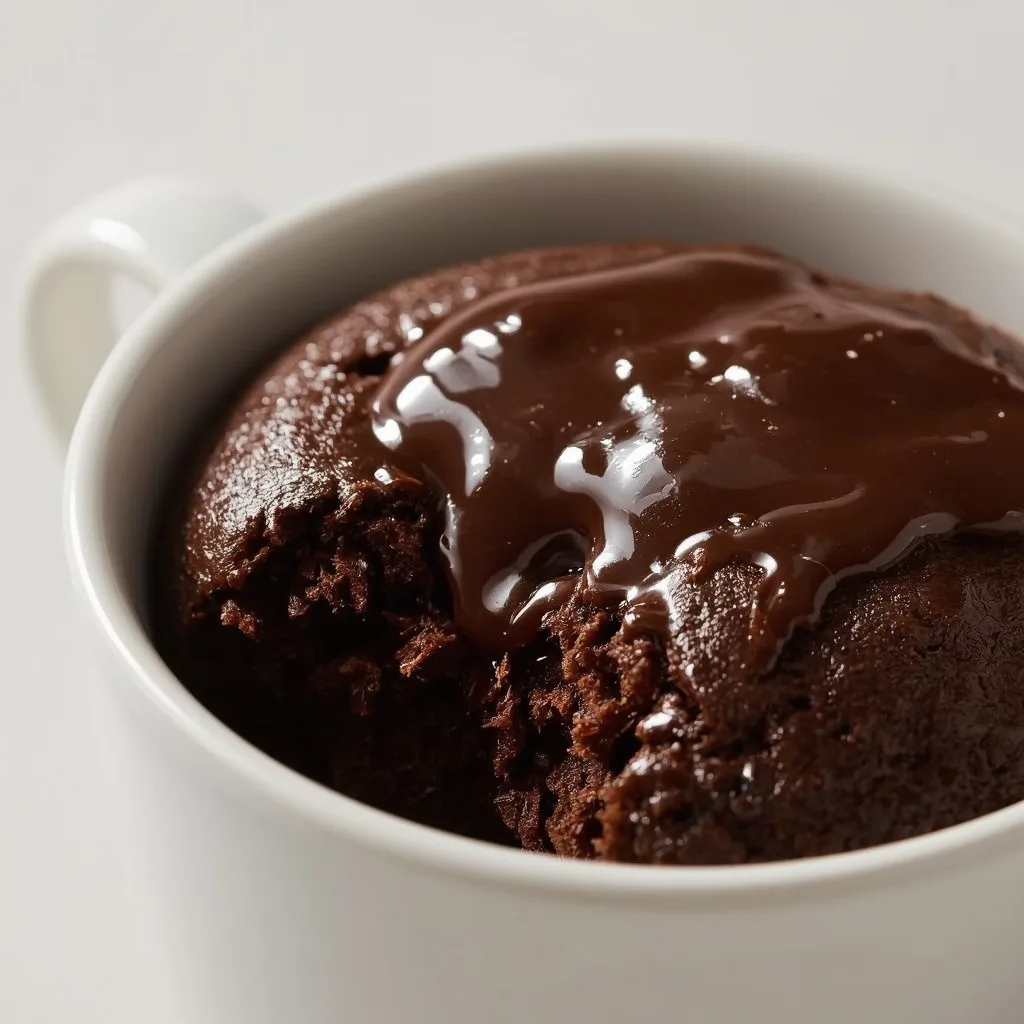
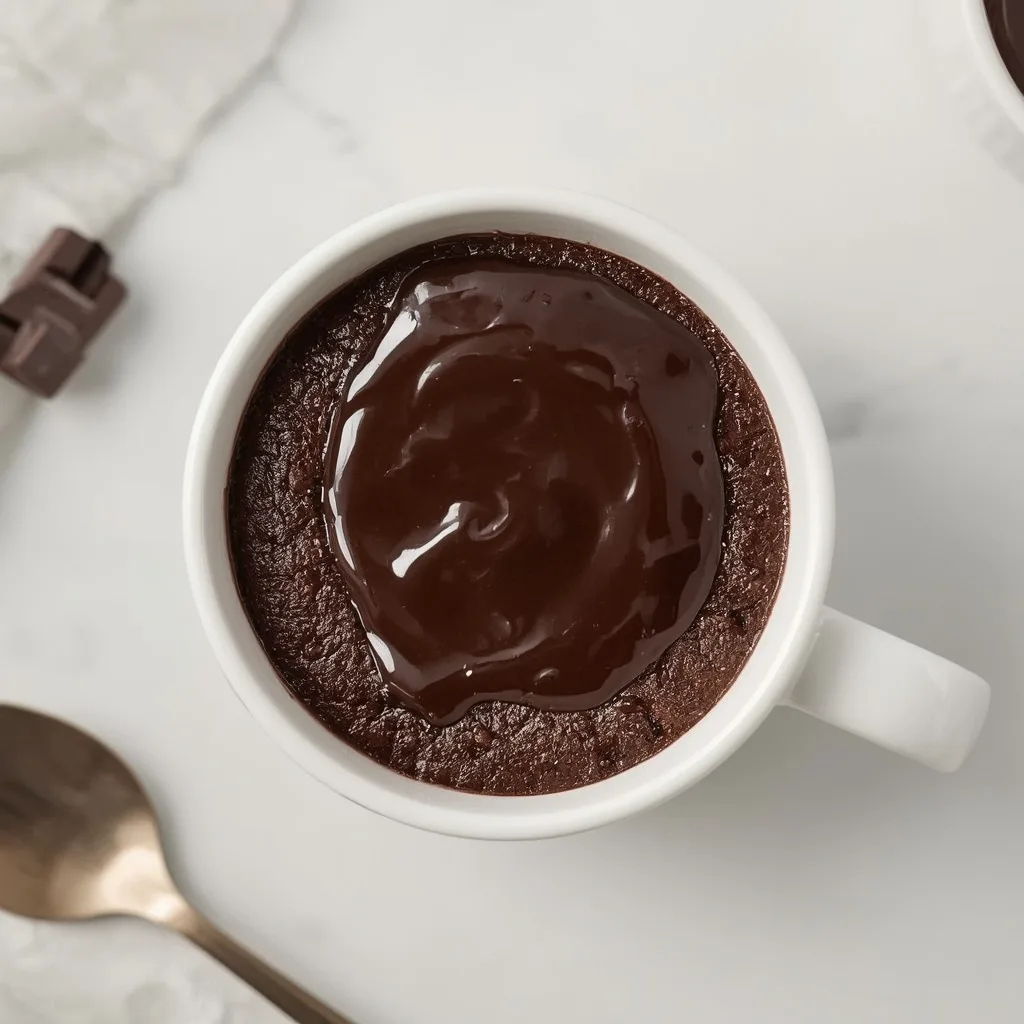
 The Pioneer Woman Chocolate Mug Cake is a rich, fudgy single-serving dessert that bakes up with a perfectly even crumb and gets topped with a glossy chocolate glaze. Made with Dutch-processed cocoa and a simple pantry lineup, this American-style treat delivers deep chocolate flavor without any fuss.
You can have this cake in the oven in 10 minutes, with just 14 minutes of baking time and a handful of basic ingredients. It’s beginner-friendly enough for a weeknight craving but polished enough for a weekend dessert moment. The only slightly tricky part is remembering not to overmix the batter.
A Quick Glimpse at Pioneer Woman Chocolate Mug Cake
This recipe combines melted butter, both granulated and brown sugar, a single egg, whole milk, and sifted dry ingredients to create a moist, tender cake baked in individual ramekins. The texture lands somewhere between a classic chocolate cupcake and a dense flourless torte, with crisp edges giving way to a soft, melty center. A quick whisk of powdered sugar, cocoa, and milk turns into a silky glaze that soaks into the warm crumb. Bake these on a rainy afternoon or when a late-night chocolate craving hits.
Why This Recipe is Worth Trying
Here is what makes this version stand out from the microwave mug cakes you have tried before.
- Oven-baked texture — Baking in a 350°F oven instead of a microwave creates an even crumb with no rubbery spots or chewy edges.
- True single-serving flexibility — The recipe makes four ramekins, but you can easily halve it for one or double it for a small gathering.
- Glossy glaze finish — The powdered sugar and cocoa topping adds a bakery-style shine that takes the cake from simple to special.
- Quick cleanup — One mixing bowl, one sifter, and four ramekins mean you are done washing dishes before the cake finishes cooling.
Essential Ingredients for This Recipe
Every ingredient here earns its place, so let me walk you through what each one does before we mix anything.
The Cake Base
- 4 tablespoons unsalted butter, melted — Butter provides richness and that tender, melt-in-your-mouth texture. Use unsalted so you control the salt level; melted (not browned) keeps the flavor clean.
- 1/4 cup granulated sugar — This adds sweetness and helps create those slightly crisp edges that contrast with the soft center.
- 2 tablespoons light brown sugar, packed — Brown sugar brings molasses notes and extra moisture, which keeps the crumb tender for days.
- 1 large egg, at room temperature — A room-temperature egg emulsifies into the batter more smoothly than a cold one, giving you a more cohesive crumb.
- 1/2 teaspoon vanilla extract — Vanilla rounds out the cocoa flavor and adds warmth without stealing the show.
- 1/4 cup whole milk — Whole milk provides the liquid needed to hydrate the flour and cocoa. The fat in whole milk contributes to the moist texture.
The Dry Mix
- 1/2 cup all-purpose flour — Standard all-purpose flour gives the cake structure without making it dense. No need for anything fancy here.
- 3 tablespoons unsweetened cocoa powder, preferably Dutch-processed — Dutch-processed cocoa has a smoother, less acidic flavor that pairs beautifully with the glaze. If you only have natural cocoa, it still works, just with a slightly sharper taste.
- 1/4 teaspoon baking powder — This leavener gives the cake its gentle rise. It is the only raising agent, so do not skip it.
- 1/8 teaspoon fine sea salt — Salt brightens the chocolate flavor and balances the sweetness across the board.
The Glaze
- 1/4 cup powdered sugar — Powdered sugar dissolves instantly into the milk, creating the glossy, smooth base for the glaze.
- 1 tablespoon unsweetened cocoa powder — This deepens the chocolate flavor in the topping so it matches the intensity of the cake itself.
- 1 tablespoon whole milk, plus more if needed — Milk thins the glaze to a pourable consistency. Add it a teaspoon at a time until it reaches your desired flow.
- 1/4 teaspoon vanilla extract — A touch of vanilla in the glaze keeps the flavors cohesive from cake to topping.
Useful Equipment
You probably have most of this already, but here is the full rundown of what you need before preheating the oven.
- Four 8-ounce ramekins or oven-safe mugs — These give the cake its signature mug shape and ensure even baking. If you use mugs, verify they are labeled oven-safe before starting.
- A medium mixing bowl — This holds the wet ingredients for whisking. Any bowl works, but a wider one makes mixing easier.
- A small sifter or fine-mesh strainer — Sifting the cocoa and flour removes lumps and adds air, which gives you a lighter crumb.
- A baking sheet — Placing the ramekins on a sheet makes transferring them in and out of the oven much safer and catches any drips.
- A toothpick — This is your doneness tester. You want a few moist crumbs clinging to it, not wet batter.
Directions to Make Pioneer Woman Chocolate Mug Cake
The process moves quickly, so gather your ingredients before you start whisking.
- Prep the oven and ramekins — Preheat your oven to 350°F (177°C). Lightly grease four 8-ounce ramekins or oven-safe mugs with cooking spray or butter to ensure easy release after baking.
- Whisk the sugars into the butter — In a medium bowl, whisk together 4 tablespoons melted butter, granulated sugar, and brown sugar until well combined and no sugar granules remain. The mixture should look glossy and smooth.
- Add the wet ingredients — Whisk in the egg, vanilla extract, and milk until fully incorporated. The batter will be slightly loose, which is correct — this ensures a moist cake.
- Sift the dry ingredients — In a separate small bowl, sift together the all-purpose flour, 3 tablespoons cocoa powder, baking powder, and salt. Sifting removes lumps and aerates the dry ingredients for a lighter crumb.
- Combine gently — Gradually add the dry ingredients to the wet mixture, whisking gently until just combined. Be careful not to overmix — stop as soon as no streaks of flour remain, or the cake will become tough.
- Fill the ramekins — Divide the batter evenly among the prepared ramekins, filling each about halfway. Tap each ramekin gently on the counter to release any trapped air bubbles.
- Bake — Place the ramekins on a baking sheet and transfer to the preheated oven. Bake for 12 to 14 minutes, until the tops are set and a toothpick inserted into the center comes out with just a few moist crumbs (not wet batter).
- Whisk the glaze — While the cakes bake, prepare the glaze: in a small bowl, whisk together the powdered sugar, 1 tablespoon cocoa powder, 1 tablespoon milk, and 1/4 teaspoon vanilla until smooth. If too thick, add milk 1 teaspoon at a time; if too thin, add more powdered sugar.
- Cool briefly — Once baked, remove the mug cakes from the oven and let them cool in the ramekins for 5 minutes. They will continue to set as they cool.
- Glaze and serve — Drizzle the glaze generously over each warm mug cake. Serve immediately, garnished with raspberries or chocolate shavings if desired. The cake is best enjoyed warm, with a melty center and crisp edges.
What I Got Wrong (And How I Fixed It)
Here is what tripped me up the first few times I made this recipe, plus the fixes that actually worked.
- Overmixing the batter — I whisked until perfectly smooth and got a dense, tough cake. Now I stop the moment the flour disappears, even if a few tiny lumps remain, and the crumb stays tender.
- Skipping the sift — Cocoa powder clumps easily, and skipping the sift left dry pockets in the batter. A quick pass through a fine-mesh strainer takes 30 seconds and makes a real difference.
- Cold egg straight from the fridge — A chilled egg seized the melted butter into clumps. Letting the egg sit on the counter for 15 minutes before mixing gives you a smooth, emulsified batter.
- Baking at the wrong time — Pulling the cakes at 12 minutes left the centers wet, while 15 minutes dried them out. The sweet spot is 13 to 14 minutes, when the toothpick shows just a few moist crumbs.
- Skipping the counter tap — Air bubbles created uneven domes in two of the cakes. Now I tap each ramekin gently on the counter before baking, and the tops come out level.
Healthier Ways to Make Pioneer Woman Chocolate Mug Cake
If you want to lighten things up without sacrificing the chocolate experience, these swaps work well.
- Swap the butter for applesauce — Replace half the melted butter with unsweetened applesauce to cut saturated fat while keeping the cake moist.
- Use almond milk instead of whole milk — Unsweetened almond milk drops the calories and fat while maintaining the same liquid ratio in the batter.
- Halve the sugars — Reduce each sugar to half its amount and the cake still tastes sweet, just less cloying. The texture stays tender because the butter and egg carry the structure.
- Choose a sugar substitute — Use a 1:1 granulated sweetener like monk fruit or erythritol to cut sugar without changing the measuring process.
Ingredient Substitutions for Pioneer Woman Chocolate Mug Cake
Out of something? Here is how to swap without breaking the recipe.
- Whole milk → Buttermilk or oat milk — Buttermilk adds a subtle tang and even more tenderness; oat milk keeps the dairy out while maintaining richness.
- All-purpose flour → Gluten-free 1:1 blend — A cup-for-cup gluten-free flour with xanthan gum works fine, though expect a slightly denser crumb.
- Dutch-processed cocoa → Natural cocoa — Natural cocoa is more acidic, so the cake will taste slightly sharper. The baking powder still provides enough lift, no other adjustments needed.
- Granulated sugar → Coconut sugar — Coconut sugar brings a deeper, caramel-like sweetness. It does not dissolve as fully, so whisk a little longer to avoid grittiness.
- Unsalted butter → Salted butter — Use salted butter and reduce the added sea salt to a pinch. This saves a step if you only have salted on hand.
Unexpected Ways to Enjoy This Pioneer Woman Chocolate Mug Cake
Beyond the classic warm-with-glaze approach, these serving ideas shake things up in a good way.
- Build a mini ice cream sundae — Crumble the warm cake into a bowl, add a scoop of vanilla bean ice cream, and drizzle with caramel sauce for a next-level sundae.
- Turn it into a trifle — Layer chunks of the cake with whipped cream and fresh berries in a small glass for an instant individual trifle.
- Use it as a base for French toast — Slice the cooled cake thick, dip in beaten egg and milk, and griddle it for a decadent weekend breakfast.
- Pair it with espresso — Serve the chocolate mug cake alongside a shot of espresso or affogato-style with hot espresso poured over the top.
- Crush it into a cheesecake crust — Blend the baked cake with a little melted butter and press it into a pan for a chocolatey cheesecake base.
Best Tips for Pioneer Woman Chocolate Mug Cake Success
These tips come from repeated batches in my own kitchen, and they save you from the usual pitfalls.
- Bring the egg to room temperature first — A cold egg seizes the melted butter, creating a lumpy batter. Set it out 15 minutes ahead, and your mixture stays silky.
- Measure the flour by spoon-and-level — Scooping straight from the bag packs in extra flour, which dries out the cake. Spoon into the cup, then level with a knife.
- Fill ramekins only halfway — The batter rises during baking, and filling to the top causes overflow. Halfway leaves room for a clean dome.
- Add the glaze warm, not boiling — Waiting the full 5 minutes lets the cake set slightly so the glaze pools on top rather than soaking straight through.
- Check doneness at 12 minutes — Ovens run differently, so start checking early. A few moist crumbs on the toothpick mean done; wet batter means it needs more time.
- Serve immediately for the best texture — The crisp edges and melty center are at their peak within 10 minutes of coming out of the oven. This cake does not keep its magic for long.
Tasty Twists on Pioneer Woman Chocolate Mug Cake
Once you master the base recipe, these variations keep things exciting batch after batch.
- Peppermint chocolate version — Stir 1/4 teaspoon of peppermint extract into the wet ingredients and crush a candy cane over the glaze for a festive spin.
- Orange-chocolate combo — Replace the vanilla with orange zest from half an orange and add a splash of orange juice instead of milk. The citrus cuts the richness beautifully.
- Salted caramel swirl — Drop a teaspoon of caramel sauce into the center of each ramekin before baking and finish with flaky sea salt on the glaze.
- Mocha twist — Dissolve 1/2 teaspoon of instant espresso powder in the milk before whisking it in. The coffee amplifies the chocolate without tasting like a latte.
- Nutty crunch addition — Fold 2 tablespoons of toasted chopped hazelnuts or pecans into the batter before dividing it among the ramekins.
Best Ways to Store Your Pioneer Woman Chocolate Mug Cake
If you have leftovers, here is how to keep them fresh without losing the texture.
- Refrigerator storage — Wrap leftover mug cakes (without glaze) individually in plastic wrap and store in the fridge for up to 3 days. The crumb stays moist, and the flavors deepen overnight.
- Freezer method — Freeze the baked, unglazed cakes in an airtight container for up to 2 months. Thaw overnight in the fridge before reheating to avoid a cold center.
- Glaze separately — The glaze is best applied fresh, so store it in a small sealed container in the fridge and rewhisk before serving.
- Room temperature shortcut — For same-day consumption, keep the cakes covered at room temperature for up to 8 hours. They firm up slightly but stay wonderfully fudgy.
Ways to Warm It Up Again
Reheating is simple, but the method changes the texture, so pick based on what you are craving.
- Microwave — Heat on high for 15 to 20 seconds until warm. Watch closely, as the center can turn rubbery if it goes too long.
- Oven — Place the cake on a baking sheet and warm at 300°F for 5 to 7 minutes. This preserves the crisp edges better than the microwave.
- Stovetop steamer — Place the cake in a small pan with a splash of water, cover, and heat on low for 3 to 4 minutes. This keeps the cake moist without drying the crumb.
Nutritional Breakdown (per serving)
Based on 1 serving = 1 portion out of 4 total, here is what you get in each ramekin.
- Calories — 340
- Protein — 6g
- Fat — 16g
- Saturated Fat — around 10g
- Carbohydrates — 46g
- Fiber — 2g
- Sugar — about 30g
- Sodium — roughly 220mg
- Cholesterol — about 75mg
Try These Recipes
Wrapping It Up
This Pioneer Woman Chocolate Mug Cake delivers everything you want from a single-serving dessert: deep cocoa flavor, a tender crumb, and a shiny glaze that makes it feel special. The recipe is forgiving enough for beginners but rewarding enough for experienced bakers looking for a quick fix. Give it a try tonight, and do not be surprised if it becomes your new go-to chocolate fix.
PrintPioneer Woman Chocolate Mug Cake
A rich, fudgy chocolate cake made in a mug and baked in the oven for a perfectly even crumb, topped with a glossy chocolate glaze. This single-serving treat is ready in under 20 minutes and satisfies any chocolate craving with a deep cocoa flavor and a moist, tender texture.
- Prep Time: 10
- Cook Time: 14
- Total Time: 24
- Yield: 4 1x
- Category: Dessert
- Method: Baking
- Cuisine: American
Ingredients
- 4 tablespoons (1/2 stick) unsalted butter, melted
- 1/4 cup granulated sugar
- 2 tablespoons light brown sugar, packed
- 1 large egg, at room temperature
- 1/2 teaspoon vanilla extract
- 1/4 cup whole milk
- 1/2 cup all-purpose flour
- 3 tablespoons unsweetened cocoa powder, preferably Dutch-processed
- 1/4 teaspoon baking powder
- 1/8 teaspoon fine sea salt
- For the glaze:
- 1/4 cup powdered sugar
- 1 tablespoon unsweetened cocoa powder
- 1 tablespoon whole milk, plus more if needed
- 1/4 teaspoon vanilla extract
- Optional: fresh raspberries or chocolate shavings for garnish
Instructions
- Preheat your oven to 350°F (177°C). Lightly grease four 8-ounce ramekins or oven-safe mugs with cooking spray or butter to ensure easy release after baking.
- In a medium bowl, whisk together 4 tablespoons melted butter, granulated sugar, and brown sugar until well combined and no sugar granules remain. The mixture should look glossy and smooth.
- Whisk in the egg, vanilla extract, and milk until fully incorporated. The batter will be slightly loose, which is correct — this ensures a moist cake.
- In a separate small bowl, sift together the all-purpose flour, 3 tablespoons cocoa powder, baking powder, and salt. Sifting removes lumps and aerates the dry ingredients for a lighter crumb.
- Gradually add the dry ingredients to the wet mixture, whisking gently until just combined. Be careful not to overmix — stop as soon as no streaks of flour remain, or the cake will become tough.
- Divide the batter evenly among the prepared ramekins, filling each about halfway. Tap each ramekin gently on the counter to release any trapped air bubbles.
- Place the ramekins on a baking sheet and transfer to the preheated oven. Bake for 12 to 14 minutes, until the tops are set and a toothpick inserted into the center comes out with just a few moist crumbs (not wet batter).
- While the cakes bake, prepare the glaze: in a small bowl, whisk together the powdered sugar, 1 tablespoon cocoa powder, 1 tablespoon milk, and 1/4 teaspoon vanilla until smooth. If too thick, add milk 1 teaspoon at a time; if too thin, add more powdered sugar.
- Once baked, remove the mug cakes from the oven and let them cool in the ramekins for 5 minutes. They will continue to set as they cool.
- Drizzle the glaze generously over each warm mug cake. Serve immediately, garnished with raspberries or chocolate shavings if desired. The cake is best enjoyed warm, with a melty center and crisp edges.
Notes
Store leftover mug cakes (without glaze) wrapped in plastic wrap in the refrigerator for up to 3 days. To reheat, microwave on high for 15–20 seconds until warm. For longer storage, freeze the baked cakes in an airtight container for up to 2 months; thaw overnight in the fridge and reheat as above. The glaze is best applied fresh, so if freezing, prepare the glaze separately.
Nutrition
- Calories: 340
- Sugar: 30g
- Sodium: 220mg
- Unsaturated Fat: 9g
- Carbohydrates: 46g
- Fiber: 2g
- Protein: 6g
- Cholesterol: 80mg
Keywords: chocolate mug cake, mug cake recipe, single serving dessert, quick chocolate dessert, microwave mug cake, oven baked mug cake, Pioneer Woman recipe, chocolate dessert, easy dessert, individual cake, fudgy chocolate cake