
 Anabelle
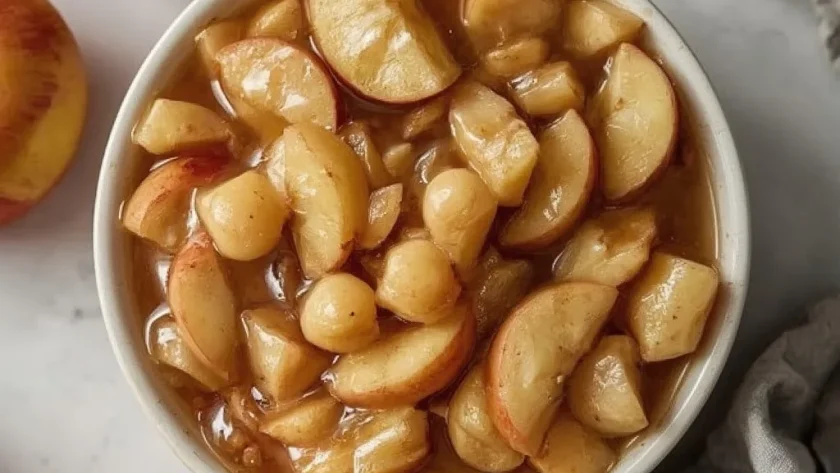
 Pioneer Woman Canning Apple Pie Filling is the kind of recipe that makes your pantry feel like a secret weapon. This stovetop method turns fresh Granny Smith apples into a thick, glossy filling with warm cinnamon, nutmeg, and allspice — ready to transform into pies, crisps, or a simple ice cream topping whenever the craving hits.
You are looking at about 70 minutes of total time here, and I would call the difficulty level intermediate — the canning process itself is the one step that demands your full attention. It is perfect for a crisp autumn weekend when apple season is at its peak and you want to stock the shelves with something truly rewarding.
A Quick Glimpse at Pioneer Woman Canning Apple Pie Filling
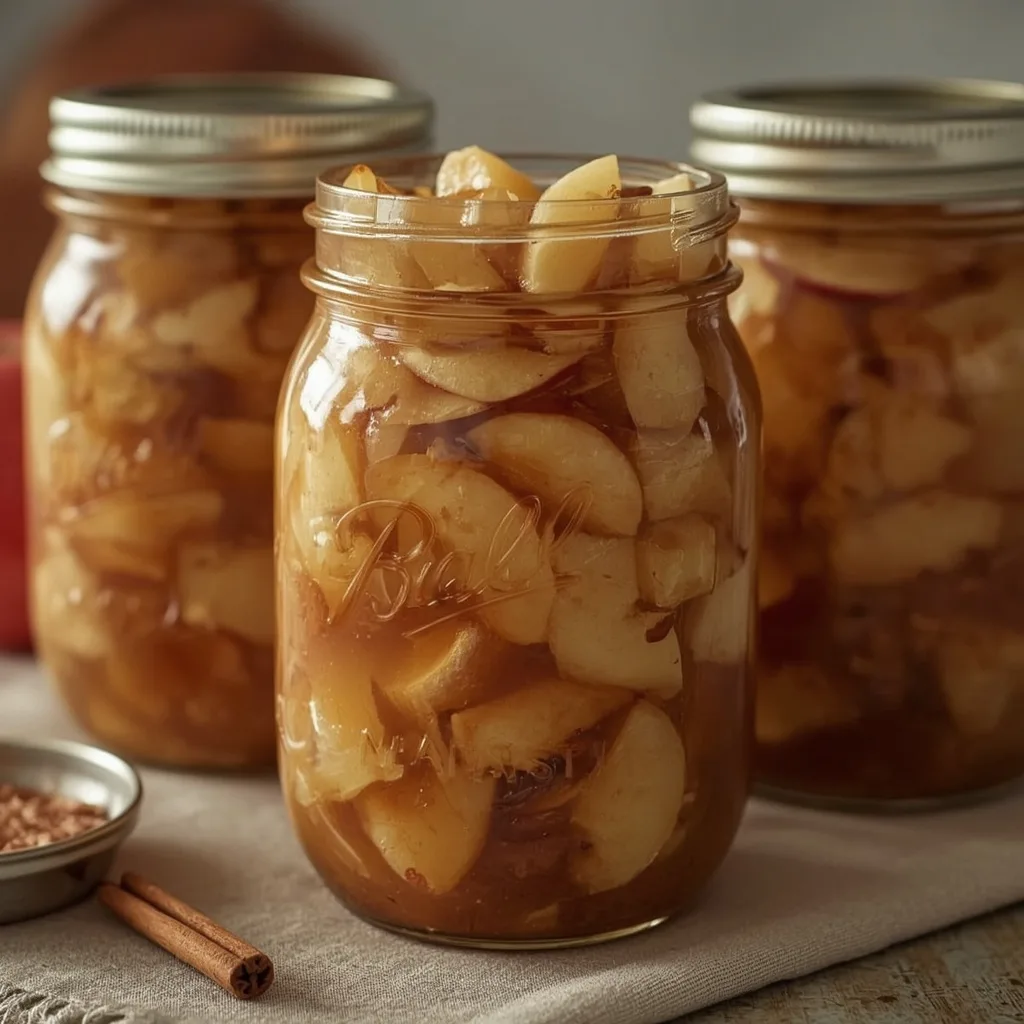
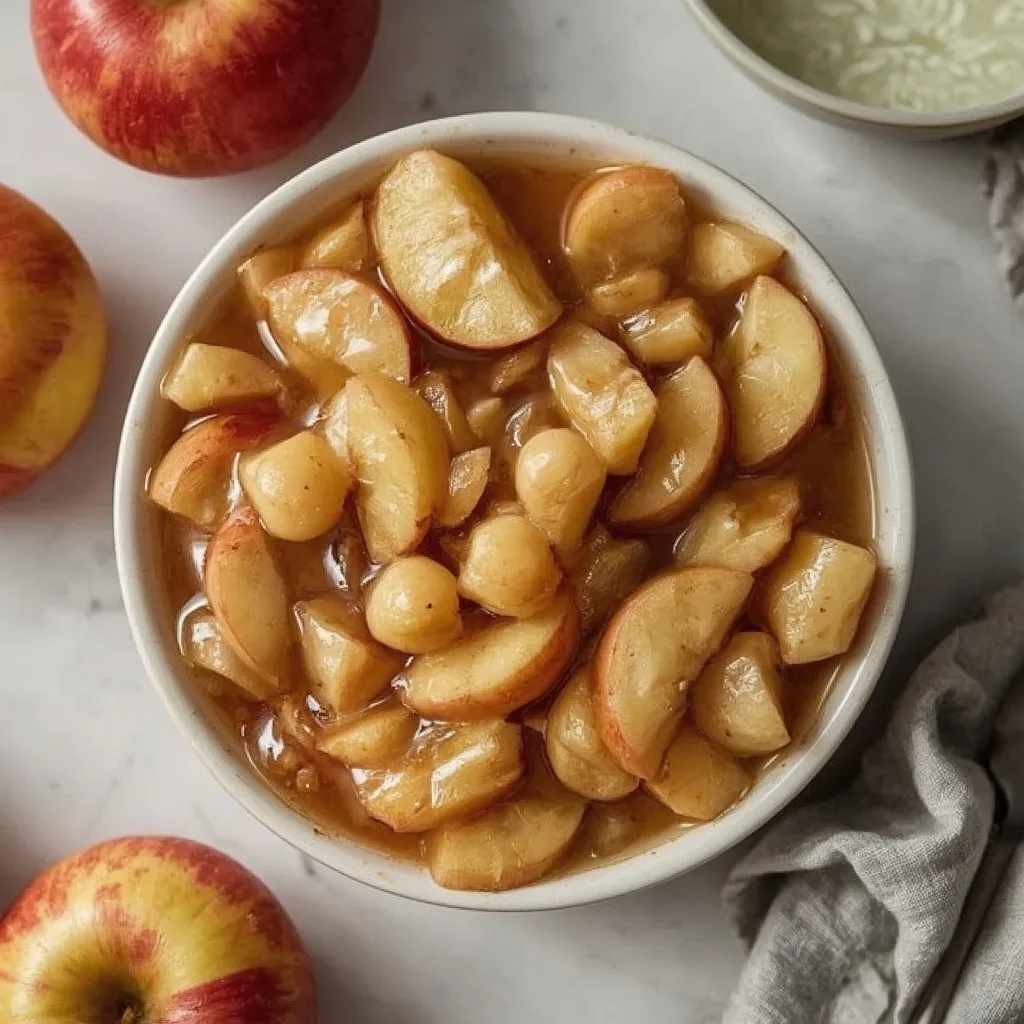
This recipe is exactly what it sounds like: five pounds of peeled, cored, and sliced Granny Smith apples simmered in a sweet, spiced syrup until tender but still holding their shape. The filling is thick enough to spoon into a pie crust without turning the bottom soggy, yet glossy enough to look gorgeous in a glass jar. You end up with four jars of pure autumn comfort, each one ready to become a dessert in under half an hour.
Why This Recipe is Worth Trying
Here is what sold me on this method after my first batch.
- Real pantry stock — You are not just making a dessert; you are building a stash of ready-to-use filling that lasts up to 12 months on the shelf.
- Superior texture — The cornstarch-thickened syrup coats each apple slice evenly, giving you that perfect pie filling consistency that store-bought versions never quite achieve.
- Flavor control — You decide exactly how much cinnamon, nutmeg, and allspice goes in, so every jar tastes the way your family actually likes it.
- Streamlined process — Everything happens in one Dutch oven from start to finish, which means minimal cleanup and no juggling multiple pots.
- Budget friendly — Buying apples in bulk during peak season and canning them yourself costs a fraction of what premium jarred fillings run at the grocery store.
Essential Ingredients for This Recipe
You only need eleven ingredients for this recipe, and most of them are probably sitting in your spice rack right now.
The Apples
- 5 pounds Granny Smith apples (about 10 medium) — Their firm texture and tart flavor hold up beautifully during cooking and balance the sweet syrup. You can swap in Honeycrisp or Fuji, but expect a softer final texture.
The Sweeteners and Thickener
- 1 cup granulated sugar — Provides the clean, straightforward sweetness that lets the apple flavor shine through.
- 1/2 cup packed light brown sugar — Adds a subtle molasses note and deepens the color of the syrup.
- 1/4 cup cornstarch — The thickening agent that gives the filling its glossy, spoonable consistency without any lumps.
The Spices and Seasonings
- 1 teaspoon ground cinnamon — The warm backbone of the spice blend; use fresh cinnamon for the most robust flavor.
- 1/4 teaspoon ground nutmeg — A gentle nutty warmth that rounds out the cinnamon.
- 1/4 teaspoon ground allspice — Brings a hint of clove and pepper complexity to the mix.
- 1/4 teaspoon fine sea salt — You will not taste it directly, but it sharpens all the sweet and spicy notes.
The Liquids
- 1 cup water — Dissolves the sugar and cornstarch into a smooth syrup base.
- 2 tablespoons lemon juice — Keeps the apple slices from browning while you prep and adds a whisper of brightness to the final flavor.
- 1 teaspoon vanilla extract — Rounds out the spice profile with a soft, aromatic sweetness.
Useful Equipment
Gather these tools before you start, and the whole process will flow much more smoothly.
- A large Dutch oven or heavy-bottomed pot — You need something wide enough for the apples to cook evenly without overcrowding.
- Canning jars with lids and rings — Standard 1-quart jars fit this recipe perfectly, giving you four full jars of filling.
- A wide-mouth funnel — This prevents drips and spills when ladling the hot filling into the jars.
- A jar lifter — Essential for safely lowering jars into the boiling water and pulling them back out without burning yourself.
- Non-metallic spatula or bubble remover — Running this along the jar edges releases trapped air that can ruin your seal.
Directions to Make Pioneer Woman Canning Apple Pie Filling
Follow these steps in order, and you will have perfectly sealed jars of this filling every single time.
- Sterilize the jars — Wash jars, lids, and rings in hot, soapy water, then boil the jars for at least 10 minutes and keep them hot until filling.
- Prep the lemon water — Fill a large bowl with cold water and stir in the lemon juice; drop apple slices in as you peel and cut them to prevent browning.
- Mix the dry ingredients — Whisk the sugars, cornstarch, cinnamon, nutmeg, allspice, and salt together in the Dutch oven before adding water.
- Build the syrup — Bring the mixture to a boil over medium-high heat, stirring constantly, then simmer for 2 to 3 minutes until it coats the back of a spoon.
- Add the apples — Drain the slices well, fold them into the syrup with the vanilla, and stir gently to coat every piece without breaking them.
- Simmer the filling — Cook over medium-low heat for 8 to 12 minutes until the apples are tender but a knife still meets slight resistance.
- Check the consistency — The filling should be thick and glossy; add a few tablespoons of water if you prefer a thinner texture for crisps.
- Fill the jars — Use the funnel to ladle hot filling into jars, leaving a full inch of headspace at the top.
- Remove air bubbles — Slide the non-metallic spatula along the jar edges, then wipe the rims with a damp paper towel for a clean seal.
- Seal the jars — Center the lids and screw the rings on until fingertip-tight, not any tighter.
- Process in the canner — Submerge jars in boiling water, return to a full rolling boil, and process for exactly 20 minutes.
- Cool slowly — Pull the jars out with the lifter and set them on a towel-lined surface for 12 to 24 hours; listen for the satisfying pop of each seal.
- Check the seals — Press each lid center to confirm it is firm; refrigerate any unsealed jars and use within 3 weeks.
What I Got Wrong (And How I Fixed It)
Nobody gets this perfect on the first try, so here are the mistakes I made so you can skip them entirely.
- Rushing the cornstarch — I added the apples before the syrup had thickened, and the filling stayed runny; now I always let the syrup simmer until it clearly coats the spoon.
- Skipping the lemon water — The apple slices turned brown before I even got them in the pot; that acid soak really does preserve that bright, fresh color.
- Overfilling the jars — I left barely any headspace, and the filling bubbled over during processing, breaking the seal; a full inch of space prevents that mess entirely.
- Overtightening the rings — Air could not escape, so the lids did not seal properly; fingertip-tight is genuinely all you need.
- Checking seals too early — I pressed the lids after just a few hours and panicked when they still flexed; give them the full 12 to 24 hours before you judge.
- Boiling the apples too long — One batch turned to mush because I left them simmering while I sterilized extra jars; set a timer for 8 to 12 minutes and respect it.
Healthier Ways to Make Pioneer Woman Canning Apple Pie Filling
You can lighten this up without sacrificing the texture or the flavor you are after.
- Swap the sugar ratio — Use 3/4 cup granulated plus 1/4 cup brown sugar instead of the full amounts to cut about 20 percent of the sugar content.
- Add more apples — Reduce the sugar to 1 1/2 cups total and add an extra pound of apples to increase the fiber and lower the sugar-to-fruit ratio.
- Choose a sugar alternative — Replace half the granulated sugar with a granulated monk fruit sweetener that measures cup-for-cup; the brown sugar still adds the molasses depth.
- Skip the added salt — Leave out the salt entirely if you are watching your sodium, or reduce it to a tiny pinch.
- Thicken with chia — Swap the cornstarch for 2 tablespoons of chia seeds mixed into the syrup; they add fiber and omega-3s while still creating a thick filling.
Ingredient Substitutions for Pioneer Woman Canning Apple Pie Filling
Here are the swaps I have tested when the pantry was not cooperating.
- Granny Smith → Honeycrisp — Sweeter and slightly softer, so reduce the granulated sugar to 3/4 cup and cut the simmer time to 6 to 8 minutes.
- Light brown sugar → dark brown sugar — Gives a deeper molasses flavor that pairs beautifully with the allspice; no measurement change needed.
- Cornstarch → arrowroot powder — Same thickening power at the same ratio, with a slightly more translucent finish; whisk it in the same way.
- Ground nutmeg → ground cardamom — A brighter, more floral spice that changes the character pleasantly; use just 1/8 teaspoon to avoid overpowering.
- Vanilla extract → almond extract — Adds a nutty, marzipan-like note; use only 1/2 teaspoon since almond is much stronger.
- Lemon juice → apple cider vinegar — The acid still prevents browning and adds a subtle fruity tang; use the same 2 tablespoons.
Unexpected Ways to Enjoy This Pioneer Woman Canning Apple Pie Filling
This filling does way more than just sit inside a pie crust, and these ideas will prove it.
- Cheesecake swirl — Warm a few spoonfuls and swirl them into a plain cheesecake batter before baking for ribbons of spiced apple throughout.
- Oatmeal stir-in — Add a generous spoonful to your morning oats along with some chopped walnuts for a warm, cinnamon-spiked start to the day.
- Pancake topping — Warm the filling and spoon it over fluffy buttermilk pancakes instead of maple syrup; add a dollop of whipped cream for good measure.
- Yogurt parfait layer — Alternate layers of Greek yogurt, granola, and this filling in a glass for a dessert that also passes as breakfast.
- Grilled cheese accent — Spread a thin layer on sourdough with sharp cheddar and brie, then grill until melty for a sweet-savory sandwich that works surprisingly well.
- Pork-free stuffing glaze — Use a few spoonfuls mixed with a splash of water as a glaze for roasted butternut squash or sweet potatoes.
Best Tips for Pioneer Woman Canning Apple Pie Filling Success
These small details make the difference between a good batch and a great one.
- Keep the slices uniform — Almond-sized chunks actually matter; they ensure even cooking so you do not end up with half-mushy, half-crunchy apples.
- Work in small batches — Peel and slice just a few apples at a time and drop them straight into the lemon water so none of them oxidize while you work.
- Trust the visual cues — The syrup is ready when it coats the back of a spoon and leaves a clear trail when you drag your finger through it.
- Resist the urge to stir hard — Use a spatula and fold gently; aggressive stirring breaks the apple slices into mush before they even reach the jars.
- Check your canner depth — The jars need at least one full inch of water above them during processing; top up with boiling water if yours runs low.
- Label the jars — Write the date and contents on the lid with a permanent marker so you know exactly what is in your pantry six months from now.
- Let the jars rest undisturbed — Do not move or jiggle them during the cooling period; movement can break the seal before it fully sets.
Tasty Twists on Pioneer Woman Canning Apple Pie Filling
Once you have mastered the base recipe, these variations are fun to play with.
- Caramel apple version — Replace the water with 1 cup of caramel sauce and reduce the granulated sugar to 1/2 cup for a richer, indulgent filling.
- Bourbon-spiked batch — Stir in 2 tablespoons of bourbon with the vanilla extract for a warm, smoky depth that works beautifully in adult desserts.
- Cranberry apple blend — Swap 2 pounds of the apples for fresh cranberries and add 1/4 cup extra sugar to balance their tartness.
- Pear apple fusion — Replace half the apples with firm Bosc pears; they hold their shape just as well and add a delicate honeyed sweetness.
- Ginger-spiced twist — Add 1 teaspoon of grated fresh ginger along with the vanilla for a bright, zesty kick that wakes up the whole spice profile.
- Maple brown sugar version — Replace the granulated sugar with 1 cup of pure maple syrup and skip the water entirely for a deeply autumnal flavor.
Best Ways to Store Your Pioneer Woman Canning Apple Pie Filling
Proper storage is the whole point of canning, so here is how to keep every jar at its best.
- Sealed jars on the shelf — Keep them in a cool, dark cupboard away from sunlight and heat sources for up to 12 months.
- Opened jar in the fridge — Once you break the seal, refrigerate and use the filling within 3 weeks for the best texture and flavor.
- Freezer-safe containers — Skip the canning process entirely and freeze the filling in quart-sized freezer bags with the air squeezed out for up to 6 months.
- Label with dates — Always note the canning or freezing date on each jar or bag so you can rotate your stock and use the oldest first.
- Unsealed jar backup — If a jar does not seal properly, move it to the fridge immediately and plan to use it within 3 weeks.
Ways to Warm It Up Again
Warm filling makes everything better, and each method gives a slightly different result.
- Stovetop — Heat gently in a saucepan over low heat for 5 to 7 minutes, stirring occasionally until warmed through and bubbling at the edges.
- Microwave — Transfer to a microwave-safe bowl and heat on medium power in 1-minute intervals, stirring between each, until hot throughout.
- Oven — Spread the filling in a baking dish, cover with foil, and warm at 350°F for 10 to 15 minutes until heated through and fragrant.
- Sous vide — Submerge the sealed jar in a water bath set to 165°F for about 20 minutes for the gentlest, most even reheating.
Nutritional Breakdown (per serving)
Based on 1 serving out of the 4 total servings this recipe makes — that is one full jar per serving, so keep that in mind.
- Calories — 568 per serving
- Protein — about 2g
- Fat — about 1g
- Saturated Fat — 0g
- Carbohydrates — close to 148g
- Fiber — about 11g
- Sugar — 120g
- Sodium — around 168mg
- Cholesterol — 0mg
Try These Recipes
Wrapping It Up
Pioneer Woman Canning Apple Pie Filling is one of those rare recipes that fills your pantry and your kitchen with the same warm, comforting feeling. The process takes a little patience, but the payoff is four jars of glossy, spiced apple goodness that make any dessert feel effortless. Give it a try this apple season, and I think you will agree that homemade filling is the only kind worth stocking.
PrintPioneer Woman Canning Apple Pie Filling
A luscious, homemade apple pie filling that captures the essence of autumn in every jar. This recipe produces a thick, glossy filling with tender apple slices and warm spices, perfect for pies, crisps, or as a decadent topping for ice cream. Each jar is a taste of comfort, ready to transform your favorite desserts.
- Prep Time: 45
- Cook Time: 25
- Total Time: 70
- Yield: 4 1x
- Category: Dessert
- Method: Stovetop
- Cuisine: American
Ingredients
- 5 pounds (about 10 medium) Granny Smith apples, peeled, cored, and sliced 1/2-inch thick
- 1 cup granulated sugar
- 1/2 cup packed light brown sugar
- 1/4 cup cornstarch
- 1 teaspoon ground cinnamon
- 1/4 teaspoon ground nutmeg
- 1/4 teaspoon ground allspice
- 1/4 teaspoon fine sea salt
- 1 cup water
- 2 tablespoons lemon juice
- 1 teaspoon vanilla extract
Instructions
- Prepare your canning jars, lids, and rings by washing them in hot, soapy water and rinsing well. Place the jars in a large pot of boiling water to sterilize for at least 10 minutes, and keep them hot until ready to fill. This ensures a safe seal and prevents the jars from cracking when filled with hot filling.
- Fill a large bowl with cold water and add the lemon juice to prevent the apple slices from browning. As you peel, core, and slice the apples, place them in the lemon water. The acid in the lemon juice slows oxidation and preserves the bright color of the fruit.
- In a large Dutch oven or heavy-bottomed pot, combine the granulated sugar, brown sugar, cornstarch, cinnamon, nutmeg, allspice, and salt. Whisk in the water until the cornstarch is fully dissolved and the mixture is smooth. This dry blend ensures even thickening without lumps.
- Bring the sugar mixture to a boil over medium-high heat, stirring constantly with a wooden spoon. Once boiling, reduce the heat to medium and let it simmer for 2 to 3 minutes, until the syrup is slightly thickened and coats the back of the spoon. This quick cook activates the cornstarch and ensures a glossy, clear sauce.
- Drain the apple slices well and add them to the hot syrup along with the vanilla extract. Stir gently with a spatula to coat every slice with the syrup, making sure not to break the apples. The apples will release some juice as they cook, which helps thin the syrup to the perfect consistency.
- Return the pot to a simmer over medium-low heat. Cook the apples for 8 to 12 minutes, stirring occasionally, until the apples are tender but still hold their shape—a knife should pierce a slice with slight resistance. Avoid overcooking, as the apples will soften further during processing.
- Remove the pot from the heat. The filling should be glossy and thick, with slices gently suspended in the syrup. If you prefer a thinner filling for crisps, add a few tablespoons of water; you can always thicken it later with cornstarch slurry.
- Place your sterilized jars on a clean kitchen towel. Use a wide-mouth funnel and ladle the hot filling into the jars, leaving 1-inch headspace from the top. This headspace is essential for a proper seal and prevents overflow during processing.
- Run a clean, non-metallic spatula or bubble remover along the inside edges of the jars to release any trapped air bubbles. Wipe the rims with a damp paper towel to remove any sticky residue, as even a drop of syrup can prevent an airtight seal.
- Center the lids on the jars and screw on the rings until they are fingertip-tight—do not overtighten. This allows air to escape during processing and ensures a proper vacuum seal as the jars cool.
- Place the filled jars in a boiling water canner with a rack. Ensure the jars are completely submerged by at least 1 inch of water. Bring the water back to a full rolling boil, then process the jars for 20 minutes (adjusting for altitude if necessary). This kills any harmful bacteria and creates a vacuum seal.
- After processing, carefully remove the jars using a jar lifter and place them on a towel-lined surface. Do not tighten the rings. Allow the jars to cool undisturbed for 12 to 24 hours; you’ll hear a satisfying ‘pop’ as each lid seals.
- After cooling, press the center of each lid to confirm it is firm and does not pop back. If any jar has not sealed, store it in the refrigerator and use within 3 weeks. For sealed jars, remove the rings, wipe the jars clean, and store in a cool, dark place for up to 12 months.
Notes
Store sealed jars in a cool, dark cupboard for up to 12 months. Once opened, refrigerate and use within 3 weeks. To serve, spoon over ice cream, stir into oatmeal, or use as a pie filling—just pour into a prepared pie crust and bake at 375°F (190°C) for 25 minutes until bubbly. For reheating, warm gently in a saucepan over low heat or microwave on medium in 1-minute intervals.
Nutrition
- Calories: 568
- Sugar: 120g
- Sodium: 168mg
- Unsaturated Fat: 0g
- Carbohydrates: 148g
- Fiber: 11g
- Protein: 2g
- Cholesterol: 0mg
Keywords: apple pie filling, canning recipe, homemade pie filling, Pioneer Woman apple pie, dessert filling, apple dessert, pie filling for canning, preserving apples, apple pie, apple filling