 Anabelle
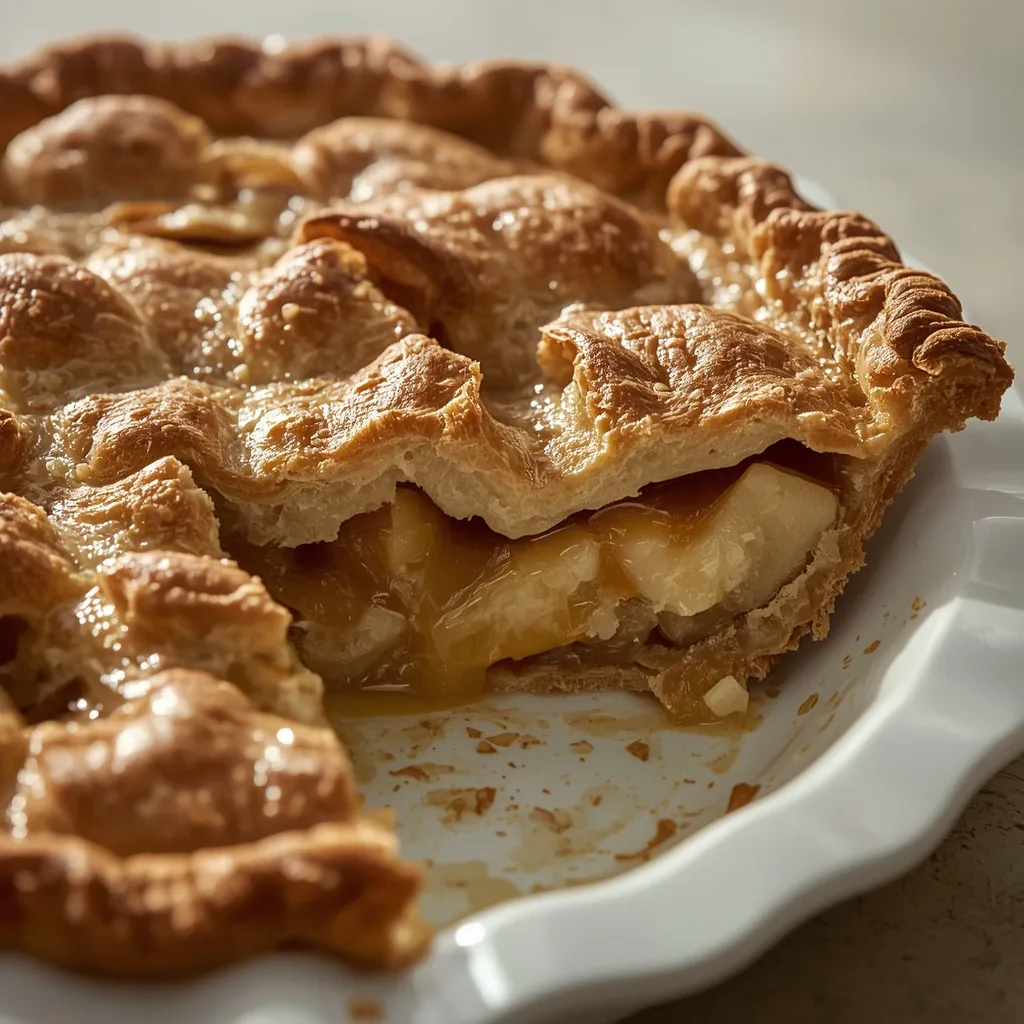
 You know that feeling when you bite into an apple pie and the filling is somehow both luxuriously rich and perfectly spiced? That is exactly what the Pioneer Woman Dreamy Apple Pie delivers. This is a dessert that combines a flaky, buttery crust with a velvety, caramel-like filling that sets it apart from standard fruit pies.
The whole process takes about 100 minutes from start to finish, making it a manageable weekend baking project. This is an intermediate-level recipe, mostly because the filling uses heavy cream to create that signature smooth texture — which also means you must let it cool fully before slicing. Plan to make this for Thanksgiving dinner, a cozy fall gathering, or any time you want a showstopping American classic.
A Quick Glimpse at Pioneer Woman Dreamy Apple Pie
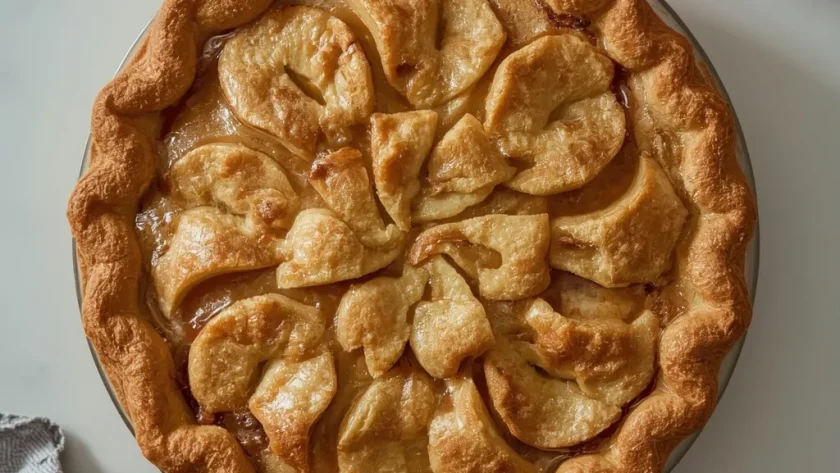
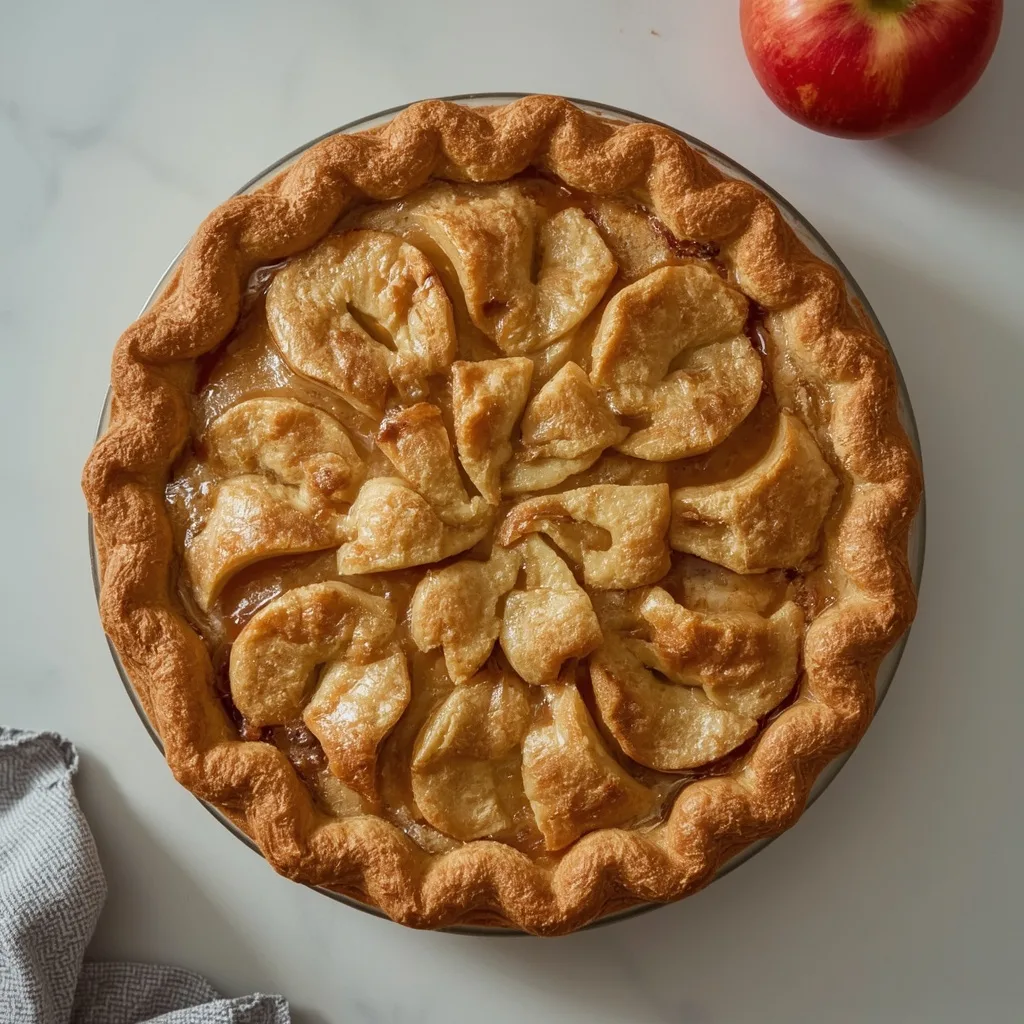
This pie relies on six large apples — a mix of tart Granny Smith and sweet Honeycrisp — tossed in a mixture of sugar, warm spices, and heavy cream. The cream and flour combine as it bakes into a smooth, almost pudding-like sauce that clings beautifully to every apple slice. The top crust gets brushed with an egg wash for that glossy, golden-brown finish you see in bakery windows. Bake it in the lower third of your oven for the best crust development, and serve it slightly warm for the dreamiest texture.
Why This Recipe is Worth Trying
Here is exactly what makes this recipe stand out from the dozens of other apple pies out there.
- The Creamy Filling — Heavy cream gets mixed right into the apples, creating a luscious, velvety sauce that you don’t get with traditional pies.
- Perfect Apple Blend — Using both Granny Smith and Honeycrisp gives you a balance of tartness and sweetness, plus a texture that holds up during baking.
- The Buttery Crust — Cold butter cut into pea-sized bits guarantees layers of flaky, tender pastry that cradles the filling.
- Manageable Timeline — With a 45-minute prep and about 55 minutes of baking, this comes together in one afternoon without fuss.
Essential Ingredients for This Recipe
You will need 21 ingredients for this recipe, and most of them are pantry staples. Here is what each one does.
For the Crust
- 1 1/4 cups all-purpose flour — This forms the structure of your crust. It gives you that sturdy base that holds the heavy filling.
- 1/2 teaspoon fine sea salt — A small amount goes a long way to balance the sweetness in both crust and filling.
- 1 tablespoon granulated sugar — This adds a subtle hint of sweetness to the pastry, so the crust doesn’t taste bland.
- 1/2 cup unsalted butter, cold and cut into small cubes — Cold butter is non-negotiable here. Chilled cubes create steam pockets that lead to flaky layers.
- 3 to 4 tablespoons ice water — This binds the dough together. Start with 3 tablespoons and add the fourth only if the dough stays dry.
For the Filling
- 3 large Granny Smith apples (about 1 1/2 pounds) — These provide the tart backbone that keeps the pie from tasting overly sweet.
- 3 large Honeycrisp apples (about 1 1/2 pounds) — Their natural sweetness and crisp texture hold up perfectly during the long bake.
- 3/4 cup granulated sugar — This sweetens the apples and helps create syrupy juices as the pie bakes.
- 1/4 cup all-purpose flour — This works as a thickener, combining with the cream to create that dreamy sauce.
- 1 teaspoon ground cinnamon — Warm cinnamon is the classic spice that pairs perfectly with apples.
- 1/4 teaspoon ground nutmeg — Just a pinch adds depth without overpowering the cinnamon.
- 1/4 teaspoon fine sea salt — Salt elevates all the other flavors, so the pie doesn’t taste flat.
- 1 tablespoon fresh lemon juice — A squeeze of lemon keeps the apples from browning and brightens the overall flavor.
- 1 teaspoon vanilla extract — Vanilla rounds out the spices and adds a warm, aromatic note.
- 1/2 cup heavy cream — This is the secret ingredient. It transforms the filling into something rich and silky.
- 2 tablespoons unsalted butter, cut into small pieces — These get dotted on top of the filling for extra richness as it bakes.
For the Egg Wash
- 1 large egg yolk — This gives the crust that deep golden color and beautiful shine.
- 1 tablespoon heavy cream — Mixing cream with the yolk makes the wash smooth and easy to brush on.
Useful Equipment
Before you start, gather these tools. You probably have most of them already.
- A 9-inch pie plate — Standard glass or ceramic works well. Glass lets you see the bottom crust browning.
- Pastry blender — This cuts butter into flour quickly. Your fingertips work too, but the blender is faster and keeps the butter colder.
- Rolling pin — Needed to roll the dough into even circles. Any rolling pin you own will do the trick.
- Baking sheet — Place this on the lower rack to catch drips. It saves you from scrubing the bottom of your oven.
- Aluminum foil or pie shield — Useful for covering the edges halfway through baking to prevent over-browning.
Directions to Make Pioneer Woman Dreamy Apple Pie
This recipe requires some patience, especially during the chilling and cooling stages. Here is the full process, step by step.
- Prepare the Dough — Whisk the flour, salt, and sugar together. Cut the cold butter into the flour until the mixture looks like coarse meal with some pea-sized butter bits. Drizzle in 3 tablespoons of ice water and toss with a fork until the dough starts coming together. Add the remaining water only if needed. Shape into a disk, wrap in plastic, and chill for at least 1 hour.
- Preheat and Prep — Set your oven to 375°F (190°C) with a rack in the lower third. Place a baking sheet on that rack to catch any drips during baking.
- Roll the Crust — On a floured surface, roll the chilled dough into a 12-inch round about 1/8-inch thick. Transfer it to your 9-inch pie plate and gently press it into the bottom and sides. Do not stretch the dough — that causes shrinking. Trim the overhang to 1 inch, fold it under, and flute the edges. Refrigerate the shell while you make the filling.
- Mix the Filling — In a large bowl, combine the sliced apples, sugar, flour, cinnamon, nutmeg, salt, lemon juice, vanilla, and heavy cream. Toss well so every apple slice gets coated. The cream and flour work together to create that signature luscious sauce.
- Fill and Dot — Pour the apple mixture into the chilled pie shell, mounding it slightly in the center. Dot the top with the small butter pieces.
- Top the Pie — Roll out the second half of dough to a 10-inch round for a full top crust, or cut 1-inch strips for a lattice. If using a full crust, place it over the filling, trim, and crimp the edges. Cut slits in the top to let steam escape.
- Apply Egg Wash — Whisk the egg yolk with the 1 tablespoon heavy cream. Brush this mixture over the top crust and edges for a golden, shiny finish.
- Bake — Place the pie on the preheated baking sheet. Bake at 375°F (190°C) for 20 minutes. Then reduce to 350°F (177°C) and bake another 35 to 40 minutes until the crust is golden and the filling is bubbly and thick. The filling should reach about 200°F (93°C) internally.
- Watch the Edges — Check halfway through. If the crust edges are browning too fast, cover them with foil or a pie shield.
- Cool Completely — Remove the pie from the oven and cool on a wire rack for at least 2 hours. This step is critical. Slicing too early makes the filling run everywhere.
- Serve Slightly Warm — For the dreamiest texture, serve warm — not hot — with vanilla ice cream or caramel sauce.
What I Got Wrong (And How I Fixed It)
I have made this pie several times, and a few things tripped me up along the way. Learning from these mistakes will save you time.
- Soggy Bottom Crust — Undercooking the bottom was my biggest issue at first. Putting the pie on the lower rack and preheating the baking sheet solved this completely.
- Burning Edges — The rim always darkened before the center finished. Adding a foil ring at the halfway mark fixed this instantly.
- Runny Filling — Slicing early ruined the structure. Waiting the full 2 hours on a wire rack lets the filling set properly.
- Dry Dough — I once skipped the extra water and the dough cracked when rolling. Adding the fourth tablespoon of ice water made all the difference.
- Tough Crust — Overworking the dough creates gluten, which makes pastry tough. Stop mixing as soon as it comes together.
- Thin Filling — Not tossing the apples well meant some slices had no coating. Take time to mix everything evenly.
Healthier Ways to Make Pioneer Woman Dreamy Apple Pie
If you want to lighten this up a bit, here are some swaps that still taste great.
- Swap the Cream — Use half-and-half instead of heavy cream. You lose a little richness but save significant fat and calories.
- Cut the Sugar — Reduce the granulated sugar to 1/2 cup. The Honeycrisp apples are sweet enough that you won’t miss it.
- Whole Wheat Crust — Replace half the all-purpose flour with whole wheat pastry flour. This adds fiber and a nutty flavor.
- Use Butter Sparingly — Reduce the butter in the filling from 2 tablespoons to 1. The cream still provides plenty of moisture.
- Lighter Wash — Brush the crust with milk instead of the egg yolk and cream mixture. It won’t be as shiny, but it works fine.
Ingredient Substitutions for Pioneer Woman Dreamy Apple Pie
Running low on something or want to put your own spin on it? Here are reliable swaps.
- Granny Smith Apples → Pink Lady — These hold up well and offer a similar tart-sweet balance.
- Honeycrisp Apples → Fuji or Gala — Both are sweet and crisp, so they bake up beautifully in this filling.
- Heavy Cream → Half-and-Half — The filling will be less luxurious but still creamy. You may need to bake 5 extra minutes to thicken.
- All-Purpose Flour → Cornstarch — Use 2 tablespoons of cornstarch in place of the 1/4 cup flour for the filling. It creates a clearer, glossier sauce.
- Vanilla Extract → Almond Extract — A tiny touch of almond adds an unexpected nutty note. Use half the amount.
- Granulated Sugar → Brown Sugar — Swapping in brown sugar brings deeper, molasses-like flavors to the filling.
Unexpected Ways to Enjoy This Pioneer Woman Dreamy Apple Pie
Beyond the classic slice, this pie has some surprising uses.
- Warm Pie Sundae — Chop a slice into chunks and warm it in the microwave. Top with coffee ice cream and caramel drizzle.
- Milkshake Base — Blend a slice with vanilla ice cream and a splash of milk. You get an incredible apple-pie-flavored shake.
- French Toast Topper — Warm the filling in a saucepan and spoon it over thick-cut French toast.
- Cheese Plate Addition — A small slice pairs surprisingly well with sharp cheddar or aged gouda.
- Trifle Layers — Layer crumbled pie pieces with vanilla pudding and whipped cream in glasses for a quick dessert.
- Ice Cream Swirl — Crumble the pie into softened ice cream, then refreeze. Homemade apple pie ice cream in no time.
Best Tips for Pioneer Woman Dreamy Apple Pie Success
These tips will take your pie from good to unforgettable.
- Keep Everything Cold — Cold butter and ice water are essential for the flakiest crust.
- Chill the Dough Long — That 1-hour minimum rest relaxes the gluten and prevents shrinking in the oven.
- Don’t Skip the Lemon — The lemon juice brightens the apples and keeps them from browning.
- Use the Lower Rack — Baking on the lower third gives the bottom crust direct heat so it cooks through.
- Cover the Edges — If the rim darkens too quickly, cover with foil immediately. Wait too long and they burn.
- Cool for the Full 2 Hours — This is not optional. The filling needs time to set or you will get a mess on your plate.
Tasty Twists on Pioneer Woman Dreamy Apple Pie
Feeling creative? These variations keep the spirit of the recipe while changing things up.
- Caramel Apple Version — Drizzle 1/4 cup of caramel sauce over the apples before adding the top crust.
- Maple Apple Pie — Substitute the vanilla with 1 teaspoon of maple extract. Serve with maple whipped cream.
- Bourbon Addition — Add 2 tablespoons of bourbon to the filling for a smoky, adult flavor profile.
-
Cranberry Twist
— Fold in 1 cup of fresh cranberries for a pop of tartness and gorgeous color. - Oat Crumble Top — Skip the top crust entirely and top with a simple oat streusel made of butter, flour, oats, and brown sugar.
- Spiced Pear Blend — Replace half the apples with firm Bosc pears. The pears add a floral sweetness pairs well with the cinnamon.
Best Ways to Store Your Pioneer Woman Dreamy Apple Pie
Store leftovers properly and this pie stays delicious for days.
- Room Temperature — Cover the pie loosely with foil and keep it on the counter for up to 2 days.
- Refrigeration — For up to 4 days, refrigerate the pie covered. Cold pie slices cleanly and tastes great chilled.
- Freeze Whole — Wrap a fully baked and cooled pie tightly in plastic wrap, then foil. Freeze for up to 3 months.
- Freeze Individual Slices — Great for portion control. Wrap each slice in plastic, place in a zip-top bag, and freeze for up to 3 months.
Ways to Warm It Up Again
Reheating brings back that fresh-from-the-oven feel.
- Oven — For a whole pie, reheat at 350°F (177°C) for 15 minutes. This works best for serving multiple people.
- Microwave — Warm individual slices on medium power for 20 to 30 seconds.
- Toaster Oven — For single slices, bake at 350°F for about 5 minutes. This keeps the crust crisp.
- Air Fryer — Reheat slices at 300°F for 3 to 4 minutes. The circulating air brings back the flakiness.
Nutritional Breakdown (per serving)
Based on 1 serving being 1 portion of the pie out of 4 total. This is a rich dessert, so enjoy it in moderation.
- Calories — 620 per slice
- Protein — About 5g
- Fat — 27g
- Saturated Fat — Around 15g
- Carbohydrates — 90g
- Fiber — About 6g
- Sugar — 60g
- Sodium — Roughly 280mg
- Cholesterol — 85mg
Try These Recipes
Wrapping It Up
The Pioneer Woman Dreamy Apple Pie is one of those desserts that tastes like a warm hug on a plate. That silky, caramel-like filling paired with a buttery, flaky crust is a combination worth every minute of effort. Whether you serve it for a holiday or a simple Sunday dinner, this pie delivers. Try it once, and it will likely become your go-to apple pie recipe.
PrintPioneer Woman Dreamy Apple Pie
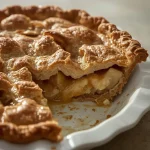
A luscious, dreamy apple pie with a buttery, flaky crust and a velvety, caramel-like apple filling. Each bite is a perfect balance of sweet, spiced apples and a smooth, creamy texture that lingers on the palate.
- Prep Time: 45
- Cook Time: 55
- Total Time: 100
- Yield: 4 1x
- Category: Dessert
- Method: Baking
- Cuisine: American
Ingredients
- For the crust:
- 1 1/4 cups all-purpose flour
- 1/2 teaspoon fine sea salt
- 1 tablespoon granulated sugar
- 1/2 cup unsalted butter, cold and cut into small cubes
- 3 to 4 tablespoons ice water
- For the filling:
- 3 large Granny Smith apples (about 1 1/2 pounds), peeled, cored, and sliced 1/4-inch thick
- 3 large Honeycrisp apples (about 1 1/2 pounds), peeled, cored, and sliced 1/4-inch thick
- 3/4 cup granulated sugar
- 1/4 cup all-purpose flour
- 1 teaspoon ground cinnamon
- 1/4 teaspoon ground nutmeg
- 1/4 teaspoon fine sea salt
- 1 tablespoon fresh lemon juice
- 1 teaspoon vanilla extract
- 1/2 cup heavy cream
- 2 tablespoons unsalted butter, cut into small pieces
- For the egg wash:
- 1 large egg yolk
- 1 tablespoon heavy cream
Instructions
- Prepare the pie dough: In a medium bowl, whisk together the flour, salt, and sugar. Add the cold butter cubes and use a pastry blender or your fingertips to cut the butter into the flour until the mixture resembles coarse meal with some pea-sized butter bits. This ensures a flaky crust.
- Drizzle 3 tablespoons of ice water over the flour mixture and toss with a fork until the dough begins to come together. If it looks dry, add the remaining water, 1 teaspoon at a time. Turn the dough out onto a lightly floured surface and gather into a disk. Wrap in plastic wrap and refrigerate for at least 1 hour.
- Preheat your oven to 375°F (190°C). Position a rack in the lower third of the oven. Place a baking sheet on the rack to catch any drips while the pie bakes.
- On a lightly floured surface, roll the chilled dough into a 12-inch round, about 1/8-inch thick. Carefully transfer the dough to a 9-inch pie plate, gently pressing it into the bottom and sides without stretching. Trim the overhang to about 1 inch and fold it under to create a thick edge. Flute the edges as desired. Place the pie shell in the refrigerator while you prepare the filling.
- In a large bowl, combine the sliced apples, sugar, flour, cinnamon, nutmeg, salt, lemon juice, vanilla extract, and heavy cream. Toss well to coat every apple slice. The cream and flour create a luscious, dreamy sauce as the pie bakes.
- Pour the apple mixture into the chilled pie shell, mounding slightly in the center. Dot the top with the small butter pieces.
- Now, create a top crust: roll out the second half of the dough (or use a simple lattice or full top crust). For a full top crust, roll to a 10-inch round, place over the filling, trim and crimp edges. If using a lattice, cut 1-inch strips and weave over the filling. Cut slits in the top crust to allow steam to escape.
- Make the egg wash: Whisk the egg yolk with the 1 tablespoon heavy cream. Brush the top crust and edges with the egg wash. This gives a golden, shiny finish.
- Place the pie on the preheated baking sheet. Bake at 375°F (190°C) for 20 minutes. Then reduce the oven temperature to 350°F (177°C) and continue baking for 35 to 40 minutes, until the crust is golden brown and the filling is bubbly and thick. The internal temperature of the filling should read about 200°F (93°C) to ensure the apples are tender and the sauce has thickened.
- Check the pie halfway through: if the crust edges are browning too quickly, cover them with a ring of aluminum foil or a pie shield.
- Once baked, remove the pie from the oven and let it cool on a wire rack for at least 2 hours before slicing. This allows the filling to set properly, so it slices cleanly.
- For the dreamiest texture, serve slightly warm—not hot—with a scoop of vanilla ice cream or a drizzle of caramel sauce. Enjoy!
Notes
Storage: Cover the pie loosely with foil and store at room temperature for up to 2 days, or refrigerate for up to 4 days. Freezing: This pie freezes beautifully. Wrap the fully baked and cooled pie tightly in plastic wrap and then aluminum foil. Freeze for up to 3 months. To serve, thaw overnight in the refrigerator and reheat in a 350°F (177°C) oven for 15 minutes or until warmed through. Reheating individual slices: microwave on medium power for 20-30 seconds, or place in a toaster oven at 350°F for 5 minutes.
Nutrition
- Calories: 620
- Sugar: 60g
- Sodium: 280mg
- Unsaturated Fat: 16g
- Carbohydrates: 90g
- Fiber: 6g
- Protein: 5g
- Cholesterol: 90mg
Keywords: apple pie, dreamy apple pie, homemade apple pie, classic apple pie, comfort dessert, apple dessert, pie recipe, fall baking, Thanksgiving dessert, buttery crust, cinnamon apple pie, easy apple pie