
 Anabelle
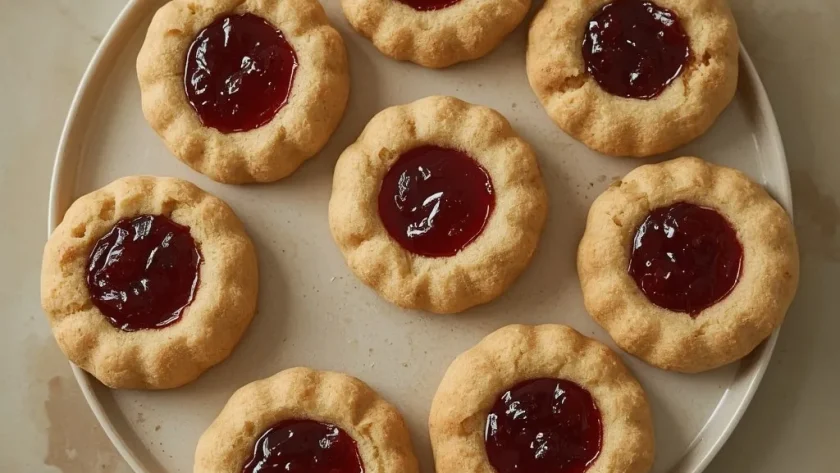
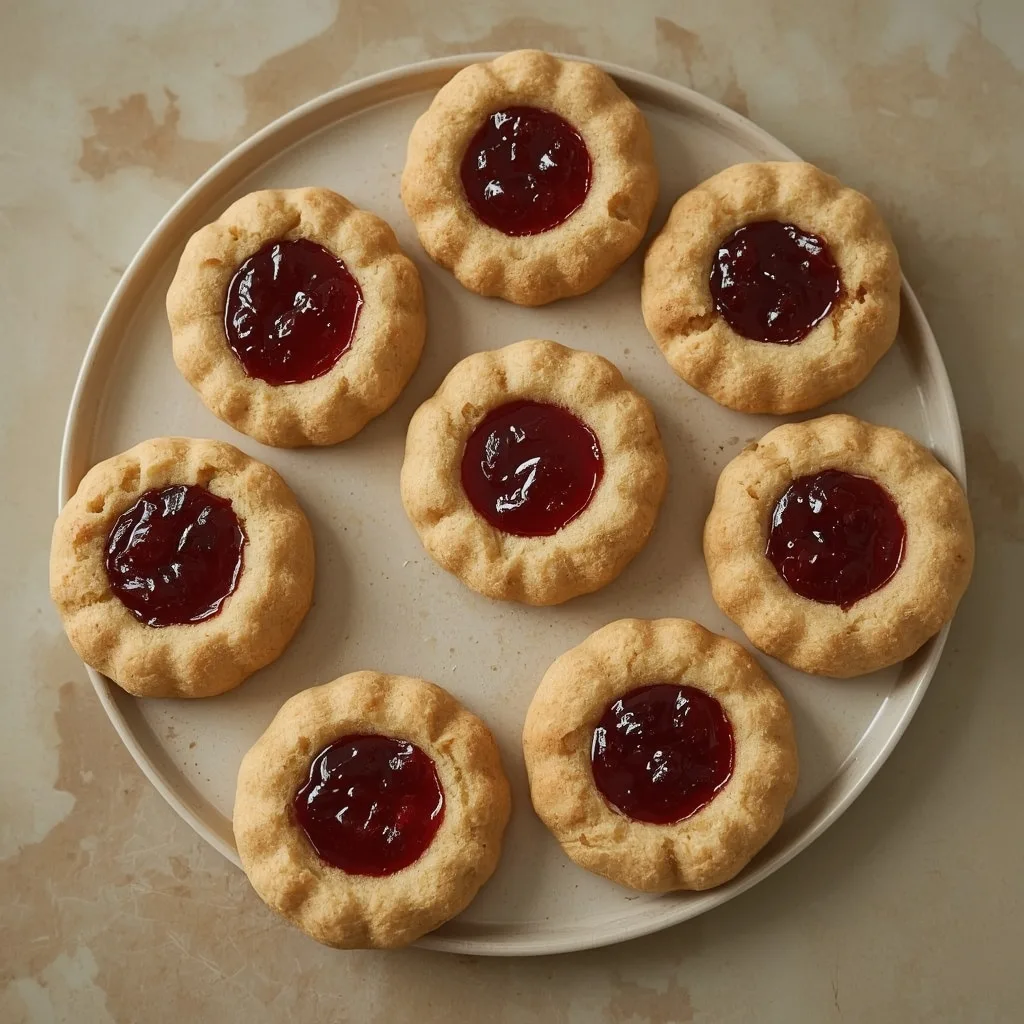
 These Pioneer Woman Thumbprint Cookies are exactly what a classic shortbread thumbprint should be: buttery, tender, and filled with a bright, sweet jam center. They come together with just eight simple ingredients and a straightforward baking method that any home cook can manage.
From start to finish, you are looking at about 34 minutes of total time, making this a beginner-friendly dessert perfect for holiday cookie trays, afternoon tea, or a simple weekend bake. The only mildly tricky part is pressing the indent without cracking the dough, but I have a simple trick for that.
A Quick Glimpse at Pioneer Woman Thumbprint Cookies
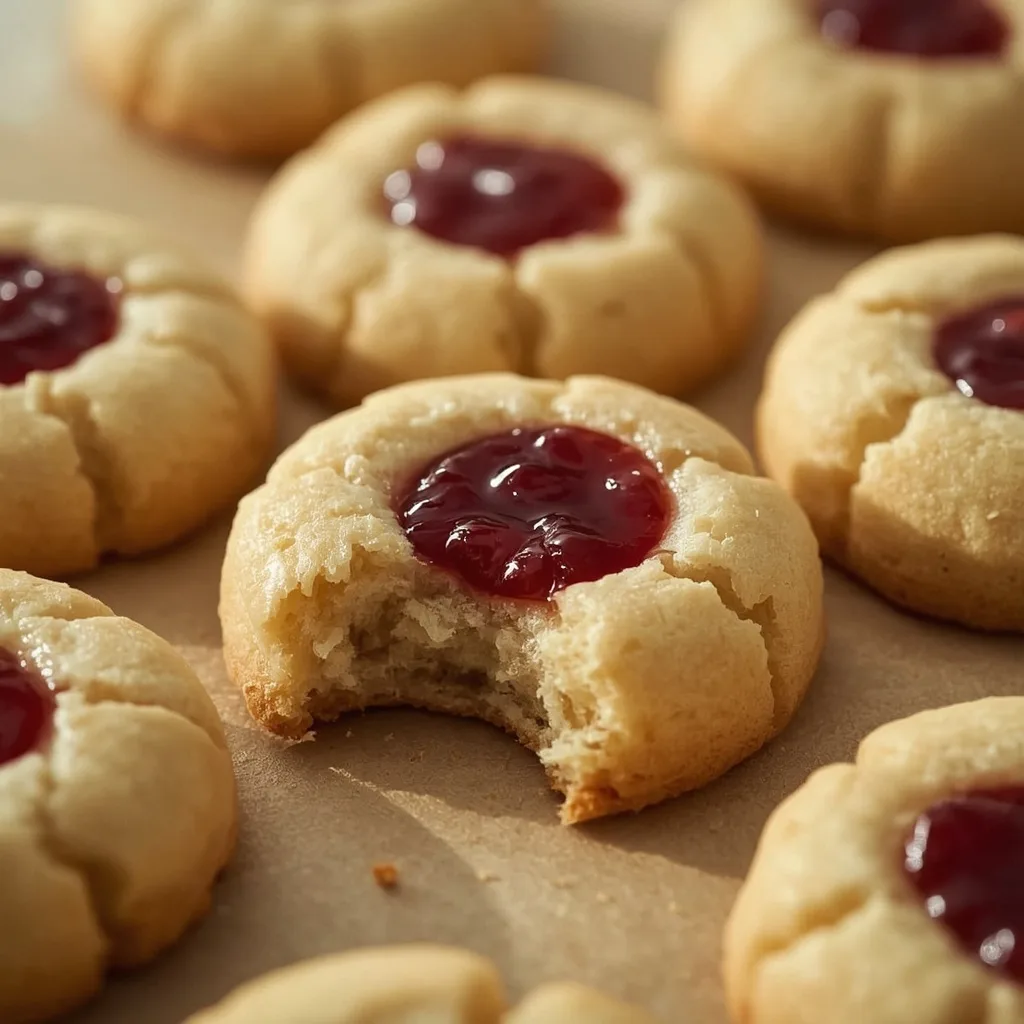
This recipe is a small-batch shortbread cookie with a tender, sandy crumb and crisp edges. The dough is made from butter, sugar, egg yolk, vanilla, and flour, then baked with a spoonful of jam in the center. The result is a cookie that is rich but not heavy, with the jam cutting through the butteriness perfectly.
Why This Recipe is Worth Trying
- Simple ingredient list — You likely have everything except the jam in your pantry right now. No specialty flours or hard-to-find extracts.
- Short total time — From mixing to cooling, you are done in just over half an hour. That makes it a great last-minute dessert option.
- Naturally portion-controlled — The recipe makes exactly 8 cookies, so you are not stuck with a massive batch. Perfect for when you just want a small treat.
- Endlessly customizable — Swap the raspberry jam for apricot, strawberry, or even a dollop of lemon curd. Your options are wide open here.
Essential Ingredients for This Recipe
Here is what you need and why each ingredient matters for the best texture and flavor.
The Base Dough
- 1/2 cup unsalted butter, softened to room temperature (65-68°F / 18-20°C) — This is the backbone of the shortbread. Softened butter creams properly with the sugar, creating air pockets that give the cookies a tender crumb. Do not use melted or cold butter here.
- 1/4 cup granulated sugar — Just enough sweetness to balance the buttery richness. Using less sugar than typical shortbread keeps the cookies from spreading too much in the oven.
- 1 large egg yolk, room temperature (reserve the white for optional egg wash) — The yolk adds richness and helps bind the dough, while the fat from the yolk keeps the cookies tender. The white is optional for a shiny top.
- 1/2 teaspoon pure vanilla extract — A modest amount that adds warmth without overpowering the butter or jam. Pure vanilla makes a difference here over imitation.
- 1/4 teaspoon fine sea salt — Salt balances the sweetness and enhances the butter flavor. Fine sea salt dissolves evenly into the dough.
- 1/2 cup plus 2 tablespoons all-purpose flour, spooned and leveled (about 60g) — Spooning and leveling is critical here. Scooping directly can pack in extra flour, making the cookies dry and crumbly. This exact amount yields a soft, workable dough.
The Filling and Topping
- 3 to 4 tablespoons seedless raspberry jam, or any flavor of choice — Seedless jam gives a smooth, clean appearance in the center. You can use strawberry, apricot, or even a thick marmalade if you prefer.
- Optional: 1 tablespoon turbinado or coarse sugar for sprinkling — This adds a subtle crunch and a slight sparkle to the cookie tops. Completely optional but worth the extra step.
Useful Equipment
- Hand mixer or stand mixer with paddle attachment — Creaming the butter and sugar by hand takes too long and often leaves lumps. A mixer gets it light and fluffy in two minutes.
- Parchment paper — Lining the baking sheet prevents sticking and promotes even browning on the bottom. Silicone mats work too, but parchment is easier to transfer cookies from.
- 1/2 teaspoon measuring spoon — The bottom of this spoon is the perfect size for pressing the indent into the dough. A small round spoon or even your thumb works in a pinch.
- Small spoon for filling — You need something narrow enough to drop jam precisely into each well without dripping over the edges. A baby spoon or a 1/4 teaspoon measure is ideal.
- Wire cooling rack — Cooling the cookies on the sheet for 5 minutes is fine, but transferring them to a rack allows air to circulate and prevents soggy bottoms.
Directions to Make Pioneer Woman Thumbprint Cookies
The process is straightforward, but a few details make the difference between a perfect cookie and a flat, cracked one. Follow these steps carefully.
- Preheat and prepare — Set your oven to 350°F / 177°C and line a baking sheet with parchment paper. This ensures even heat distribution and easy cleanup.
- Cream the butter and sugar — In a medium bowl, beat the softened butter and sugar on medium speed until light and fluffy, about 2 to 3 minutes. Scrape down the sides halfway through for even mixing.
- Add the wet ingredients — Mix in the egg yolk, vanilla, and salt on low speed for about 15 seconds. Just until combined. Overmixing here develops gluten and toughens the cookies.
- Incorporate the flour — Add the flour and mix on low until a soft dough forms, roughly 30 seconds. The dough should be cohesive but not sticky. If it feels too soft, refrigerate it for 10 minutes before shaping.
- Shape the dough balls — Roll the dough into 8 equal balls, each about 1 inch in diameter. Place them on the prepared sheet, spacing them 2 inches apart. Smooth each ball with your palms for a uniform shape.
- Apply the optional egg wash and sugar — If using, beat the reserved egg white with 1 teaspoon water, brush a thin layer on each ball, and sprinkle with coarse sugar. This step gives a glossy finish and a slight crunch.
- Press the indent — Use the bottom of a 1/2 teaspoon measure or your thumb to press a well into the center of each ball, going about halfway through the dough (roughly 1/4 inch deep). Rotate the tool slightly to make the well round. If the dough cracks, gently smooth the edges with your fingertips.
- Fill with jam — Spoon about 1/2 to 3/4 teaspoon of jam into each indent. Fill just below the rim — the jam will spread slightly during baking but should not overflow.
- Bake and rotate — Bake for 12 to 14 minutes, rotating the sheet halfway through. The cookies are done when the edges are set and barely golden, but the tops remain pale. The center may look slightly puffed but will settle as they cool.
- Cool on the sheet — Let the cookies rest on the baking sheet for 5 minutes. This allows the structure to firm up before handling. Do not skip this step or the cookies may break apart.
- Transfer to a rack — Move the cookies to a wire rack and cool completely, about 20 minutes. The jam will thicken and become tacky as it cools, and the cookies will develop their signature sandy texture.
What I Got Wrong (And How I Fixed It)
- Cracked edges on the indent — Pressing too hard or using a tool that is too wide caused the dough to crack. Using the bottom of a 1/2 teaspoon measure and smoothing any cracks with my fingertips fixed this completely.
- Jam overflow during baking — I overfilled the wells on my first batch, and the jam bubbled over the edges. Filling just below the rim prevents this entirely.
- Cookies spread too flat — Using butter that was too soft or skipping the chilling step caused the cookies to spread into flat discs. Chilling the dough for 10 minutes before baking keeps the shape intact.
- Dough was too sticky to roll — Not measuring the flour correctly by spooning and leveling resulted in too much flour. Sticking to the exact weight of 60g or spooning gently into the cup solved the stickiness.
- Cookies were dry and crumbly — Overbaking by even a minute dried out the shortbread. Pulling them at the 12-minute mark when edges are just set keeps the centers tender.
Healthier Ways to Make Pioneer Woman Thumbprint Cookies
- Reduce the sugar — Cut the granulated sugar to 3 tablespoons instead of 1/4 cup. The cookies will be less sweet, but the jam filling still provides enough sweetness. Reduce baking time by 1-2 minutes.
- Swap the jam for a lower-sugar option — Use a no-sugar-added or reduced-sugar fruit spread instead of regular jam. This cuts the overall sugar content by about half per cookie.
- Use whole wheat pastry flour — Replace half of the all-purpose flour with whole wheat pastry flour. It adds fiber and a mild nutty flavor without making the cookies dense or tough.
- Use a sugar substitute — Swap the granulated sugar for a 1:1 baking blend sweetener like erythritol or monk fruit. Keep in mind the texture may be slightly less tender, but the flavor stays close.
Ingredient Substitutions for Pioneer Woman Thumbprint Cookies
- Butter → Vegan butter or coconut oil (solid form) — Use a stick-style vegan butter for the closest texture. If using coconut oil, chill it solid and cream it as you would butter. The cookies will have a slightly different flavor but still work well.
- Egg yolk → 1 tablespoon plain yogurt or buttermilk — This adds moisture and richness without the egg. The cookies may be slightly less tender, but the flavor remains good.
- All-purpose flour → Gluten-free 1:1 baking flour — A good gluten-free blend with xanthan gum works here. Do not use single flours like almond or coconut unless adjusting the liquid ratio.
- Raspberry jam → Apricot preserves or lemon curd — Apricot gives a milder sweetness, while lemon curd adds a tangy, bright contrast. Reduce baking time by 1-2 minutes if using lemon curd, as it sets faster.
- Vanilla extract → Almond extract — Use just 1/4 teaspoon of almond extract instead. It pairs beautifully with fruit jams, especially cherry or strawberry.
- Turbinado sugar → Demerara sugar or regular granulated sugar — Demerara has similar crunch. Regular sugar will dissolve more and not give the same texture, but it works in a pinch.
Unexpected Ways to Enjoy This Pioneer Woman Thumbprint Cookies
- Sandwich two cookies together — Spread a thin layer of cream cheese frosting or whipped cream between two thumbprint cookies for a mini sandwich. The tangy filling balances the sweet jam.
- Crumble over vanilla ice cream — Break a cooled cookie into small pieces and sprinkle over a scoop of vanilla or honey ice cream. The buttery crumb and jam add texture and flavor.
- Use as a tartlet base — Press the dough into mini tartlet pans instead of shaping into cookies. Fill with jam and bake as directed for a delicate tartlet with a thicker crust.
- Serve with a cheese plate — Pair an unfilled thumbprint cookie with a soft goat cheese or aged cheddar. The buttery shortbread complements the tangy cheese beautifully.
- Dip in melted chocolate — Once cooled, dip half of each cookie into melted dark or milk chocolate. Let set on parchment for a richer, more decadent treat.
- Make mini ice cream sandwiches — Place a small scoop of vanilla or strawberry ice cream between two thumbprint cookies. Press gently and freeze for 30 minutes before serving.
Best Tips for Pioneer Woman Thumbprint Cookies Success
- Measure your flour correctly every time — Spoon the flour into the measuring cup and level it with a knife. Packing it down adds up to 20% more flour, which makes the cookies dry and dense.
- Use room temperature butter, not melted — Softened butter creams properly with sugar, creating air pockets that give the cookies lift. Melted butter leads to flat, greasy cookies with no structure.
- Chill the dough if it feels too soft — A 10-minute rest in the fridge firms up the butter, preventing spreading and making the indent much easier to press without cracking.
- Press the indent gently but firmly — Go about halfway through the dough. If you press too deep, the bottom becomes too thin and the jam may leak. Too shallow, and the well disappears during baking.
- Rotate the baking sheet halfway through — Ovens often have hot spots. Rotating at the 6-7 minute mark ensures even golden edges on all the cookies.
- Do not skip the 5-minute cooling on the sheet — The cookies are fragile right out of the oven. Letting them rest on the hot sheet for 5 minutes allows the structure to set before moving.
- Use a clean spoon for each jam flavor — If you are using multiple jam types, use a separate spoon for each to prevent colors and flavors from bleeding together in the bowl.
Tasty Twists on Pioneer Woman Thumbprint Cookies
- Chocolate-hazelnut thumbprints — Replace the jam with a teaspoon of chocolate-hazelnut spread per cookie. Press a few chopped hazelnuts on top before baking for extra crunch.
- Lemon-blueberry variation — Add 1/2 teaspoon lemon zest to the dough and fill with blueberry jam. The citrus note brightens the whole cookie beautifully.
- Spiced chai thumbprints — Add 1/4 teaspoon ground cardamom and a pinch of cinnamon to the flour mixture. Fill with apricot preserves for a warm, aromatic twist.
- Pistachio and rose thumbprints — Fold 2 tablespoons finely chopped pistachios into the dough. Fill with rose petal jam or a dollop of rosewater-scented honey.
- Salted caramel thumbprints — Fill each well with a soft caramel cube instead of jam. Sprinkle flaky sea salt on top before baking for a sweet-salty combination.
- Matcha green tea thumbprints — Sift 1 teaspoon matcha powder into the flour. Fill with white chocolate ganache or strawberry jam for a lovely color contrast.
Best Ways to Store Your Pioneer Woman Thumbprint Cookies
- Room temperature in an airtight container — Store cooled cookies in a single layer or between sheets of parchment in an airtight container. They stay fresh for up to 5 days at room temperature.
- Freeze unfilled cookies — Bake the cookies without the jam, cool completely, and place in a single layer in a freezer-safe container. Freeze for up to 3 months. Thaw at room temperature, then fill with jam as directed.
- Freeze filled cookies with care — You can freeze filled cookies, but the jam may soften the cookie texture slightly upon thawing. Freeze in a single layer for up to 1 month for best results.
- Use parchment between layers — When stacking cookies in any container, place a sheet of parchment between each layer. This prevents the jam from sticking to the cookie above it.
Ways to Warm It Up Again
- Oven method (recommended) — Preheat to 300°F / 150°C and warm the cookies on a parchment-lined sheet for 3-4 minutes. This crisps the edges and softens the center without overcooking the jam.
- Microwave method (quick option) — Place one cookie on a microwave-safe plate and heat for 10-15 seconds. The cookie will be soft, but the edges may lose some crispness. Best for a single serving.
- Air fryer method — Preheat air fryer to 300°F / 150°C and warm cookies for 2-3 minutes. Check at the 2-minute mark to avoid overbrowning. Works well for restoring crisp edges.
- Do not reheat from frozen without thawing — Thaw frozen cookies at room temperature for 15 minutes before reheating. Reheating directly from frozen can cause uneven warming and jam leakage.
Nutritional Breakdown (per serving)
Based on 1 serving = 1 portion out of 4 total (2 cookies per serving).
- Calories: 253
- Protein: 3g
- Fat: about 17g
- Carbohydrates: about 25g
- Fiber: 0g
- Sugar: around 13g
- Sodium: close to 155mg
Try These Recipes
Wrapping It Up
These Pioneer Woman Thumbprint Cookies are a straightforward, rewarding bake that delivers on buttery flavor and a bright jam center every time. The recipe is forgiving enough for beginners but elegant enough for holiday cookie trays or a simple afternoon treat.
I hope you give this recipe a try and find the perfect jam combination that works for you. It takes just over half an hour, and the result is a small batch of cookies that feel special without any fuss. Happy baking.
PrintPioneer Woman Thumbprint Cookies

These classic thumbprint cookies feature a rich, buttery shortbread base with a tender crumb and a sweet jam center. The cookie is perfectly crisp on the edges and soft in the middle, with the fruit jam adding a bright, tangy contrast. Ideal for holiday cookie trays or an elegant afternoon treat.
- Prep Time: 20
- Cook Time: 14
- Total Time: 34
- Yield: 4 1x
- Category: Dessert
- Method: Baking
- Cuisine: American
Ingredients
- 1/2 cup unsalted butter, softened to room temperature (65-68°F / 18-20°C)
- 1/4 cup granulated sugar
- 1 large egg yolk, room temperature (reserve the white for optional egg wash)
- 1/2 teaspoon pure vanilla extract
- 1/4 teaspoon fine sea salt
- 1/2 cup plus 2 tablespoons all-purpose flour, spooned and leveled (about 60g)
- 3 to 4 tablespoons seedless raspberry jam, or any flavor of choice
- Optional: 1 tablespoon turbinado or coarse sugar for sprinkling
Instructions
- Preheat oven to 350°F / 177°C. Line a baking sheet with parchment paper. This prevents sticking and ensures even browning on the bottom of the cookies.
- In a medium mixing bowl, place 1/2 cup softened unsalted butter and 1/4 cup granulated sugar. Using a hand mixer or stand mixer with paddle attachment, cream on medium speed until light and fluffy, about 2 to 3 minutes. Scrape down the sides of the bowl to ensure even mixing.
- Add 1 large egg yolk (reserve the white if using for optional egg wash), 1/2 teaspoon vanilla extract, and 1/4 teaspoon fine sea salt. Beat on low speed until just combined, about 15 seconds. Do not overmix at this stage to avoid developing gluten, which would make the cookies tough.
- Add 1/2 cup plus 2 tablespoons all-purpose flour. Mix on low speed just until a soft dough forms, about 30 seconds. The dough should be cohesive but not sticky. Gather it into a ball and refrigerate for 10 minutes if the dough feels too soft to handle. Chilling firms the butter, preventing spreading during baking and preserving the thumbprint shape.
- Using clean hands, roll the dough into 8 equal balls, about 1 inch in diameter. Place them evenly on the prepared baking sheet, spacing about 2 inches apart. Each ball should be smooth and round.
- Optionally, beat the reserved egg white with 1 teaspoon water to make an egg wash. Lightly brush the tops of each dough ball with a thin layer of egg wash, then sprinkle with coarse sugar if using. This step adds a subtle sheen and a slight crunch to the outside of the cookies. If you prefer a more rustic look, skip this step and proceed directly to the thumbprint.
- Using the bottom of a 1/2 teaspoon measure, the back of a small round spoon, or your thumb, gently press an indent into the center of each dough ball, going about halfway through the dough (approximately 1/4 inch deep). Rotate the tool slightly to make the well round and even. If the dough cracks around the edges, gently smooth the sides with your fingertips.
- Spoon about 1/2 to 3/4 teaspoon of your chosen jam into each indentation. Fill to just below the rim of the well; the jam will spread slightly during baking but should not overflow. Use a clean spoon for each type of jam to prevent color bleeding.
- Bake the cookies in the preheated oven for 12 to 14 minutes, rotating the baking sheet halfway through the baking time. The cookies are done when the edges are set and just starting to turn golden brown, but the tops remain pale. The center may look slightly puffed but will settle as they cool.
- Remove the baking sheet from the oven and let the cookies cool directly on the sheet for 5 minutes. This allows the structure to firm up before handling. During this time, the residual heat continues to set the jam and the cookie interior. Do not skip this resting step or the cookies may break apart.
- Transfer the cookies to a wire rack and cool completely, about 20 minutes. The jam will thicken and become tacky as it cools, and the cookies will develop a light, sandy texture. Once fully cool, they are ready to serve or store.
Notes
Store cooled cookies in an airtight container at room temperature for up to 5 days. For longer storage, freeze the baked, unfilled cookies (without jam) in a single layer in a freezer-safe container for up to 3 months. To serve, thaw at room temperature, then fill with jam as directed. Filled cookies can also be frozen, but the jam may soften the cookie texture slightly upon thawing. If reheating, warm in a 300°F / 150°C oven for 3-4 minutes to crisp the edges.
Nutrition
- Calories: 253
- Sugar: 13g
- Sodium: 155mg
- Unsaturated Fat: 10g
- Carbohydrates: 25g
- Fiber: 0g
- Protein: 3g
- Cholesterol: 87mg
Keywords: thumbprint cookies, pioneer woman thumbprints, jam cookies, shortbread thumbprints, butter cookies with jam, holiday cookies, easy cookie recipe, baking, dessert, fruit jam thumbprints


