
 Anabelle
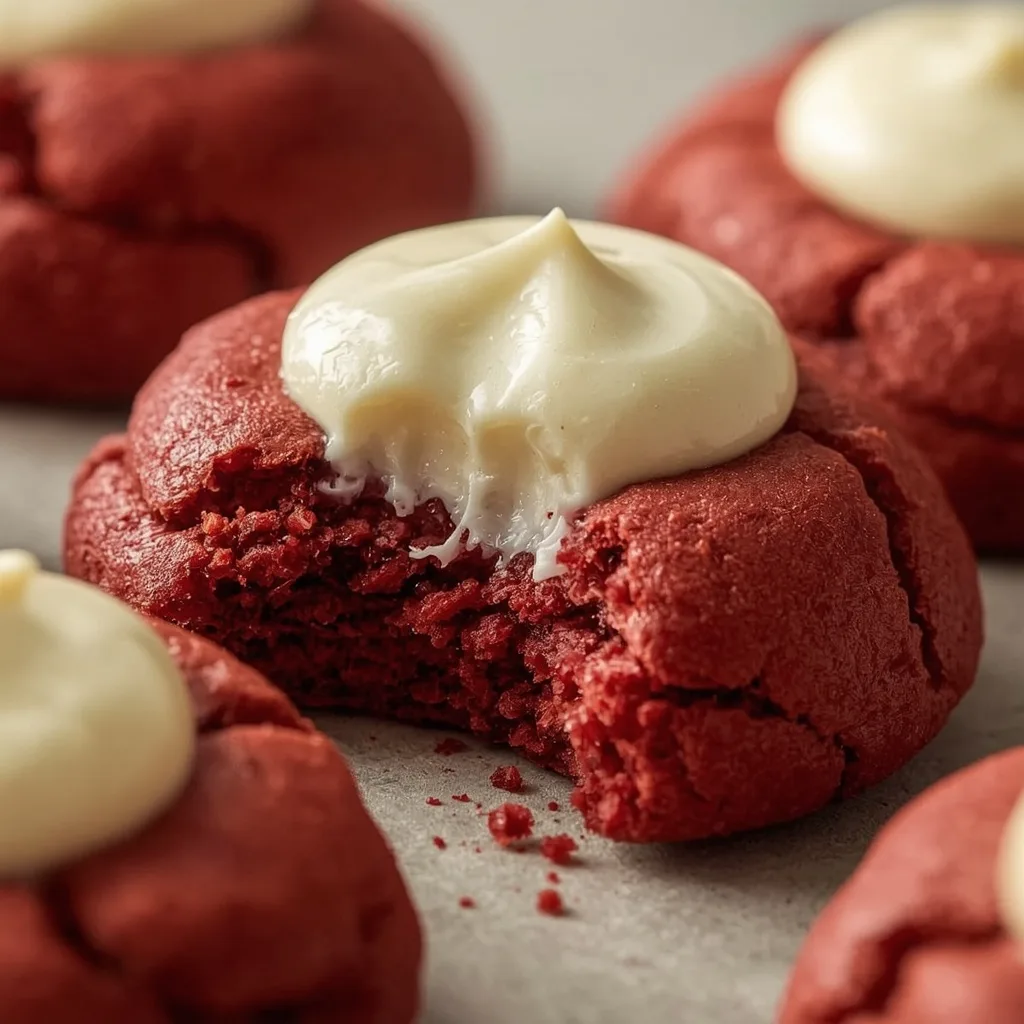
 These Pioneer Woman Red Velvet Cookies take the classic cake flavor and pack it into a soft, chewy cookie with a rich cream cheese frosting. The buttery cocoa base gets a tangy kick from buttermilk and a vibrant red hue that makes it stand out on any dessert table.
The whole process takes about 35 minutes from start to finish, making this a beginner-friendly recipe you can pull off on a weeknight. The only slightly tricky part is not overbaking — the centers should look soft when you pull them from the oven, so trust that step.
A Quick Glimpse at Pioneer Woman Red Velvet Cookies
These are soft-baked cookies made with cocoa powder, buttermilk, and a touch of vinegar for tenderness, then topped with a tangy cream cheese frosting. The texture is chewy with a slight crumb, not cakey like the original dessert. The frosting brings a creamy, slightly tangy finish that balances the subtle cocoa flavor. These are perfect for Christmas cookie exchanges, Valentine’s Day, or any celebration where you want a pop of red.
Why This Recipe is Worth Trying
- Quick prep time — From mixing to baking takes under 40 minutes, with only 10 minutes in the oven.
- No cake mix required — You get that classic red velvet flavor from scratch without any shortcuts.
- Perfect chewy texture — The combination of butter, brown sugar, and a short chill gives you that ideal soft-but-steady bite.
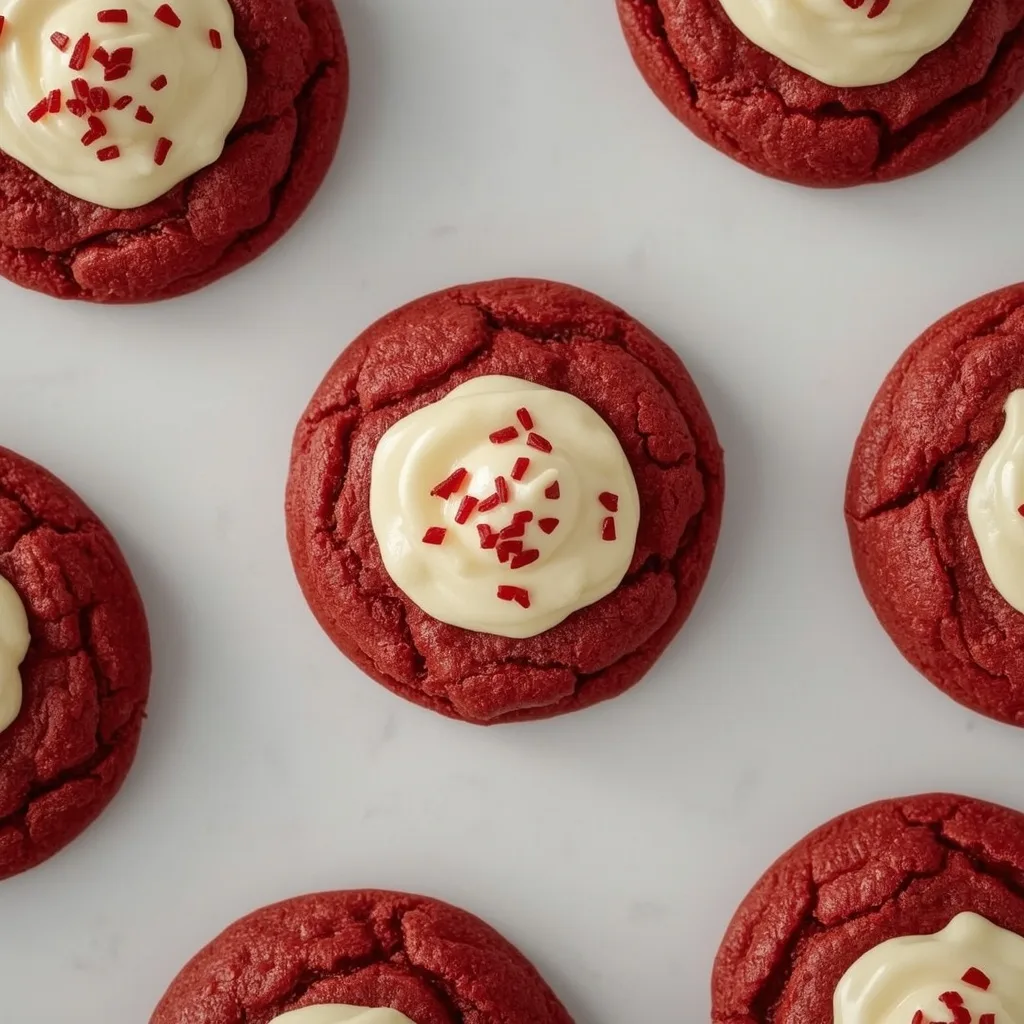
- Stunning presentation — The bright red cookies topped with white frosting look professional with minimal effort.
- Make-ahead friendly — Unfrosted cookies freeze beautifully, so you can bake them days before an event.
Essential Ingredients for This Recipe
Here is everything you need, broken down by category. Most of these are pantry staples you likely already have on hand.
For the Cookies
- Unsalted butter — 1/2 cup, softened to 65-68°F. This gives richness and helps the cookies spread just the right amount.
- Granulated sugar — 1/2 cup for sweetness and light texture.
- Light brown sugar — 1/4 cup packed adds moisture and a subtle caramel depth.
- Large egg — 1, at room temperature so it blends smoothly into the batter.
- Pure vanilla extract — 1 teaspoon for warm flavor.
- White vinegar — 1/2 teaspoon. Sounds odd, but it activates the baking soda for a tender crumb.
- Buttermilk — 1 tablespoon at room temperature gives that signature tangy note.
- Unsweetened cocoa powder — 1 tablespoon, sifted to avoid streaks in the dough.
- All-purpose flour — 1 1/4 cups, spooned and leveled so you do not accidentally pack it.
- Baking soda — 1/2 teaspoon for lift.
- Fine sea salt — 1/4 teaspoon to balance sweetness.
- Red liquid food coloring — 1 tablespoon for that iconic color.
For the Cream Cheese Frosting
- Cream cheese — 4 oz, fully softened to about 70°F. Cold cream cheese will leave lumps.
- Unsalted butter — 1/4 cup softened for a creamy, spreadable frosting.
- Powdered sugar — 1 1/2 cups, sifted to remove clumps.
- Vanilla extract — 1/2 teaspoon for flavor.
- Fine sea salt — A pinch to cut the sweetness.
Useful Equipment
- Stand mixer or hand mixer — Creaming the butter and sugar properly requires steady mixing. A hand mixer works just fine.
- Baking sheets — Two large sheets lined with parchment paper or silicone mats prevent sticking and help cookies brown evenly.
- Cookie scoop — A 1 1/2 tablespoon scoop gives uniform portions, which means even baking.
- Wire cooling rack — Cookies need to cool completely before frosting. A rack speeds that up.
- Rubber spatula — For scraping down the bowl halfway through mixing and for folding ingredients without overworking the dough.
Directions to Make Pioneer Woman Red Velvet Cookies
Follow these steps carefully, especially the chilling and cooling parts. They make the difference between a flat cookie and a perfectly puffy one.
- Preheat and prep — Set your oven to 350°F (177°C) with a rack in the middle. Line two baking sheets with parchment or silicone mats.
- Cream the butter and sugars — In a large bowl, beat the 1/2 cup softened butter, 1/2 cup granulated sugar, and 1/4 cup brown sugar on medium speed for 2 to 3 minutes until light and fluffy. Scrape the bowl halfway through.
- Add wet ingredients — Beat in the egg, vanilla, vinegar, and buttermilk on low speed until just combined, about 30 seconds. Do not overmix here.
- Whisk dry ingredients — In a separate bowl, whisk together the sifted cocoa powder, flour, baking soda, and salt. Sifting the cocoa prevents dark streaks.
- Combine wet and dry — Add the dry mixture to the wet in two additions, mixing on low after each. Add the red food coloring with the second addition. Mix until the dough is uniformly red with no white streaks.
- Chill the dough — Refrigerate the dough for 15 minutes. This solidifies the butter so the cookies do not spread too much.
- Portion the dough — Use a 1 1/2 tablespoon scoop to form 12 equal balls (about 1.5 ounces each). Place 6 balls per sheet, spaced 2 inches apart.
- Bake one sheet at a time — Bake on the middle rack for 9 to 11 minutes. The edges should be set and lightly puffed, but the centers will look slightly soft and underdone. Do not overbake.
- Cool on the sheet — Let the cookies rest on the hot baking sheet for 5 minutes. This firms them up for transfer. Then move them to a wire rack to cool completely — about 30 minutes.
- Make the frosting — Beat the 4 oz softened cream cheese and 1/4 cup softened butter together on medium speed until smooth, about 2 minutes. Scrape the bowl well.
- Finish the frosting — Sift the powdered sugar over the cream cheese mixture, then add the vanilla and pinch of salt. Beat on low until combined, then on medium for 1 minute until fluffy. Do not overbeat or the frosting will thin out.
- Frost the cookies — Once the cookies are fully cool, spread or pipe about 1 heaping tablespoon of frosting onto each one. Serve immediately or refrigerate 15 minutes to set the frosting.
What I Got Wrong (And How I Fixed It)
- Skipping the chill — I baked the dough right away and got flat, spread-out cookies. A 15-minute chill in the fridge solves this completely.
- Overmixing the dough — Beating too long after adding the flour made tough, dense cookies. Mix only until the streaks disappear.
- Using cold cream cheese — The frosting came out lumpy and wouldn’t smooth out. Letting the cream cheese sit at room temperature for a full hour fixed it.
- Baking too long — I waited until the centers looked fully set, and the cookies came out dry. Take them out when the edges are set but the centers still look soft.
- Frosting warm cookies — The frosting melted into a mess. Cooling the cookies completely on a wire rack for 30 minutes is non-negotiable.
Healthier Ways to Make Pioneer Woman Red Velvet Cookies
- Swap half the butter — Use 1/4 cup unsweetened applesauce in place of half the butter to cut fat and add moisture.
- Reduce the sugar — Cut the granulated sugar to 1/3 cup and use 2 tablespoons of brown sugar. The cookies will be slightly less sweet but still tasty.
- Use low-fat cream cheese — Neufchâtel cream cheese works well in the frosting and saves about 15 calories and 2 grams of fat per serving.
- Replace white flour — Substitute half the all-purpose flour with whole wheat pastry flour for extra fiber without a drastic texture change.
- Skip the food coloring — The cookies will be a warm brown instead of bright red, but the flavor stays the same.
Ingredient Substitutions for Pioneer Woman Red Velvet Cookies
- Buttermilk → Milk + lemon juice — Add 1 teaspoon of lemon juice to 1 tablespoon of milk, let it sit 5 minutes. This mimics buttermilk’s acidity perfectly.
- White vinegar → Apple cider vinegar — Same acidity, same effect on the baking soda. No flavor difference in the final cookie.
- Red food coloring → Beet powder — Mix 1 tablespoon beet powder with 1 tablespoon water and add to the wet ingredients. Gives a natural red hue.
- All-purpose flour → Gluten-free 1:1 blend — Works well, but add an extra 2 tablespoons of flour to the dough for structure.
- Powdered sugar → Homemade powdered sugar — Blend 1 1/2 cups granulated sugar with 1 tablespoon cornstarch in a high-speed blender until fine.
- Cream cheese → Mascarpone — Sweeter and less tangy, but still creamy. Use the same amount and reduce the powdered sugar by 1/4 cup.
Unexpected Ways to Enjoy This Pioneer Woman Red Velvet Cookies
- Cookie ice cream sandwiches — Place a scoop of vanilla bean ice cream between two frosted cookies, then freeze for 2 hours.
- Crumbled over cheesecake — Crumble 2 cookies over plain cheesecake slices for a crunchy red velvet topping.
- Frozen yogurt parfait — Layer crumbled cookies with vanilla Greek yogurt and fresh raspberries for a quick dessert.
- Cookie cake base — Press the dough into a 9-inch round pan, bake 15 minutes, cool, and frost for a giant cookie cake.
- Trifle layers — Cube the cookies and layer them in a trifle dish with whipped cream and chocolate pudding for a no-bake dessert.
Best Tips for Pioneer Woman Red Velvet Cookies Success
- Soften butter properly — Leave it on the counter for 30-45 minutes. It should yield when pressed gently but not be melted.
- Use room temperature egg — A cold egg will seize the butter and create a lumpy batter. Submerge it in warm water for 5 minutes to warm it quickly.
- Spoon and level your flour — Scooping directly from the bag packs in up to 25% more flour. Fluff the flour, spoon it into the measuring cup, then level with a knife.
- Chill the dough evenly — Cover the bowl with plastic wrap so the surface does not dry out while it chills.
- Space cookies generously — Two inches of space between each dough ball prevents them from merging into one giant cookie.
- Cool cookies completely before frosting — Warm cookies will melt the cream cheese frosting into a thin glaze. Give them the full 30 minutes on a rack.
- Store frosted cookies in the fridge — The cream cheese frosting needs refrigeration. Let them sit at room temperature for 15 minutes before serving for the best texture.
Tasty Twists on Pioneer Woman Red Velvet Cookies
- White chocolate chip version — Fold 1/2 cup white chocolate chips into the dough before chilling. The sweet chips contrast nicely with the cocoa.
- Mint red velvet cookies — Add 1/4 teaspoon peppermint extract to the dough and top with crushed candy canes before frosting sets.
- Nutella-stuffed cookies — Freeze 12 half-teaspoon dollops of Nutella. Flatten each dough ball, place a frozen Nutella dollop in the center, and seal the dough around it before baking.
- Lemon cream cheese variation — Add 1 teaspoon lemon zest and 1/2 teaspoon lemon extract to the cream cheese frosting for a bright citrus twist.
- Chocolate drizzle finish — After frosting, drizzle melted dark chocolate over the top and let it set at room temperature for 10 minutes.
Best Ways to Store Your Pioneer Woman Red Velvet Cookies
- Room temperature (unfrosted) — Keep unfrosted cookies in an airtight container at room temperature for up to 3 days. Place a piece of bread in the container to maintain softness.
- Refrigerator (frosted) — Arrange frosted cookies in a single layer in an airtight container, separating layers with parchment paper. Refrigerate for up to 3 days.
- Freezer (unfrosted) — Place cooled, unfrosted cookies in a single layer in a zip-top freezer bag. Remove as much air as possible. Freeze for up to 3 months.
- Freezer (frosted) — Flash-freeze frosted cookies on a baking sheet for 30 minutes, then transfer to an airtight container with parchment between layers. Freeze for up to 2 months.
- Thawing frozen cookies — For unfrosted cookies, thaw at room temperature for 30 minutes before frosting. For frosted cookies, thaw in the refrigerator overnight, then let sit at room temperature for 15 minutes.
Ways to Warm It Up Again
- Oven method (unfrosted only) — Place the cookie on a baking sheet and warm in a 300°F oven for 3-4 minutes. This restores the chewy texture without drying it out.
- Microwave (unfrosted only) — Heat on a microwave-safe plate for 8-10 seconds on medium power. Any longer and the cookie will turn tough.
- Air fryer (unfrosted only) — Set the air fryer to 300°F and warm the cookie for 2 minutes. The outside will crisp slightly while the inside stays soft.
- Do not microwave frosted cookies — The cream cheese frosting will melt and slide off. If you want a warm cookie, remove the frosting first and re-add after microwaving.
Nutritional Breakdown (per serving)
Based on 1 serving = 1 portion out of 4 total
- Calories — 465
- Protein — 6g
- Fat — 21g
- Carbohydrates — 66g
- Fiber — 1g
- Sugar — 42g
- Sodium — about 260mg
Try These Recipes
Wrapping It Up
These Pioneer Woman Red Velvet Cookies deliver everything you love about the classic cake in a fraction of the time. The soft, chewy cookie paired with tangy cream cheese frosting is a combination that never gets old.
Give this recipe a try for your next holiday gathering or just a weekend treat. Once you see how easy they are, you will be making them on repeat.
PrintPioneer Woman Red Velvet Cookies

These Red Velvet Cookies are a delightful twist on the classic cake, offering a soft and chewy texture with a rich, buttery cocoa flavor and a hint of buttermilk tang. Topped with a creamy, tangy cream cheese frosting, they are perfect for holidays or any occasion that calls for a showstopping treat.
- Prep Time: 25
- Cook Time: 10
- Total Time: 35
- Yield: 4 1x
- Category: Dessert
- Method: Baking
- Cuisine: American
Ingredients
- For the cookies:
- 1/2 cup unsalted butter, softened to room temperature (65-68°F)
- 1/2 cup granulated sugar
- 1/4 cup packed light brown sugar
- 1 large egg, at room temperature
- 1 teaspoon pure vanilla extract
- 1/2 teaspoon white vinegar
- 1 tablespoon buttermilk, at room temperature
- 1 tablespoon unsweetened cocoa powder, sifted
- 1 1/4 cups all-purpose flour, spooned and leveled
- 1/2 teaspoon baking soda
- 1/4 teaspoon fine sea salt
- 1 tablespoon red liquid food coloring
- For the cream cheese frosting:
- 4 oz cream cheese, fully softened to room temperature (about 70°F)
- 1/4 cup unsalted butter, softened
- 1 1/2 cups powdered sugar, sifted
- 1/2 teaspoon vanilla extract
- Pinch of fine sea salt
Instructions
- Preheat your oven to 350°F (177°C) with a rack in the middle position. Line two large baking sheets with parchment paper or silicone baking mats to prevent sticking and promote even browning.
- In a large bowl, use a hand mixer or stand mixer fitted with the paddle attachment to cream together the 1/2 cup softened butter, granulated sugar, and brown sugar on medium speed for 2 to 3 minutes, until light and fluffy. Scrape down the sides of the bowl with a rubber spatula halfway through to ensure even mixing.
- Add the egg, vanilla extract, white vinegar, and buttermilk to the butter-sugar mixture. Beat on low speed until just combined, about 30 seconds. The vinegar helps activate the baking soda for a tender crumb, but don’t overmix or the cookies will be tough.
- In a separate medium bowl, whisk together the sifted cocoa powder, all-purpose flour, baking soda, and fine sea salt until evenly distributed. Sifting the cocoa ensures no lumps remain, which would create dark streaks in the red batter.
- Add the dry ingredients to the wet mixture in two additions, mixing on low speed after each until just incorporated. Add the red food coloring with the second addition. Mix until the dough is uniformly bright red with no white streaks, scraping the bowl once more. Do not overmix.
- Chill the dough in the refrigerator for 15 minutes. This step solidifies the butter slightly, preventing excessive spreading and yielding thicker, chewier cookies.
- Using a 1 1/2 tablespoon cookie scoop or a spoon, portion the dough into 12 equal balls (about 1.5 ounces each). Place six dough balls on each prepared baking sheet, spacing them at least 2 inches apart to allow for spreading.
- Bake one sheet at a time on the middle rack for 9 to 11 minutes. The cookies are done when the edges are set and lightly puffed, but the centers still look slightly soft and underdone. Do not overbake; they will continue to set on the hot sheet.
- Remove the baking sheet from the oven and let the cookies cool on the sheet for 5 minutes. This allows them to firm up enough to transfer without breaking. Then move them to a wire rack to cool completely before frosting—about 30 minutes.
- While the cookies cool, make the frosting: In a medium bowl, beat the 4 oz softened cream cheese and 1/4 cup softened butter together on medium speed until smooth and creamy, about 2 minutes. Scrape the bowl well.
- Sift the powdered sugar directly over the cream cheese mixture to avoid lumps. Add the 1/2 teaspoon vanilla and pinch of salt. Beat on low speed until combined, then increase to medium and beat for 1 minute until fluffy. Do not overbeat or the frosting will thin out.
- Once the cookies are fully cool, spread or pipe about 1 heaping tablespoon (approximately 1 ounce) of cream cheese frosting onto each cookie. Serve immediately or refrigerate for 15 minutes to set the frosting for a cleaner presentation.
Notes
Store frosted cookies in an airtight container in the refrigerator for up to 3 days. Bring to room temperature for 15 minutes before serving for the best texture. Unfrosted cookies can be frozen in a zip-top freezer bag for up to 3 months; thaw at room temperature before frosting. To reheat, warm an unfrosted cookie in a 300°F oven for 3-4 minutes, but do not microwave as it will ruin the texture.
Nutrition
- Calories: 465
- Sugar: 42g
- Sodium: 260mg
- Unsaturated Fat: 12g
- Carbohydrates: 66g
- Fiber: 1g
- Protein: 6g
- Cholesterol: 95mg
Keywords: red velvet cookies, red velvet dessert, cream cheese cookies, soft batch cookies, holiday baking, cookie recipe, buttermilk cookies, chocolate cookies, pioneer woman recipe, homemade cookies