

 Anabelle
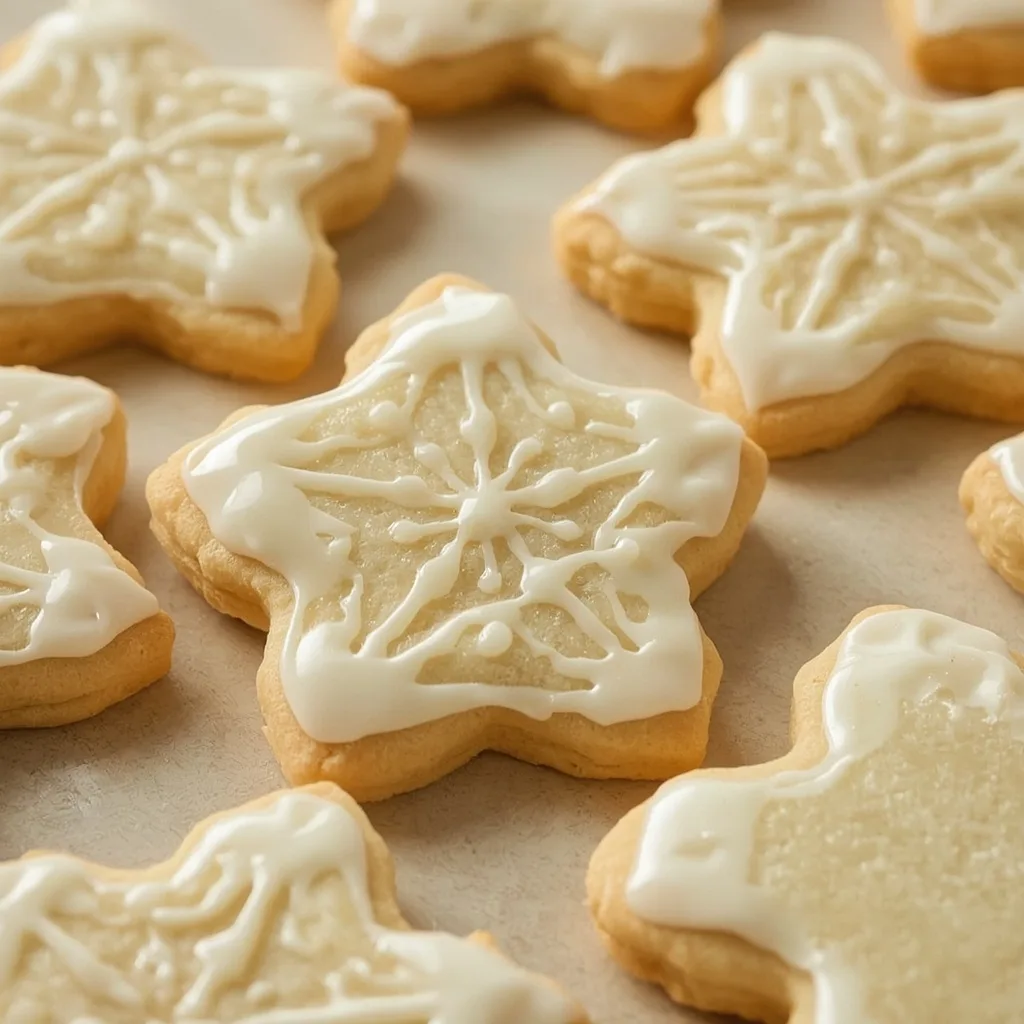
 Pioneer Woman Cut-Out Cookies are my go-to sugar cookies for any holiday that requires a cookie cutter. They bake up tender and buttery, with a clean edge that holds whatever shape you choose, and a simple vanilla flavor that pairs perfectly with sweet royal icing.
The process takes about 2.5 hours total, with most of that being chill time, making it a beginner-friendly project. You will need to plan ahead for the two-hour dough rest, but the active work is straightforward, and the results are always picture-perfect.
A Quick Glimpse at Pioneer Woman Cut-Out Cookies
These are classic sugar cookies made with butter, vanilla, and a touch of baking powder for lift. The dough is rolled thin, stamped into shapes, and baked until the edges just barely turn golden. The texture is tender and slightly crumbly, not cakey, with a clean bite that makes decorating easy. They are ideal for Christmas, Halloween, birthdays, or any occasion that calls for decorated cookies.
Why This Recipe is Worth Trying
- Perfect shape retention — The dough chills for two hours, which solidifies the butter and prevents spreading during baking, so your stars, trees, or hearts come out with sharp, clean edges.
- Tender, not tough — The instructions warn against overmixing the dough, which keeps gluten development low and results in a delicate crumb that melts in your mouth.
- Simple royal icing — You get a glossy, hard-finish icing that sets firm in about an hour, making stacking and storing easy without smudging your decorations.
- Customizable for any holiday — The basic dough and icing accept any cookie cutter shape, gel food coloring, and sprinkle combination, so one recipe covers every celebration.
Essential Ingredients for This Recipe
All twelve ingredients are pantry staples, but a few need attention to temperature and freshness.
Cookie Dough Base
- Unsalted butter, softened — 1 cup (2 sticks), softened to 65-68°F. This gives the cookies richness and helps them spread just the right amount during baking. Use unsalted so you control the salt level.
- Granulated sugar — 1 cup for sweetness and structure. It also helps the cookies brown lightly at the edges.
- Large egg — 1 egg, room temperature, for binding the dough. Cold egg can seize the butter and create lumps.
- Pure vanilla extract — 1½ teaspoons for warm vanilla flavor. Imitation vanilla works in a pinch, but pure vanilla gives a cleaner taste.
- Fine sea salt — ½ teaspoon to balance sweetness and enhance the butter flavor.
- Baking powder — ½ teaspoon for a subtle lift. This keeps the cookies from being too dense, but too much will cause puffing and loss of shape.
- All-purpose flour — 2¾ cups, plus extra for dusting the work surface. Spoon and level the flour for accurate measurement — scooping packs it too dense.
Royal Icing
- Confectioners’ sugar, sifted — 2 cups for a smooth, lump-free icing base. Sifting is critical — unsifted sugar leaves gritty spots.
- Egg whites or meringue powder — 2 large egg whites or 4 teaspoons meringue powder mixed with ¼ cup water. This gives the icing its structure and glossy finish.
- Fresh lemon juice — 1 teaspoon to stabilize the icing and add a faint tang that cuts the sweetness.
- Gel food coloring — Use as desired. Gel colors are concentrated and won’t thin the icing like liquid ones do.
- Sprinkles, sanding sugar, or nonpareils — For decorating the wet icing before it sets.
Useful Equipment
- Stand mixer with paddle attachment — Makes creaming the butter and sugar easy and consistent. A hand mixer works too, but expect longer mixing times.
- Silicone spatula — Essential for scraping down the bowl during creaming and folding the dough at the end without overmixing.
- Rolling pin with ¼-inch rings — This ensures the dough is rolled to an even thickness, which means all cookies bake uniformly. If you do not have rings, use two wooden dowels of the same depth as guides.
- Cookie cutters — Metal cutters with sharp edges cut cleanly through the dough. Plastic ones work but may drag the edges.
- Parchment paper — Lines the baking sheets and prevents sticking. It also makes transferring the cut cookies easier and cleanup quicker.
Directions to Make Pioneer Woman Cut-Out Cookies
These fourteen steps walk you through the entire process from dough to decorated cookies. Follow the times and temperatures closely for the best results.
- Cream the butter and sugar — Beat on medium speed (speed 4 on a KitchenAid) for 3-4 minutes until light and fluffy. Scrape the bowl halfway through. The mixture should look pale yellow and increased in volume.
- Add the egg and vanilla — Beat on medium speed until fully incorporated, about 30 seconds. The mixture may look slightly curdled — that is normal and will smooth out when you add the dry ingredients.
- Whisk the dry ingredients — In a separate bowl, whisk together the flour, salt, and baking powder until evenly combined. This distributes the leavening and prevents bitter pockets of baking powder.
- Combine wet and dry — With the mixer on low speed (speed 2), add the flour mixture in three additions. Mix just until the dough comes together and forms a cohesive ball. Stop as soon as the flour disappears — overworking develops gluten and makes tough cookies.
- Shape and chill the dough — Turn the dough out onto a lightly floured surface and divide it in half. Flatten each half into a ½-inch-thick disk, wrap tightly in plastic wrap, and refrigerate for at least 2 hours, or up to 3 days. Chilling solidifies the butter, which prevents spreading during baking and keeps sharp edges intact.
- Preheat and prepare sheets — Preheat the oven to 350°F (177°C). Position racks in the upper and lower thirds. Line two large baking sheets with parchment paper. If using non-insulated sheets, stack two together to prevent the cookie bottoms from over-browning.
- Roll the dough — Remove one disk of chilled dough and let it sit at room temperature for 5 minutes until just pliable. On a lightly floured surface, roll it to an even ¼-inch thickness. Use a rolling pin with rings or two wooden dowels as guides.
- Cut the shapes — Use floured cookie cutters to stamp out shapes as close together as possible to minimize scraps. Use a thin metal spatula to transfer the cut shapes to the prepared baking sheets, spacing them about 1½ inches apart.
- Re-roll scraps — Gather the remaining dough scraps into a ball, re-roll, and cut additional shapes. Discard dough after the second re-roll to avoid overworked, tough cookies. Repeat with the second chilled disk of dough.
- Bake the cookies — Bake for 8-10 minutes, rotating the sheets front to back and between racks halfway through. The edges should be just barely golden and the surfaces should look dry, not glossy. The centers should remain pale and set. Overbaking results in dry, hard cookies.
- Cool the cookies — Let them cool on the baking sheets for 5 minutes, then transfer them to a wire rack to cool completely — at least 30 minutes. Any warmth will cause the royal icing to run and become translucent.
- Prepare the royal icing — In a medium bowl, whisk together the sifted confectioners’ sugar, egg whites (or meringue powder mixture), and fresh lemon juice until smooth and thick. The icing should hold a ribbon when drizzled from a spoon. If too thick, add water a few drops at a time; if too thin, add more sifted confectioners’ sugar by the teaspoon. Divide and tint with gel food coloring if desired.
- Pipe and flood the cookies — Transfer the icing to a piping bag fitted with a small round tip (size 2 or 3), or use a small squeeze bottle. Pipe the outline of each cookie, then flood the interior with a slightly thinned version of the same icing (add water ½ teaspoon at a time until it flows like honey). Use a toothpick to guide the icing into corners and pop any air bubbles.
- Decorate and set — Immediately sprinkle with decorations while the icing is still wet. Let the decorated cookies sit at room temperature, uncovered, for at least 1 hour, or until the icing is completely hardened to a matte, firm finish. Do not stack until fully dry.

What I Got Wrong (And How I Fixed It)
- Overbaking the cookies — I used to leave them in the full 10 minutes every time, and they came out dry and hard. Now I check at 8 minutes, rotate the sheets, and pull them the moment the edges show the faintest gold. The centers should still look pale and feel slightly soft.
- Skipping the flour whisking — I thought just dumping the dry ingredients into the mixer was fine. The first batch had small spots of pure baking powder that tasted bitter. Whisking the salt and baking powder into the flour before adding prevents this entirely.
- Icing that was too thin — I added too much water trying to make the royal icing flow easily. It ran off the edges of every cookie and would not set into a hard finish. Adding sifted confectioners’ sugar by the teaspoon thickened it back to the right consistency.
- Rolling the dough unevenly — Without measuring the thickness, some cookies were thin and crispy while others were thick and doughy in the center. Using a rolling pin with ¼-inch rings solved this immediately. Now every cookie bakes at the same rate.
- Not chilling the dough long enough — I rushed it one time and chilled only 45 minutes. The cookies spread into blobs and lost all their shape. The full 2-hour chill is non-negotiable — it solidifies the butter and prevents spreading.
Healthier Ways to Make Pioneer Woman Cut-Out Cookies
- Reduce the sugar — Cut the granulated sugar to ¾ cup for a less sweet cookie. The texture will still be tender, but the cookies will brown a bit faster, so watch the bake time closely.
- Swap butter for a plant-based stick — Use a vegan butter stick that contains at least 80% fat. This works one-for-one and lowers the saturated fat content without sacrificing shape retention.
- Use white whole wheat flour — Replace half the all-purpose flour with white whole wheat flour. This adds about 2 grams of fiber per serving and gives a slightly nuttier flavor without making the cookies dense.
- Cut the royal icing sugar — Reduce the confectioners’ sugar to 1½ cups and increase the meringue powder by 1 teaspoon. The icing will still set hard but with less total sugar per cookie.
Ingredient Substitutions for Pioneer Woman Cut-Out Cookies
- Butter → coconut oil (solid) — Use equal amounts of solid coconut oil, but expect a slightly different texture and a faint coconut flavor. Chill the dough an extra 30 minutes for best results.
- Egg → ¼ cup unsweetened applesauce — This works for binding but will make the cookies slightly softer and less crisp around the edges. Add ½ teaspoon more baking powder to help with lift.
- Vanilla extract → almond extract — Use ½ teaspoon almond extract for a nutty, floral flavor that pairs well with royal icing. Almond extract is much stronger, so do not use the full 1½ teaspoons.
- All-purpose flour → gluten-free baking flour — Use a 1:1 gluten-free baking blend that contains xanthan gum. The dough will be more crumbly to handle, so roll it between two sheets of parchment paper instead of on a floured surface.
- Egg whites (icing) → meringue powder + water — Use 4 teaspoons meringue powder mixed with ¼ cup water as a safe alternative to raw egg whites. The icing sets just as hard and glossy.
Unexpected Ways to Enjoy This Pioneer Woman Cut-Out Cookies
- Ice cream sandwich base — Bake the cookies slightly thinner (⅛-inch) and use two of them to sandwich a scoop of vanilla or chocolate ice cream. Roll the edges in sprinkles for a fun twist.
- Crumb crust for cheesecake — Crush leftover cookies into fine crumbs and mix with melted butter to form a crust for a no-bake cheesecake or a fruit tart.
- Cookie butter spread — Pulse cooled, undecorated cookies in a food processor until finely ground, then blend with a few tablespoons of melted butter and a splash of milk until it forms a spreadable consistency. Use it on toast or waffles.
- Milkshake add-in — Drop a handful of broken cookies into a vanilla milkshake and blend briefly for chunks of buttery cookies throughout. Top with whipped cream.
Best Tips for Pioneer Woman Cut-Out Cookies Success
- Weigh your flour — 344 grams is exact. Scooping with a measuring cup can add up to 50 extra grams, which makes the dough dry and crumbly. A kitchen scale is the most reliable tool here.
- Chill the dough for the full 2 hours — Less time means the butter stays soft and the cookies spread during baking. The sharper your cookie cutter shape, the more critical this is.
- Roll between parchment sheets — If your kitchen is warm or humid, place the dough between two sheets of parchment before rolling. This prevents sticking without adding extra flour, which can dry out the dough.
- Use a toothpick to pop icing bubbles — After flooding the interior, small air bubbles often appear. A quick poke with a toothpick releases them and leaves a smooth, professional finish.
- Let the first batch cool completely before decorating — Any residual warmth on the cookie surface will thin the royal icing and cause it to run off the edges. Patience here saves you a messy redo.
- Store undecorated cookies in the freezer — Baked, undecorated cookies freeze well for up to 2 months. Pull them out as needed and decorate fresh for holiday gatherings without the last-minute bake rush.
- Do not re-roll the dough more than twice — Each re-roll develops more gluten, which leads to tough, dense cookies. After the second re-roll, discard any remaining scraps or bake them as “cooky bits” for snacking.
Tasty Twists on Pioneer Woman Cut-Out Cookies
- Lemon zest twist — Add the zest of one lemon to the butter and sugar mixture during creaming. The citrus brightens the vanilla flavor and works beautifully with a simple lemon royal icing.
- Chocolate dipped edges — Skip the royal icing entirely and dip half of each cooled cookie into melted dark chocolate. Let the chocolate set on parchment for a quick, elegant finish.
- Spiced winter version — Add 1 teaspoon ground cinnamon, ½ teaspoon ground ginger, and ¼ teaspoon ground nutmeg to the dry ingredients. These pair well with a cream cheese glaze instead of royal icing.
- Matcha green tea variation — Replace 2 tablespoons of the flour with matcha powder. The cookies will turn a soft green and have a subtle earthy flavor that balances the sweetness of the icing.
- Salted caramel drizzle — Bake the cookies plain, then drizzle with a simple caramel sauce and a flaky sea salt finish. No icing needed, and the salty-sweet combination is addictive.
Best Ways to Store Your Pioneer Woman Cut-Out Cookies
- Room temperature in an airtight container — Place completely dried, decorated or undecorated cookies in a single layer in an airtight container. Separate layers with parchment or wax paper. They stay fresh for up to 1 week.
- Freeze unbaked dough disks — Wrap each disk tightly in plastic wrap, then in foil, and freeze for up to 3 months. Thaw in the refrigerator overnight before rolling and cutting.
- Freeze baked, undecorated cookies — Stack them in an airtight container between layers of parchment and freeze for up to 2 months. Thaw at room temperature for 1 hour before icing.
- Do not freeze decorated cookies — Royal icing softens and becomes sticky upon thawing, ruining the decorative finish. Only freeze undecorated cookies.
Ways to Warm It Up Again
- Oven method — Place undecorated cookies on a baking sheet and warm in a 300°F (150°C) oven for 3-5 minutes. Watch closely — they heat fast and can brown further. This method restores the freshly baked texture.
- Microwave method — Heat a single undecorated cookie on a microwave-safe plate for 8-10 seconds. This softens it slightly but will not crisp the edges. Do not use this method for iced cookies.
- Air fryer method — Place a few undecorated cookies in the air fryer basket at 300°F (150°C) for 2-3 minutes. Check at 2 minutes to avoid over-browning. Works best for cookies that have lost their initial crispness.
- Room temperature method — For iced cookies, simply let them sit at room temperature for 10-15 minutes. The icing stays firm while the cookie softens slightly from the ambient heat.
Nutritional Breakdown (per serving)
Based on 1 serving = 1 portion out of 4 total.
- Calories — 612
- Protein — about 8.3 grams
- Fat — 24.5 grams
- Carbohydrates — around 91 grams
- Fiber — 1.1 grams
- Sugar — roughly 50.5 grams
- Sodium — 289 milligrams
Try These Recipes
Wrapping It Up
Pioneer Woman Cut-Out Cookies deliver exactly what a decorated sugar cookie should — a buttery, tender base that holds its shape and a glossy icing that sets hard enough to stack. The process is straightforward once you respect the chill time and the icing consistency. Grab your favorite cookie cutters, a bottle of sprinkles, and give this recipe a try for your next holiday gathering. You will have perfect, professional-looking cookies that taste just as good as they look.
PrintPioneer Woman Cut-Out Cookies

These buttery, vanilla-scented cut-out cookies hold their shape perfectly during baking, with a tender crumb that melts in your mouth. The simple royal icing sets to a glossy, hard finish, making them ideal for decorating with sprinkles or colored sugar for any holiday or occasion.
- Prep Time: 30
- Cook Time: 10
- Total Time: 155
- Yield: 4 1x
- Category: Dessert
- Method: Baking
- Cuisine: American
Ingredients
- 1 cup (2 sticks / 227 g) unsalted butter, softened to room temperature (65-68°F / 18-20°C)
- 1 cup (200 g) granulated sugar
- 1 large egg (50 g), room temperature
- 1 1/2 teaspoons (7 ml) pure vanilla extract
- 1/2 teaspoon (3 g) fine sea salt
- 1/2 teaspoon (2 g) baking powder
- 2 3/4 cups (344 g) all-purpose flour, plus more for dusting
- For royal icing: 2 cups (240 g) confectioners’ sugar, sifted
- For royal icing: 2 large egg whites (60 g) or 4 teaspoons (20 ml) meringue powder mixed with 1/4 cup (60 ml) water
- For royal icing: 1 teaspoon (5 ml) fresh lemon juice
- For royal icing: gel food coloring (optional), as needed
- For decorating: sprinkles, sanding sugar, or nonpareils, as desired
Instructions
- In the bowl of a stand mixer fitted with the paddle attachment, beat the softened unsalted butter and granulated sugar on medium speed (speed 4 on KitchenAid) until light and fluffy, about 3-4 minutes. Scrape down the sides and bottom of the bowl with a silicone spatula halfway through; the mixture should look pale yellow and increased in volume.
- Add the room-temperature egg and pure vanilla extract, then beat on medium speed until fully incorporated, about 30 seconds. The mixture may look slightly curdled at this point, but that’s fine — it will come together once the dry ingredients are added.
- In a separate medium bowl, whisk together the fine sea salt, baking powder, and all-purpose flour until evenly combined. This ensures the leavening is distributed throughout the flour, preventing bitter pockets of baking powder in the baked cookies.
- With the mixer on low speed (speed 2), gradually add the flour mixture in three additions, mixing just until the dough comes together and starts to form a cohesive ball. Stop mixing as soon as the flour disappears — overworking the dough will develop gluten and result in tough, dense cookies.
- Turn the dough out onto a lightly floured surface and divide it in half. Flatten each half into a 1/2-inch-thick disk (this helps it chill evenly and roll out faster), wrap tightly in plastic wrap, and refrigerate for at least 2 hours, or up to 3 days. Chilling solidifies the butter, which prevents the cookies from spreading during baking and keeps their sharp edges intact.
- When ready to bake, preheat the oven to 350°F (177°C) and position racks in the upper and lower thirds. Line two large baking sheets (preferably insulated or heavy-gauge aluminum) with parchment paper; if using non-insulated sheets, stack two sheets together to prevent the cookie bottoms from over-browning.
- Remove one disk of chilled dough from the refrigerator and let it sit at room temperature for 5 minutes, until just pliable enough to roll without cracking. On a lightly floured surface, roll the dough to an even 1/4-inch thickness, using a rolling pin with 1/4-inch rings or measuring the thickness with two wooden dowels of the same depth on either side of the dough.
- Using floured cookie cutters of your choice, stamp out shapes as closely together as possible to minimize scraps. Use a thin metal spatula to transfer the cut shapes to the prepared baking sheets, spacing them about 1 1/2 inches apart — they will not spread much, but air circulation ensures even browning.
- Gather the remaining dough scraps into a ball, re-roll, and cut additional shapes. Discard dough after the second re-roll to avoid overworked, tough cookies. Repeat with the second chilled disk of dough.
- Bake the cookies for 8-10 minutes, rotating the sheets front to back and between racks halfway through, until the edges are just barely golden and the surfaces look dry, not glossy. The centers should remain pale and set; a slight indent when pressed gently with a fingertip indicates they are done. Overbaking will result in dry, hard cookies.
- Let the cookies cool on the baking sheets for 5 minutes, then transfer them to a wire rack to cool completely — at least 30 minutes. This resting period allows the structure to firm up before icing; any warmth will cause the royal icing to run and become translucent.
- While the cookies cool, prepare the royal icing: In a medium bowl, whisk together the sifted confectioners’ sugar, egg whites (or meringue powder mixture), and fresh lemon juice until smooth and thick. The icing should hold a ribbon when drizzled from a spoon; if too thick, add water a few drops at a time; if too thin, add more sifted confectioners’ sugar by the teaspoon until you reach a consistency that holds its shape for piping but settles into a flat surface. Divide and tint with gel food coloring if desired.
- Transfer the icing to a piping bag fitted with a small round tip (size 2 or 3), or use a small squeeze bottle. Pipe the outline of each cookie, then flood the interior with a slightly thinned version of the same icing (add water 1/2 teaspoon at a time until it flows like honey). Use a toothpick to guide the icing into corners and to pop any air bubbles.
- Immediately sprinkle with decorations while the icing is still wet. Let the decorated cookies sit at room temperature, uncovered, for at least 1 hour, or until the icing is completely hardened to a matte, firm finish. Do not stack until fully dry, and store in a single layer in an airtight container at room temperature for up to 1 week.
Notes
Storage: Place completely dry, undecorated or decorated cookies in a single layer in an airtight container at room temperature for up to 1 week. Separate layers with parchment or wax paper. Freezing: Unbaked cookie dough disks wrapped tightly in plastic and then foil will keep for up to 3 months. Thaw in the refrigerator overnight before rolling and cutting. Baked, undecorated cookies can be frozen in airtight containers between layers of parchment for up to 2 months — thaw at room temperature for 1 hour before icing. Do not freeze decorated cookies, as the icing may soften and become sticky upon thawing. Royal icing can be made ahead and stored in an airtight container in the refrigerator for up to 3 days; stir well and adjust consistency with a few drops of water or additional confectioners’ sugar before using.
Nutrition
- Calories: 612
- Sugar: 50.5g
- Sodium: 289mg
- Unsaturated Fat: 14.7g
- Carbohydrates: 91g
- Fiber: 1.1g
- Protein: 8.3g
- Cholesterol: 102mg
Keywords: Pioneer Woman cut-out cookies, sugar cookies, rolled cookies, decorated cookies, vanilla cookies, butter cookies, holiday cookies, Christmas cookies, cut-out cookies recipe, soft sugar cookies, royal icing cookies, baking with kids