 Anabelle
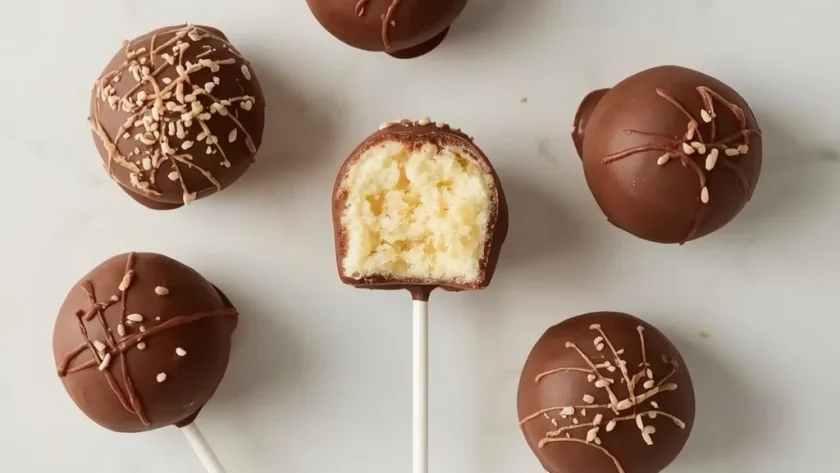
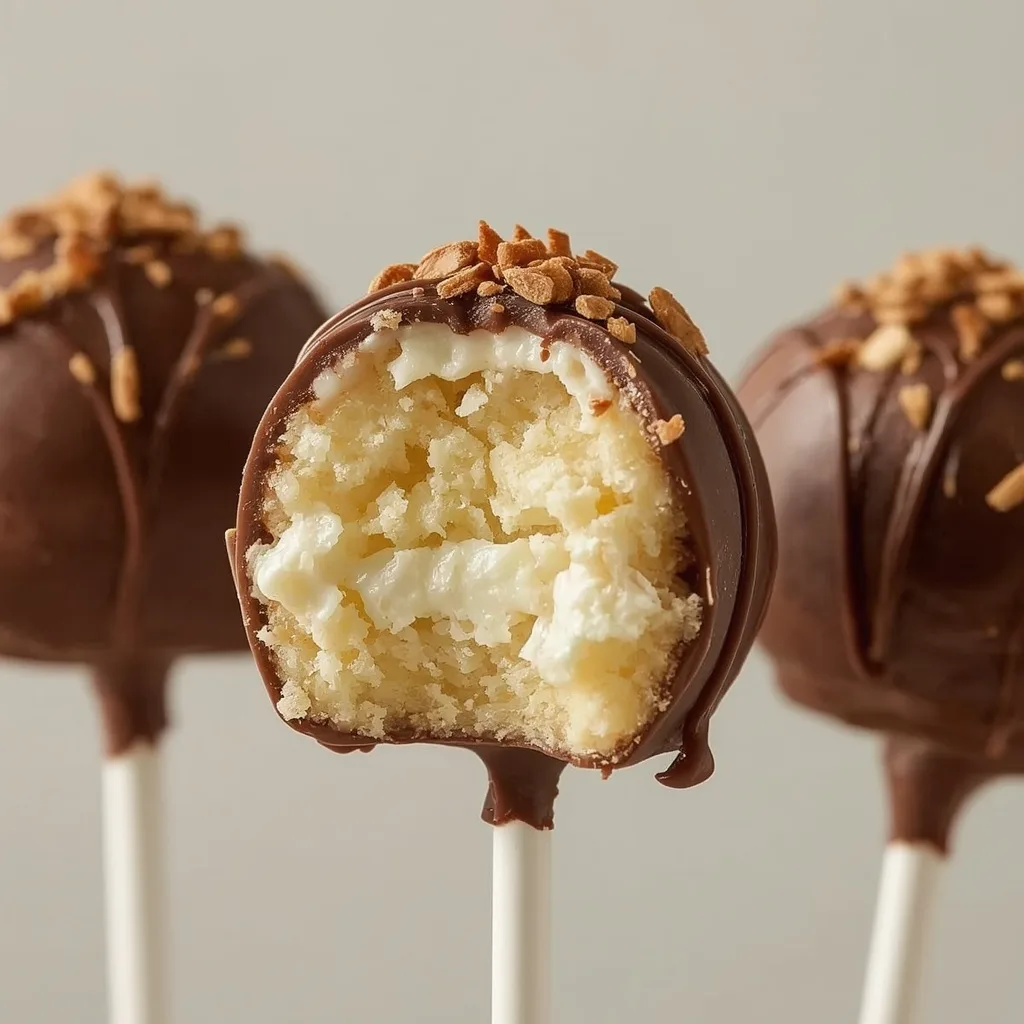
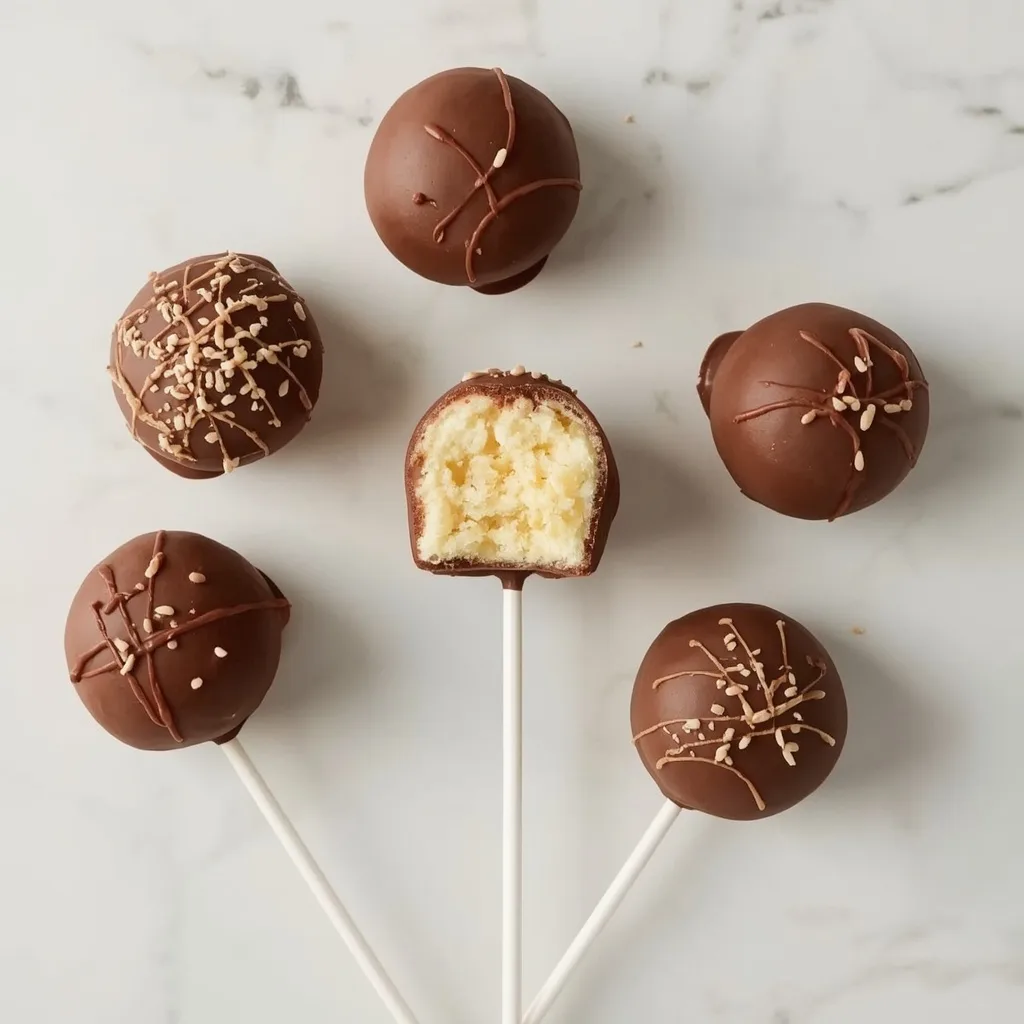
 These Pioneer Woman cake pops are a fun and decadent treat made with moist vanilla cake, creamy frosting, and a crisp chocolate coating. Each bite-sized pop is rich, tender, and perfectly sweet, making them ideal for parties or gifting.
From start to finish, you are looking at about 1 hour and 55 minutes of total time, including chilling. This is a beginner-friendly recipe, though the dipping and coating step requires a bit of patience — the chocolate can thicken fast if you are not careful.
A Quick Glimpse at Pioneer Woman Cake Pops
At its simplest, this is a vanilla cake that gets crumbled, mixed with cream cheese frosting, rolled into balls, and then dipped in melted chocolate. The inside stays soft and tender while the outside turns crisp and glossy. The pops are perfect for birthday parties, holiday trays, or any gathering where you want a dessert that stands out.
Why This Recipe is Worth Trying
Here is what makes these cake pops a project worth taking on.
- Moist texture every time — The combination of whole milk and vegetable oil keeps the cake crumb tender, and the cream cheese frosting binds everything without making it soggy.
- No special tools needed — You do not need a cake pop maker or any fancy equipment. Just a standard 8×8-inch pan, a microwave-safe bowl, and some lollipop sticks.
- Customizable from start to finish — You can swap the vanilla cake for chocolate or lemon, change the frosting flavor, and top with any sprinkles or decorations you like.
- Great for make-ahead planning — The chilled cake balls can sit in the fridge for up to a day before you dip them, which makes party prep much smoother.
- Portion control built right in — Each pop is a single serving, so guests can grab one without cutting or scooping. That makes them ideal for buffets or dessert tables.
Essential Ingredients for This Recipe
You only need 13 ingredients for these cake pops, and most are pantry staples. Let me walk through each one.
The Cake Base
- 1 cup all-purpose flour (4.25 oz / 120g) — Provides the structure. Spoon and level it into your measuring cup for accuracy, do not scoop directly from the bag.
- 1/2 cup granulated sugar (3.5 oz / 100g) — Sweetens the cake and helps with browning. Standard white sugar works best here.
- 1/2 teaspoon baking powder — Gives the cake its rise. Make sure it is fresh, otherwise the cake will be dense.
- 1/4 teaspoon baking soda — Works with the acid in the recipe to create a lighter crumb. Do not skip it.
- 1/4 teaspoon kosher salt — Balances the sweetness and enhances the vanilla flavor. If using fine table salt, use half that amount.
- 1 large egg, room temperature — Binds the batter and adds richness. Let it sit out for 15 minutes before using.
- 1/4 cup whole milk (2 oz / 60ml) — Adds moisture. Whole milk gives the best texture, but 2% works in a pinch.
- 1/4 cup vegetable oil (2 oz / 60ml) — Keeps the cake tender and moist, even after it is crumbled and re-rolled. Canola or avocado oil both work well.
- 1/2 teaspoon vanilla extract — Pure vanilla adds a clean, sweet flavor. Avoid imitation vanilla if possible.
The Filling and Coating
- 1/4 cup cream cheese frosting (store-bought or homemade) — This binds the crumbled cake into a cohesive dough. Store-bought is perfectly fine, just use the standard kind, not the whipped version.
- 8 oz semisweet chocolate chips (about 1 1/3 cups) — Creates the crisp outer shell. You can use milk or dark chocolate if you prefer.
- 1 tablespoon coconut oil or vegetable shortening — Thins the melted chocolate so it coats smoothly and sets with a glossy finish. Do not skip this.
For Presentation
- 4 lollipop sticks (if needed for presentation) — These are optional but make the cake pops look professional. If you skip them, you can serve the cake balls as truffles instead.
Useful Equipment
You likely have most of these tools already. Here is what you need.
- 8×8-inch baking pan — A standard square pan works perfectly for this amount of batter. Line it with parchment for easy removal.
- Microwave-safe bowl — For melting the chocolate and coconut oil together. Glass or ceramic both work.
- Baking sheet lined with parchment paper — Holds the rolled cake balls during chilling and the finished pops while the coating sets.
- Lollipop sticks (4 count) — Optional but recommended for the classic cake pop look. You can find them at craft stores or online.
- Wire rack — Lets the baked cake cool evenly before you crumble it. A flat plate works in a pinch.
Directions to Make Pioneer Woman Cake Pops
Follow these steps in order, and you will have perfect cake pops every time.
- Preheat and prepare the pan — Set your oven to 350°F (177°C). Grease an 8×8-inch pan or line it with parchment paper. Whisk the flour, sugar, baking powder, baking soda, and salt together in a medium bowl until evenly combined.
- Mix the wet ingredients — In a separate small bowl, whisk the egg, milk, vegetable oil, and vanilla extract until smooth. Pour these into the dry ingredients and stir with a spatula until just combined. A few small lumps are fine, do not overmix.
- Bake until golden — Pour the batter into the prepared pan and spread it evenly. Bake for 20-25 minutes, until a toothpick inserted into the center comes out clean and the edges are lightly golden. Let the cake cool in the pan for 5 minutes, then transfer to a wire rack to cool completely.
- Crumble and bind — Once the cake is completely cool, crumble it into a large bowl with your hands or a fork until no large pieces remain. Add 1/4 cup cream cheese frosting and mix with a spatula or your hands until the mixture holds together when pressed. It should be moist but not sticky.
- Roll and chill — Line a baking sheet with parchment paper. Roll the mixture into 12 uniform balls, about 1 inch each. Place them on the sheet and refrigerate for at least 30 minutes, until firm. This step is critical — warm cake balls will fall apart during dipping.
- Melt the chocolate — Combine the chocolate chips and coconut oil in a microwave-safe bowl. Microwave in 30-second increments, stirring after each, until fully melted and smooth. You can also use a double boiler over simmering water.
- Insert the sticks — Remove the cake balls from the fridge. Dip the tip of each lollipop stick into the melted chocolate, then insert it into a cake ball. This secures the stick. Place the pops back on the sheet and refrigerate for another 10 minutes to set.
- Dip and tap — Hold each pop by the stick and dip it into the melted chocolate, covering it completely. Gently tap the pop against the bowl to let excess chocolate drip off. Place it upright on the parchment sheet. If the chocolate thickens, reheat it in 10-second bursts.
- Set and serve — Add sprinkles or decorations while the coating is still wet. Let the pops set at room temperature for about 15 minutes, until the chocolate is firm and glossy. Serve immediately or store as directed.
What I Got Wrong (And How I Fixed It)
Even after years of baking, I have made my share of mistakes with cake pops. Here are the ones that tripped me up most often.
- Cake not cooled completely — Warm cake crumb mixed with frosting turns into a sticky mess that will not roll into clean balls. After that first failure, I started setting a timer and waiting for the cake to reach room temperature before crumbling.
- Skipping the second chill — I once dipped cake balls right after adding the sticks, and half of them slipped off into the chocolate. The second 10-minute chill in the fridge is not optional — it locks the stick in place.
- Chocolate overheating — Microwaving chocolate too long in one go causes it to seize into a grainy, stiff paste. Now I always use 30-second bursts and stir between each one, even when I am in a hurry.
- Overmixing the binder — Adding too much frosting or mixing until the texture is perfectly smooth makes the interior dense and greasy. I learned to stop as soon as the mixture holds together when pressed.
- Thick chocolate coating — Dipping into chocolate that has started to cool results in a thick, lumpy shell. A quick 10-second reheat in the microwave smooths it right out again.
- Uneven ball sizes — Eyeballing the portions led to some giant pops and some tiny ones, which meant uneven coating coverage. Using a small cookie scoop or weighing each ball at about 20g fixed this completely.
Healthier Ways to Make Pioneer Woman Cake Pops
If you want to lighten these up without losing the fun, here are a few easy swaps.
- Whole wheat pastry flour — Substitute half the all-purpose flour with whole wheat pastry flour for extra fiber without a heavy texture. The crumb stays tender.
- Reduced sugar frosting — Use a cream cheese frosting with half the sugar, or make your own with powdered erythritol. The sweetness will be milder but still satisfying.
- Dark chocolate coating — Swap semisweet chips for 70% or higher dark chocolate. You get more antioxidants and less sugar per pop.
- Greek yogurt binder — Replace the cream cheese frosting with plain Greek yogurt mixed with a little honey. This cuts the sugar significantly while keeping the cake balls moist.
- Coconut oil in the cake — Use refined coconut oil instead of vegetable oil for a lighter fat profile. The coconut flavor stays neutral so the vanilla still shines.
Ingredient Substitutions for Pioneer Woman Cake Pops
Here is how to swap ingredients when you are out of something or need to accommodate dietary needs.
- All-purpose flour → Gluten-free 1-to-1 flour — A quality gluten-free blend with xanthan gum works perfectly. No other changes needed.
- Whole milk → Unsweetened almond milk — Use the same amount, but expect a slightly less tender crumb. The difference is minor once the cake is crumbled and mixed.
- Vegetable oil → Melted butter — Butter adds a richer flavor but makes the cake slightly denser. Use the same amount by volume.
- Cream cheese frosting → Vanilla buttercream — Buttercream works as a binder, but it is sweeter and firmer. You may need to add a teaspoon of milk to reach the right consistency.
- Semisweet chocolate chips → White chocolate chips — Swap in white chips for a sweeter, creamier coating. Add an extra teaspoon of coconut oil since white chocolate is thicker when melted.
- Coconut oil → Vegetable shortening — Shortening thins the chocolate just as well and keeps a glossy finish. Use the same amount.
Unexpected Ways to Enjoy This Pioneer Woman Cake Pops
These little treats are more versatile than you might think. Try these ideas for serving or gifting.
- Dessert charcuterie board — Arrange the cake pops on a board with fresh berries, chocolate-dipped pretzels, and small cookies. Guests can grab a pop alongside other bites.
- Hot cocoa stirrers — Dip the finished pop into a mug of hot milk or hot chocolate. The coating melts slightly and the cake softens, creating a rich, flavored drink.
- Ice cream topping — Crumble two or three cake pops over a bowl of vanilla ice cream. You get bits of crunchy coating and soft cake in every spoonful.
- Gift jars — Stand pops upright in a mason jar filled with decorative paper shreds. Tie a ribbon around the jar for an instant homemade gift.
- Birthday cake alternative — Skip the big cake and serve these at a kids party. Each child gets their own pop, which means no cutting, no plates, and less mess.
- Dipped in caramel — Before the chocolate sets, drizzle a thin line of salted caramel over the top. The combination of chocolate, caramel, and vanilla cake is hard to beat.
Best Tips for Pioneer Woman Cake Pops Success
These tips come from trial and error. Use them to save time and avoid frustration.
- Crush the cake finely — Use your fingers to break it into crumbs that look like wet sand. Large chunks create gaps in the balls that make them fall apart during dipping.
- Test the binder first — Before mixing all the frosting into the crumbs, add half and squeeze a small handful. If it holds together, stop. If it crumbles, add the rest.
- Chill the balls twice — The first chill firms the cake balls. The second chill, after inserting sticks, keeps everything stable during dipping. Do not skip either one.
- Tap off excess chocolate — Hold the dipped pop over the bowl and tap your wrist lightly. This lets extra chocolate drip off so the coating is thin and even rather than thick and lumpy.
- Work in small batches — Keep the chilled cake balls in the fridge while you dip one at a time. Pull out only three or four at a time so they stay cold and firm.
- Reheat chocolate as needed — The chocolate thickens as it cools. A 10-second burst in the microwave brings it back to a smooth dipping consistency. Do this as many times as needed.
- Use a styrofoam block for drying — Insert the dipped pops into a block of styrofoam or a thick piece of cardboard so they stand upright while the coating sets. This prevents flat spots and smudges.
Tasty Twists on Pioneer Woman Cake Pops
Once you have mastered the basic recipe, try one of these variations to change up the flavor.
- Chocolate cake pops — Replace 1/4 cup of the flour with unsweetened cocoa powder. Use chocolate frosting instead of cream cheese for an even richer pop.
- Lemon cake pops — Add the zest of one lemon to the batter and use lemon cream cheese frosting. The bright citrus flavor pairs beautifully with white chocolate coating.
- Red velvet cake pops — Add 1 tablespoon of unsweetened cocoa powder and 1 teaspoon of red food coloring to the batter. Use cream cheese frosting as the binder and top with white chocolate coating.
- Coffee cake pops — Dissolve 1 teaspoon of instant espresso powder in the milk before adding it to the batter. A dark chocolate coating and a sprinkle of espresso sugar on top complete the flavor.
- Sprinkle cake pops — Fold 2 tablespoons of rainbow sprinkles into the cake mixture before rolling. Use white chocolate coating and more sprinkles on top for a colorful, party-ready pop.
- Peanut butter cake pops — Swirl 2 tablespoons of creamy peanut butter into the cream cheese frosting before mixing it with the crumbled cake. A milk chocolate coating and a drizzle of melted peanut butter finish these off.
Best Ways to Store Your Pioneer Woman Cake Pops
Proper storage keeps the coating glossy and the cake soft. Here is how to do it right.
- Room temperature storage — Place the pops in a single layer in an airtight container. Store at room temperature for up to 5 days. Do not stack them unless you have parchment between layers.
- Refrigerator storage — For longer keeping, refrigerate the pops in an airtight container for up to 1 week. Let them sit at room temperature for 10 minutes before serving so the coating softens slightly.
- Freezer storage — Arrange the pops in a single layer in a freezer-safe container with parchment between layers. Freeze for up to 3 months. Thaw overnight in the refrigerator before serving.
- Warm weather care — If you are serving these outdoors in summer, keep them chilled until the last minute. The chocolate coating softens quickly in heat above 75°F (24°C).
- Frosting caution — Avoid refrigerating cake pops with cream cheese frosting for more than a few hours, as the frosting can soften and seep into the coating. For longer storage, use buttercream instead.
Ways to Warm It Up Again
These pops are best enjoyed at room temperature or slightly chilled, but if you want to warm them, here are the safe methods.
- Microwave method — Place one pop on a microwave-safe plate and heat on low power (30%) for 10 seconds. The coating will soften slightly without melting off.
- Room temperature rest — Take the pops out of the fridge and let them sit on the counter for 15 minutes. This is the safest method and keeps the coating intact.
- Warm oven method — Preheat your oven to 200°F (93°C). Place the pops on a baking sheet and warm for 3-4 minutes. Watch closely — the chocolate should become shiny but not liquid.
- Air fryer method — Set the air fryer to 250°F (121°C) and heat for 2 minutes. Check after 90 seconds, as air fryers run hot and can melt the coating quickly.
Nutritional Breakdown (per serving)
Based on 1 serving = 1 portion out of 4 total. Each serving includes three cake pops.
- Calories: 350
- Protein: 5g
- Fat: 16g
- Saturated Fat: around 7g
- Carbohydrates: 48g
- Fiber: about 2g
- Sugar: 34g
- Sodium: roughly 200mg
- Cholesterol: about 35mg
Try These Recipes
Wrapping It Up
These Pioneer Woman cake pops are proof that a simple vanilla cake can become something completely new with a little effort. The soft interior, crisp chocolate shell, and endless flavor options make them a dessert that never gets old. I hope you give this recipe a try and share them with the people you care about.
PrintPioneer Woman Cake Pops
These cake pops are a fun and decadent treat made with moist vanilla cake, creamy frosting, and a crisp chocolate coating. Each bite-sized pop is rich, tender, and perfectly sweet, making them ideal for parties or gifting.
- Prep Time: 25
- Cook Time: 25
- Total Time: 115
- Yield: 4 1x
- Category: Dessert
- Method: Baking
- Cuisine: American
Ingredients
- 1 cup all-purpose flour (4.25 oz / 120g)
- 1/2 cup granulated sugar (3.5 oz / 100g)
- 1/2 teaspoon baking powder
- 1/4 teaspoon baking soda
- 1/4 teaspoon kosher salt
- 1 large egg, room temperature
- 1/4 cup whole milk (2 oz / 60ml)
- 1/4 cup vegetable oil (2 oz / 60ml)
- 1/2 teaspoon vanilla extract
- 1/4 cup cream cheese frosting (store-bought or homemade)
- 8 oz semisweet chocolate chips (about 1 1/3 cups)
- 1 tablespoon coconut oil or vegetable shortening
- 4 lollipop sticks (if needed for presentation)
Instructions
- Preheat oven to 350°F (177°C). Grease an 8×8-inch baking pan or line with parchment paper. In a medium bowl, whisk together flour, sugar, baking powder, baking soda, and salt until evenly combined.
- In a separate small bowl, whisk together the egg, milk, vegetable oil, and vanilla extract until smooth. Pour the wet ingredients into the dry ingredients and stir with a spatula until just combined — do not overmix; a few small lumps are fine.
- Pour the batter into the prepared pan and spread evenly. Bake for 20-25 minutes, or until a toothpick inserted into the center comes out clean and the edges are lightly golden. Let the cake cool in the pan for 5 minutes, then transfer to a wire rack to cool completely to room temperature.
- Once the cake is completely cool, crumble it into a large bowl using your hands or a fork until no large pieces remain. Add 1/4 cup cream cheese frosting and mix with a spatula or your hands until the mixture holds together when pressed — it should be moist but not sticky.
- Line a baking sheet with parchment paper. Roll the cake mixture into 12 uniform balls, about 1 inch each. Place on the prepared sheet and refrigerate for at least 30 minutes, or until firm. Chilling prevents the pops from falling apart during coating.
- In a microwave-safe bowl, combine the chocolate chips and coconut oil. Microwave in 30-second increments, stirring after each, until fully melted and smooth. Alternatively, melt in a double boiler over simmering water, stirring constantly.
- Remove the cake balls from the refrigerator. If using lollipop sticks, dip the tip of each stick into the melted chocolate before inserting it into a cake ball (this helps secure it). Place the pops back on the sheet and refrigerate for another 10 minutes to set the stick.
- Hold each cake pop by the stick and dip into the melted chocolate, covering completely. Gently tap the pop against the bowl to allow excess chocolate to drip off. Place upright on the parchment-lined sheet. If the chocolate thickens, reheat in 10-second bursts.
- While the coating is still wet, you can add sprinkles or decorations. Let the pops set at room temperature for about 15 minutes, or until the chocolate is firm and glossy. Serve immediately or store as directed.
Notes
Store cake pops in an airtight container at room temperature for up to 5 days. For longer storage, refrigerate for up to 1 week or freeze for up to 3 months. To freeze, place in a single layer in a freezer-safe container with parchment between layers. Thaw in the refrigerator overnight before serving. Avoid refrigerating for long periods if using cream cheese frosting, as it may soften.
Nutrition
- Calories: 350
- Sugar: 34g
- Sodium: 200mg
- Unsaturated Fat: 8g
- Carbohydrates: 48g
- Fiber: 2g
- Protein: 5g
- Cholesterol: 45mg
Keywords: cake pops, pioneer woman cake pops, vanilla cake pops, chocolate coated cake pops, birthday dessert, party treats, easy cake pops, homemade cake pops