 Anabelle
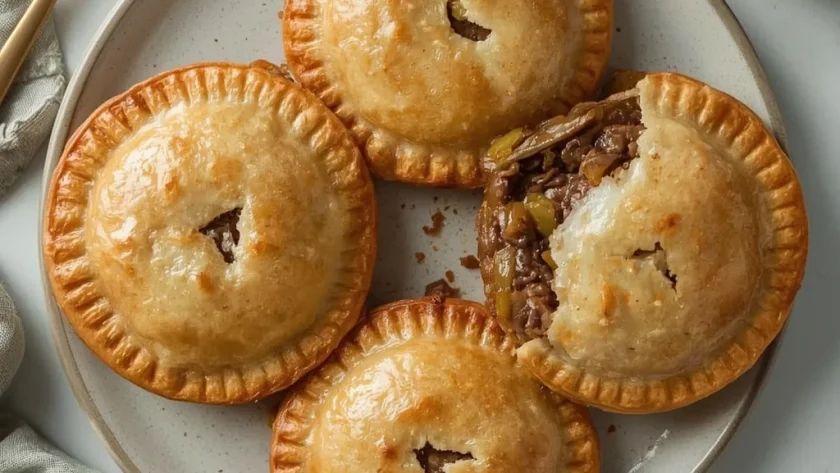
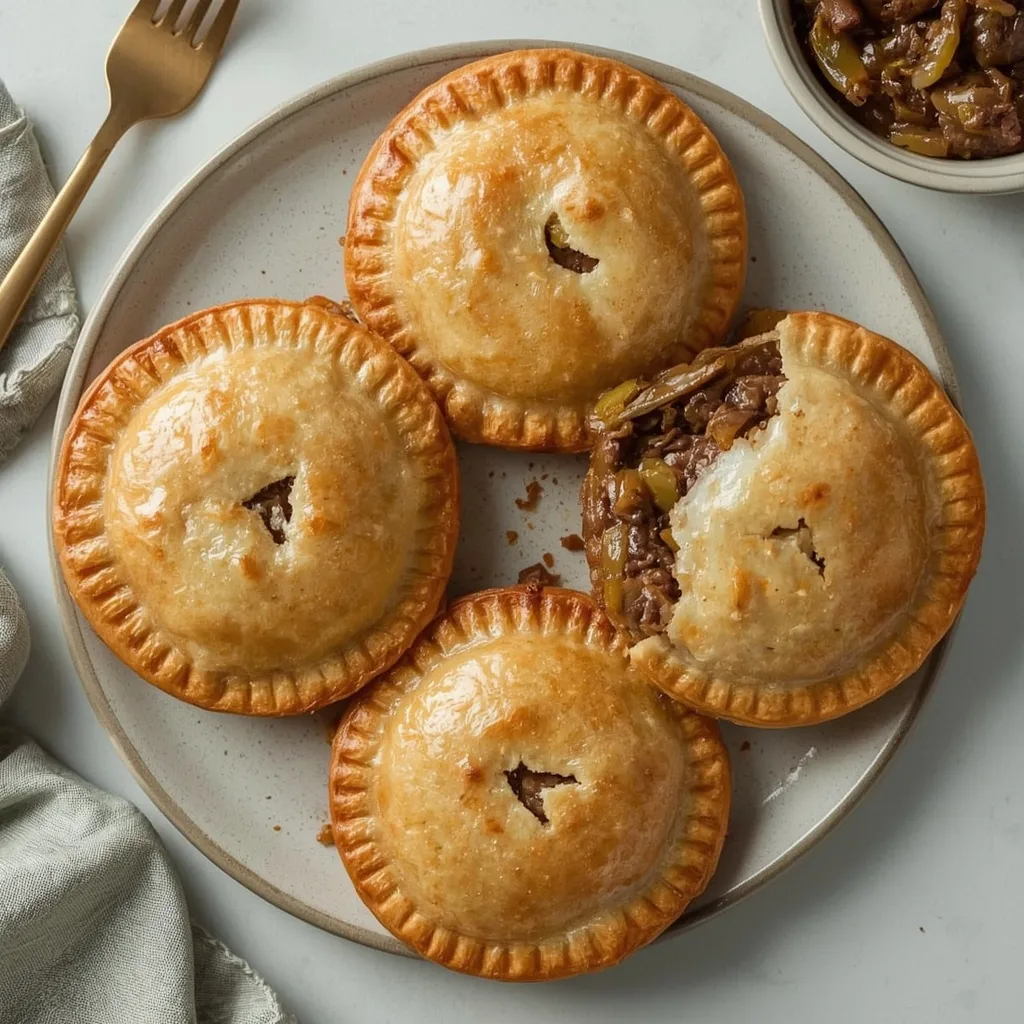
 Pioneer Woman Beef Hand Pies deliver everything you want from a handheld dinner — golden, flaky pastry wrapped around a rich, savory beef filling simmered with onions, garlic, and Worcestershire. This American comfort food classic comes together in about 65 minutes total, making it a realistic weeknight project even for beginner cooks.
The only mildly tricky part is cooling the filling completely before assembling. Hot filling will soften the crust and fight you during sealing. Other than that, this recipe moves quickly and rewards you with four hearty, portable pies perfect for lunchboxes, picnics, or casual dinners.
A Quick Glimpse at Pioneer Woman Beef Hand Pies
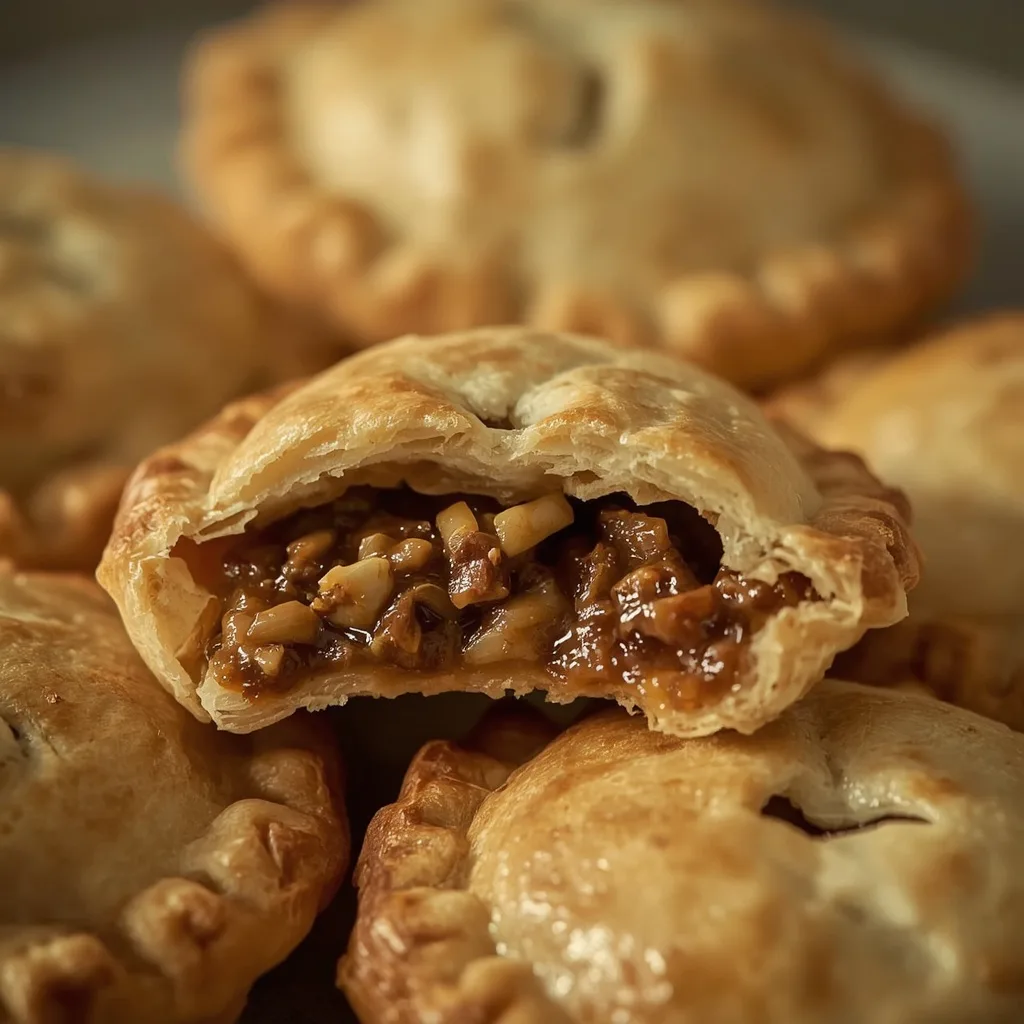
Ground beef, diced onion, garlic, tomato paste, and a whisper of dried thyme simmer into a thick, glossy filling that holds its shape inside a buttery refrigerated pie crust. Each hand pie bakes up with a shatteringly crisp exterior and a tender, spoonable center. These are satisfying enough for a main course yet compact enough to eat on the go — think of them as a cross between a pot pie and a turnover.
Why This Recipe is Worth Trying
Five reasons keep me coming back to this particular hand pie method:
- Store-bought shortcut — Using refrigerated pie crusts eliminates the most time-consuming part of pastry making while still delivering a genuinely flaky, buttery result.
- No draining required — Leaving the rendered beef fat in the skillet adds moisture and depth to the filling, so you skip a step and gain flavor.
- Portable by design — These pies travel well in lunchboxes or picnic baskets without turning into a mess, thanks to their sealed, crimped edges.
- Freezer-friendly flexibility — You can assemble a batch ahead and bake straight from frozen, which makes meal prep genuinely practical.
- Customizable filling base — The beef mixture accepts easy tweaks like extra vegetables or a pinch of red pepper flakes without throwing off the ratios.
Essential Ingredients for This Recipe
Thirteen ingredients stand between you and a batch of these hand pies. Most are pantry staples you likely already stock.
For the Filling
- 1 lb ground beef (85% lean) — The 15% fat content keeps the filling moist and flavorful. Leaner beef will work but may turn out drier.
- 1 tbsp olive oil — A small amount helps the beef brown evenly without sticking to the skillet.
- 1/2 cup yellow onion, finely diced — Fine dice ensures the onion softens quickly and distributes evenly through the filling.
- 2 cloves garlic, minced — Added after the beef browns so it becomes fragrant without burning.
- 2 tbsp all-purpose flour — This thickens the sauce into a cohesive filling that won’t make the crust soggy.
- 1/2 cup low-sodium beef broth — The liquid base that deglazes the pan and carries all the savory flavors.
- 2 tbsp tomato paste — Concentrated umami that deepens the color and richness of the filling.
- 1 tbsp Worcestershire sauce — Adds that tangy, slightly sweet savoriness you associate with hearty beef dishes.
- 1/2 tsp kosher salt — Seasoning that also helps draw out the beef’s natural flavor.
- 1/4 tsp freshly ground black pepper — Freshly ground makes a real difference here; pre-ground lacks the same punch.
- 1/4 tsp dried thyme — A subtle herbaceous note that complements beef without overpowering it.
For the Assembly
- 1 large egg, beaten — Brushed on edges for sealing and on tops for that glossy golden finish.
- 1 package refrigerated pie crusts (14.1 oz, 2 crusts) — The buttery shortcut that forms both tops and bottoms of each hand pie.
Useful Equipment
You probably own most of what you need already. Here is what I use every time:
- Large skillet — A 12-inch pan gives the beef room to brown properly instead of steaming.
- 5-inch round cookie cutter — Creates uniformly sized circles for even baking. A small plate and sharp knife work as a substitute.
- Baking sheet with parchment paper — Prevents sticking and makes cleanup almost effortless.
- Silicone spatula — Ideal for scraping up the browned bits from the skillet bottom after adding broth.
- Pastry brush — Applies the egg wash evenly. A paper towel works in a pinch but won’t be as precise.
Directions to Make Pioneer Woman Beef Hand Pies
The process moves through four phases — brown, thicken, assemble, and bake. Here is the full sequence:
- Preheat and prep — Heat your oven to 375°F (190°C) and line a large baking sheet with parchment paper.
- Brown the beef — Warm the olive oil in a large skillet over medium-high heat until it shimmers, then add the ground beef. Cook 5-7 minutes, breaking it up with a wooden spoon, until browned and no longer pink. Do not drain the fat.
- Soften the aromatics — Reduce the heat to medium and stir in the diced onion and minced garlic. Sauté 3-4 minutes until the onion turns translucent and the garlic smells fragrant.
- Add the thickener — Sprinkle the flour over the meat mixture and stir constantly for 1-2 minutes. This coats everything evenly and prevents lumpy filling.
- Build the sauce — Pour in the beef broth slowly, scraping up any browned bits from the pan bottom. Stir in the tomato paste, Worcestershire, salt, pepper, and thyme.
- Simmer until thick — Bring the mixture to a gentle simmer, then reduce the heat to low. Cook 5-6 minutes, stirring occasionally, until the filling looks glossy and holds together like a thick pot pie filling.
- Cool completely — Remove the skillet from the heat and let the filling reach room temperature, about 15-20 minutes. Spread it on a plate and refrigerate to speed this up if you are in a hurry.
- Cut the crusts — On a lightly floured surface, unroll both pie crusts. Cut four circles from each using a 5-inch cutter, gathering and re-rolling scraps for a final circle if needed — 8 total.
- Fill and seal — Place about 1/3 cup of cooled filling in the center of four dough circles, leaving a 1-inch border. Brush egg around the edges, top with remaining circles, and press firmly with your fingers. Crimp with a fork for a tight, decorative seal.
- Vent and wash — Transfer the pies to the prepared baking sheet, spacing them 2 inches apart. Cut three small slits on top of each, then brush lightly with the remaining beaten egg.
- Bake until golden — Bake 25-30 minutes until the crust is deep golden brown and the filling bubbles. An instant-read thermometer should register 165°F (74°C) in the center.
- Rest before serving — Cool on the baking sheet for 5-10 minutes so the juices set. Serve warm.
What I Got Wrong (And How I Fixed It)
My first attempt taught me several hard lessons. These fixes saved my second batch:
- Hot filling disaster — I assembled with warm filling once and the crust turned greasy and tore during sealing. Cooling to room temperature completely solved this.
- Overstuffed pies — More filling sounded better until it oozed out during baking and made a mess. Stick to 1/3 cup per pie.
- Skipping the vents — Without slits on top, steam built up and burst the crust open. Three small cuts per pie prevent this entirely.
- Weak edge seals — Finger pressing alone let filling leak out. Firm fork crimping creates the tight seal these need.
- Impatient slicing — Cutting into a pie right out of the oven sent hot juices running everywhere. The 5-10 minute rest is not optional.
Healthier Ways to Make Pioneer Woman Beef Hand Pies
A few small swaps lighten this dish without sacrificing the things that make it great:
- Leaner beef choice — Using 93% lean ground beef cuts significant saturated fat while still producing a decent filling.
- More vegetables — Finely diced mushrooms or carrots stretch the beef further and add fiber and nutrients without changing the texture much.
- Reduced-sodium broth — Swapping in low-sodium beef broth and cutting the added salt to 1/4 teaspoon lowers the sodium load considerably.
- Whole wheat crust — A whole wheat pie crust adds fiber, though the texture will be slightly denser and nuttier.
- Smaller portions — Cutting the recipe into six smaller pies instead of four controls portions while keeping the same ingredients.
Ingredient Substitutions for Pioneer Woman Beef Hand Pies
Sometimes you need to work with what is in your kitchen. These substitutions all hold up well:
- Ground beef → Ground turkey or chicken — The filling will be leaner and slightly lighter in flavor; add an extra tablespoon of olive oil to compensate for the missing fat.
- Dried thyme → Fresh thyme — Use roughly 3/4 teaspoon of fresh leaves, added with the broth so they soften during simmering.
- Worcestershire → Soy sauce or balsamic vinegar — Both mimic the savory tang. Soy is saltier, so reduce the added salt slightly.
- Refrigerated pie crust → Homemade pie dough — Your favorite all-butter pastry recipe works beautifully; just keep the dough chilled while assembling. For a gluten-free alternative, use a gluten-free pie crust mix or dough — it will be more delicate, so handle it gently and chill well before crimping.
- Yellow onion → Shallots or leeks — Shallots give a milder, sweeter note, while finely chopped leeks add a subtle onion-garlic character.
- Beef broth → Chicken or vegetable broth — Any savory broth works here. Vegetable broth makes the dish slightly lighter in flavor.
Unexpected Ways to Enjoy This Pioneer Woman Beef Hand Pies
These pies shine beyond the obvious dinner application. Try them in these settings:
- Game day spread — Slice each pie into quarters and arrange on a platter with spicy mustard for dipping.
- Breakfast remix — Top a warm hand pie with a fried egg for a savory morning meal that feels indulgent.
- Soup sidekick — Serve alongside tomato soup or French onion soup for a hearty lunch combo.
- Party appetizer — Make miniature versions using a smaller cutter and serve them as elegant passed hors d’oeuvres.
- Salad topper — Crumble a leftover pie over a crisp green salad with a tangy vinaigrette for a creative main course salad.
- Dipping destination — Pair with horseradish cream, garlic aioli, or barbecue sauce for customized flavor at the table.
Best Tips for Pioneer Woman Beef Hand Pies Success
Years of making hand pies taught me these non-negotiable details:
- Chill everything — Keep the crusts refrigerated until the moment you need them. Warm dough sticks and tears.
- Cool the filling fast — Spread it in a thin layer on a plate and pop it in the fridge for 10 minutes if you are short on time.
- Measure the filling — Use a 1/3 cup measure for consistency. Eyeballing leads to some pies bursting and others looking deflated.
- Flour your surface lightly — Too much flour makes the crust tough; too little causes sticking. A light dusting is the sweet spot.
- Vent every pie — Three small slits may seem decorative, but they are functional steam releases that prevent splitting.
- Watch the bake — Ovens vary. Start checking at 25 minutes and pull the pies when they reach a deep golden brown, not pale yellow.
- Rest patiently — That 5-10 minute rest is non-negotiable. Cutting early means runny filling and a burnt mouth.
Tasty Twists on Pioneer Woman Beef Hand Pies
Once you master the base recipe, these variations keep things interesting:
- Cheesy beef version — Stir 1/2 cup shredded cheddar into the cooled filling for a melty, gooey center.
- Southwest style — Add a drained can of diced green chiles and 1/2 teaspoon cumin to the filling for a smoky kick.
- Mushroom and beef combo — Sauté 8 ounces of sliced cremini mushrooms with the onions for deeper umami flavor.
- Peppery kick — Add 1/4 teaspoon red pepper flakes along with the thyme for heat that builds gradually.
- Herb garden twist — Swap the dried thyme for 1 teaspoon fresh rosemary, finely chopped, for a piney aromatic note.
- Breakfast-style pies — Crumble cooked breakfast sausage into the filling alongside the beef for a morning-oriented version.
Best Ways to Store Your Pioneer Woman Beef Hand Pies
Leftovers store beautifully when handled correctly:
- Refrigerator storage — Keep baked pies in an airtight container for up to 4 days. Layer parchment between them to prevent sticking.
- Freezer raw — Assemble the pies, place them on a baking sheet, and freeze until solid. Transfer to a freezer bag and store up to 2 months.
- Freezer baked — Fully baked and cooled pies also freeze well for up to 2 months. Reheat directly from frozen.
- Individual wrapping — Wrap each pie separately in plastic wrap before bagging them. This makes grabbing single servings easy.
Ways to Warm It Up Again
Reheating method matters more than you might think. Here is what works best:
- Oven method — Reheat at 350°F (177°C) for 10-12 minutes until heated through. This restores the flaky crust texture.
- Microwave option — Use the defrost setting for speed, though the crust will soften and lose its crispness.
- Frozen direct bake — Add 10-15 minutes to the original 25-30 minute baking time if starting from frozen.
- Toaster oven route — Heat at 350°F for 8-10 minutes for small batches without heating up the full oven.
Nutritional Breakdown (per serving)
Based on 1 serving = 1 hand pie out of 4 total. These numbers reflect the recipe as written:
- Calories — 540
- Protein — 28g
- Fat — about 28g
- Carbohydrates — 46g
- Fiber — 2g
- Sugar — 4g
- Sodium — around 680mg
Try These Recipes
Wrapping It Up
Pioneer Woman Beef Hand Pies deliver restaurant-quality results from refrigerated crusts and a simple skillet filling. The contrast between the shattering pastry and the rich, savory center makes every bite worth the small effort involved. If you have never made hand pies at home, this recipe is the perfect place to start — clear steps, forgiving ingredients, and reliable results every time.
PrintPioneer Woman Beef Hand Pies

These golden, flaky hand pies are stuffed with a rich, savory beef filling that’s been simmered with onions, garlic, and a touch of Worcestershire. The buttery, all-butter crust shatters with each bite, giving way to a hearty, comforting center. Perfect for a satisfying lunch, a picnic treat, or a fun weeknight dinner that’s both portable and delicious.
- Prep Time: 30
- Cook Time: 35
- Total Time: 65
- Yield: 4 1x
- Category: Main Course
- Method: Baking
- Cuisine: American
Ingredients
- 1 lb ground beef (85% lean)
- 1 tbsp olive oil
- 1/2 cup yellow onion, finely diced
- 2 cloves garlic, minced
- 2 tbsp all-purpose flour
- 1/2 cup low-sodium beef broth
- 2 tbsp tomato paste
- 1 tbsp Worcestershire sauce
- 1/2 tsp kosher salt
- 1/4 tsp freshly ground black pepper
- 1/4 tsp dried thyme
- 1 large egg, beaten (for egg wash)
- 1, 14.1 oz package refrigerated pie crusts (2 crusts, as per Pillsbury brand)
Instructions
- Preheat your oven to 375°F (190°C) and line a large baking sheet with parchment paper. This moderate temperature allows the crust to bake through to a golden crispness without burning the filling.
- In a large skillet, heat the olive oil over medium-high heat until it shimmers. Add the ground beef, breaking it up with a wooden spoon, and cook for 5-7 minutes, until browned and no longer pink. Do not drain—the fat adds flavor and moisture.
- Reduce the heat to medium and add the diced onion and minced garlic to the skillet. Sauté for 3-4 minutes, stirring occasionally, until the onion softens and becomes translucent and the garlic is fragrant.
- Sprinkle the flour over the beef mixture and stir constantly for 1-2 minutes to evenly coat the meat and vegetables. This roux will help thicken the filling, ensuring it doesn’t make the pie crust soggy.
- Slowly pour in the beef broth, scraping up any browned bits from the bottom of the pan with a silicone spatula—those bits are packed with flavor. Add the tomato paste, Worcestershire sauce, salt, black pepper, and dried thyme.
- Bring the mixture to a gentle simmer, then reduce the heat to low. Let it cook for 5-6 minutes, stirring occasionally, until the sauce has thickened and the filling is glossy and cohesive. The mixture should resemble a thick, spoonable pot pie filling.
- Remove the skillet from the heat and allow the filling to cool completely to room temperature, about 15-20 minutes. You can speed this up by spreading the filling on a plate and refrigerating it. Hot filling will melt the crust and make it difficult to seal.
- On a lightly floured surface, unroll the two pie crusts. Using a 5-inch round cookie cutter or a small plate as a guide, cut out four circles from each crust, for a total of 8 circles. Gather and re-roll scraps if needed for a final circle.
- Place about 1/3 cup of the cooled filling in the center of each of 4 dough circles, leaving a 1-inch border around the edges. Be careful not to overfill, as the filling will push out during sealing.
- Brush a little of the beaten egg around the edges of the filled circles. Place a second dough circle on top of each filled one, and press the edges together firmly with your fingers to seal. Then, use a fork to crimp the edges securely, creating a decorative pattern and ensuring a tight seal.
- Transfer the hand pies to the prepared baking sheet, spacing them about 2 inches apart. Cut three small slits on the top of each pie with a sharp knife to allow steam to escape during baking—this prevents the pies from bursting open.
- Brush the tops of the hand pies lightly with the remaining beaten egg. This egg wash will give them a beautiful, shiny, golden-brown finish once baked.
- Bake the hand pies in the preheated oven for 25-30 minutes, until the crust is deep golden brown and the filling is bubbly. If you have an instant-read thermometer, you can check that the center of the filling reaches 165°F (74°C) to ensure the meat is fully cooked.
- Allow the hand pies to cool on the baking sheet for 5-10 minutes before serving. This resting time lets the juices set and prevents the filling from running out when you bite into them. Serve warm.
Notes
Storage: Refrigerate leftover hand pies in an airtight container for up to 4 days. Freezing: Assemble and freeze unbaked hand pies on a baking sheet until solid, then transfer to a freezer bag or container. Freeze for up to 2 months. To bake from frozen, add 10-15 minutes to the baking time. Reheating: For best texture, reheat in a 350°F (177°C) oven for 10-12 minutes, or until heated through. You can also microwave on a defrost setting for a quicker option, but the crust may become soggy.
Nutrition
- Calories: 540
- Sugar: 4g
- Sodium: 680mg
- Unsaturated Fat: 10g
- Carbohydrates: 46g
- Fiber: 2g
- Protein: 28g
- Cholesterol: 75mg
Keywords: beef hand pies, hand pie recipe, pioneer woman beef hand pies, savory hand pies, flaky pastry, ground beef recipe, comfort food, picnic food, freezer friendly, weeknight dinner, baked hand pies