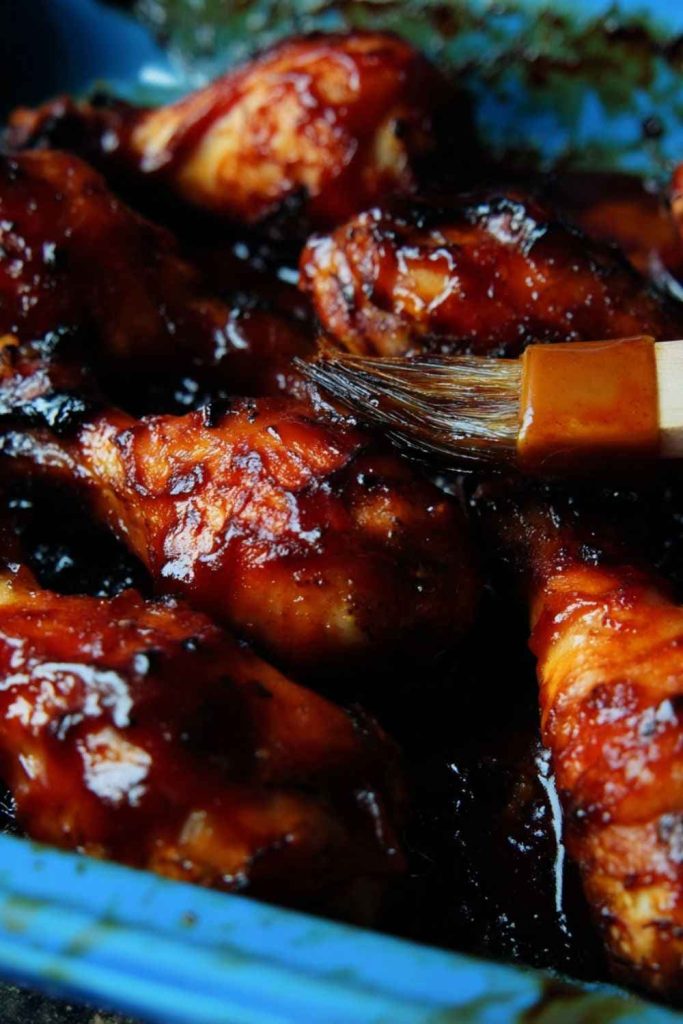
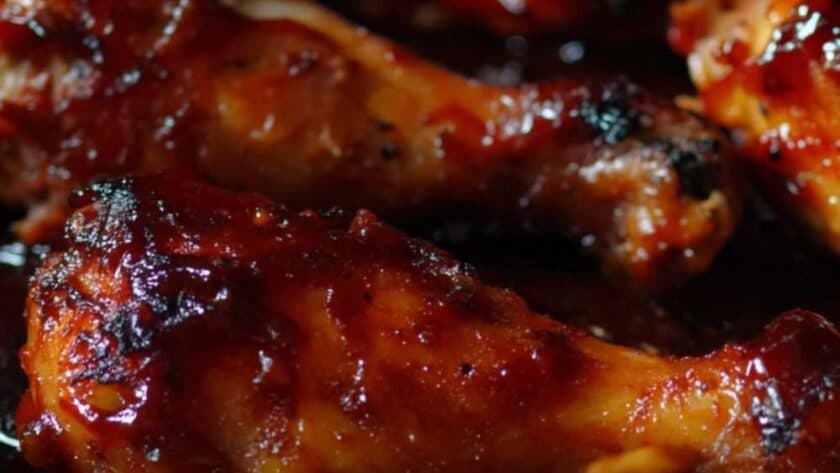
When you need a fuss-free dinner that’s finger-licking good, Pioneer Woman’s Sticky Chicken Legs are the answer. These drumsticks are coated in a sweet, tangy, and savory glaze that caramelizes beautifully in the oven, leaving you with juicy meat inside and a sticky, flavorful crust on the outside. Perfect for family dinners, cookouts, or even meal prep, this recipe proves that sometimes the simplest dishes deliver the biggest rewards.
The balance of soy sauce, honey, ketchup, and spices creates a glaze that’s both bold and comforting. Best of all, this recipe requires very little prep—just toss the chicken in the sauce, bake, and enjoy.
A Quick Glimpse at Pioneer Woman’s Sticky Chicken Legs
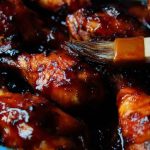
This dish is all about juicy chicken drumsticks roasted with a sticky glaze that clings to every bite. The sauce thickens as the chicken bakes, creating a glossy coating that’s irresistible. It’s a family-friendly recipe that pairs well with rice, mashed potatoes, or even a crisp salad.
Try Other Pioneer Woman Recipes
- Pioneer Woman Taco Seasoning
- Pioneer Woman Cajun Chicken Pasta
- Pioneer Woman Mexican Rice Casserole
- Pioneer Woman Roasted Grapes
- Pioneer Woman Beef Barley Soup
Why This Recipe is Worth Trying
- Easy preparation – Minimal prep, oven does the work.
- Budget-friendly – Chicken legs are affordable and full of flavor.
- Kid-approved – Sweet and savory glaze is a hit with all ages.
- Perfect for gatherings – Scales up easily for a crowd.
- Versatile – Pairs with almost any side dish.
Essential Ingredients for This Recipe
- 12 chicken drumsticks
- 1/2 cup soy sauce
- 1/2 cup honey
- 1/2 cup ketchup
- 2 cloves garlic, minced
- 1 tablespoon apple cider vinegar
- 1 teaspoon ground ginger
- 1/2 teaspoon black pepper
- 1/2 teaspoon chili flakes (optional, for heat)
- 2 tablespoons olive oil
Directions to Make Pioneer Woman’s Sticky Chicken Legs
Step 1: Preheat the oven
Set oven to 375°F (190°C) and line a baking sheet with foil or parchment paper.
Step 2: Make the glaze
In a bowl, whisk together soy sauce, honey, ketchup, garlic, vinegar, ginger, pepper, and chili flakes until smooth.
Step 3: Prepare the chicken
Pat the drumsticks dry with a paper towel. Place them in a large bowl, drizzle with olive oil, and toss to coat evenly.
Step 4: Coat with sauce
Pour the prepared glaze over the chicken legs. Toss well until each piece is coated generously.
Step 5: Arrange on a sheet pan
Place chicken legs on the prepared baking sheet in a single layer. Reserve extra sauce for basting.
Step 6: Bake until sticky
Bake for 45–50 minutes, turning once halfway and basting with reserved sauce. The glaze should thicken and caramelize, and the chicken should reach 165°F internally.
Step 7: Serve and enjoy
Remove from the oven, let rest for 5 minutes, and serve warm with sides of choice.
What I Got Wrong (And How I Fixed It)
- Too much sauce pooling – I crowded the pan, causing soggy bottoms. Spacing out the chicken solved it.
- Skipping basting – Without basting, the glaze didn’t cling well. Regular basting gave it that glossy finish.
- Cooking at low heat – The glaze didn’t caramelize enough. Baking at 375°F delivered the perfect sticky coating.
Unexpected Ways to Enjoy This Dish
- As a party snack – Serve with toothpicks as sticky chicken bites.
- With fried rice – Adds a takeout-style twist.
- Shredded for sandwiches – Pull the meat off the bone and tuck into buns.
- As a salad topper – Slice and add to greens with sesame dressing.
Best Tips for Pioneer Woman’s Sticky Chicken Legs Success
- Dry chicken first – Ensures the glaze sticks better.
- Don’t skip the basting – Keeps the coating glossy and flavorful.
- Line your pan – The glaze caramelizes and can stick, so foil helps with cleanup.
- Watch the timing – Avoid overbaking to keep the chicken juicy.
- Use a meat thermometer – Chicken is done at 165°F.
- Rest before serving – Juices redistribute, keeping the chicken moist.
Tasty Twists on Pioneer Woman’s Sticky Chicken Legs
- Spicy kick – Add sriracha or hot sauce to the glaze.
- Asian-inspired – Add sesame oil and garnish with sesame seeds.
- Citrusy twist – Add orange juice or zest for brightness.
- Smoky flavor – Use smoked paprika or liquid smoke in the sauce.
- Maple glaze – Swap honey for maple syrup for a deeper sweetness.
Best Ways to Store Your Sticky Chicken Legs
- Refrigerate – Store in an airtight container for up to 4 days.
- Freeze – Wrap in foil, place in freezer bags, and freeze for up to 2 months.
- Store sauce separately – Keep extra glaze aside if you want to add more when reheating.
Ways to Warm It Up Again
- Oven method – Reheat at 350°F until hot, brushing with leftover glaze.
- Microwave – Heat in short bursts, covering to avoid drying.
- From frozen – Thaw overnight, then reheat in the oven for best texture.
Nutritional Breakdown (per serving, 2 drumsticks)
- Calories: ~310
- Protein: 28g
- Fat: 15g
- Carbohydrates: 20g
- Fiber: 1g
- Sodium: 820mg
(Values are approximate and vary with ingredient choices.)
PrintPioneer Woman’s Sticky Chicken Legs
This dish is all about juicy chicken drumsticks roasted with a sticky glaze that clings to every bite. The sauce thickens as the chicken bakes, creating a glossy coating that’s irresistible. It’s a family-friendly recipe that pairs well with rice, mashed potatoes, or even a crisp salad.
- Prep Time: 10
- Cook Time: 45
- Total Time: 55 minutes
- Yield: 6 1x
- Category: Main Course
- Method: Baking
- Cuisine: American
Ingredients
-
12 chicken drumsticks
-
1/2 cup soy sauce
-
1/2 cup honey
-
1/2 cup ketchup
-
2 cloves garlic, minced
-
1 tablespoon apple cider vinegar
-
1 teaspoon ground ginger
-
1/2 teaspoon black pepper
-
1/2 teaspoon chili flakes (optional, for heat)
-
2 tablespoons olive oil
Instructions
Set oven to 375°F (190°C) and line a baking sheet with foil or parchment paper.
In a bowl, whisk together soy sauce, honey, ketchup, garlic, vinegar, ginger, pepper, and chili flakes until smooth.
Pat drumsticks dry with a paper towel. Place them in a large bowl, drizzle with olive oil, and toss to coat evenly.
Pour the prepared glaze over the chicken legs. Toss well until each piece is coated generously.
Place chicken legs on the prepared baking sheet in a single layer. Reserve extra sauce for basting.
Bake for 45–50 minutes, turning once halfway and basting with reserved sauce. The glaze should thicken and caramelize, and the chicken should reach 165°F internally.
Remove from the oven, let rest for 5 minutes, and serve warm with sides of choice.
FAQs
How do you make the glaze stick to chicken legs?
The glaze sticks best when the chicken legs are patted dry before coating. Drying removes excess moisture, allowing the sauce to cling better and caramelize as it bakes. Basting halfway through cooking also helps build up a sticky coating.
Should you cover sticky chicken legs while baking?
Sticky chicken legs are best baked uncovered. This allows the glaze to thicken and caramelize properly. Covering them traps steam, which can prevent the sauce from becoming glossy and sticky.
How do you know when chicken legs are fully cooked?
Chicken legs are fully cooked when they reach an internal temperature of 165°F (74°C). Using a meat thermometer is the most accurate way to check doneness, ensuring the meat is juicy but safe to eat.
Can you marinate chicken legs in the sticky sauce before baking?
Yes, marinating chicken legs in the sauce for a few hours or overnight enhances the flavor. However, always reserve some fresh sauce for basting while baking, since marinade that touches raw chicken should not be reused.
Wrapping It Up
Pioneer Woman’s Sticky Chicken Legs are a delicious mix of sweet, savory, and tangy flavors that make every bite irresistible. With a glossy caramelized glaze and juicy meat, they’re perfect for weeknight dinners, parties, or even meal prepping. Once you try this easy recipe, it’ll quickly become a regular favorite in your kitchen.